The no-code Builder
The Builder is the visual editor where you create browser automations by combining steps. This guide covers the essentials: adding, duplicating, and moving steps, plus useful keyboard shortcuts.
To open the Builder, click New automation on the Dashboard.
Name your automation
Give your automation a memorable title so you can find it later. We recommend including meta information in the title (such as version or status, for example In progress) to help you keep track of work in flight.
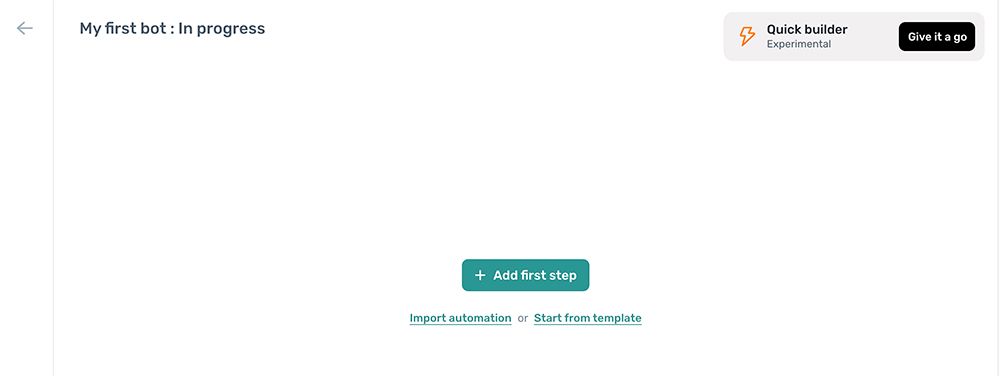
- Click the title New automation in the top left corner.
- Delete the default text and type your own title.
Save your automation
To save changes to your automation, click Save in the top right corner. We recommend saving periodically as you build.
Tip: Your automation saves automatically when you click Run. For a quick save, press Ctrl + S with your mouse pointer inside the extension.
Return to the dashboard
To return to the Dashboard, click the back button in the top left corner of the Builder. You will be prompted to save any unsaved changes before leaving.

Duplicate your automation
To duplicate your automation, use the kebab menu in the top right corner of the Builder.
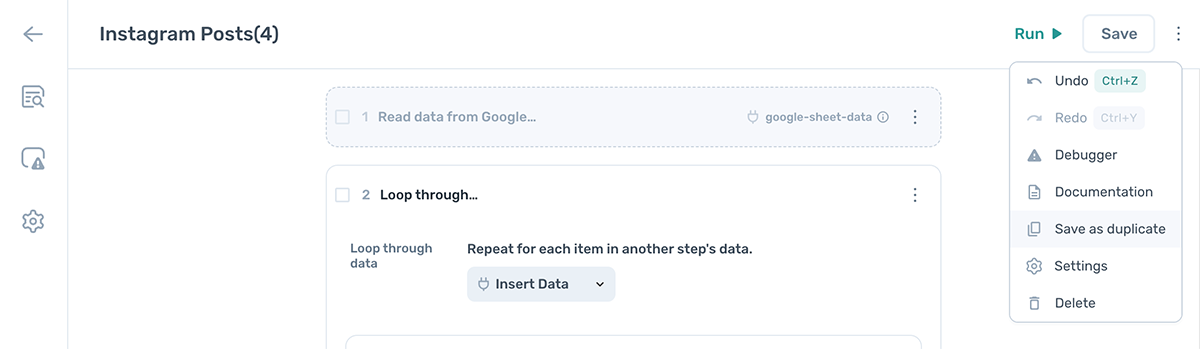
- Click the kebab menu icon in the top right corner.
- Select Save as duplicate from the dropdown.
- The Builder switches to editing the duplicate.
Start your automation
When you open the Builder, you are offered several starting points. For more on starting points for beginners, see your first automation.
Quick builder (Beta)
Let axiom.ai build an automation for you based on a description of what you want it to do.
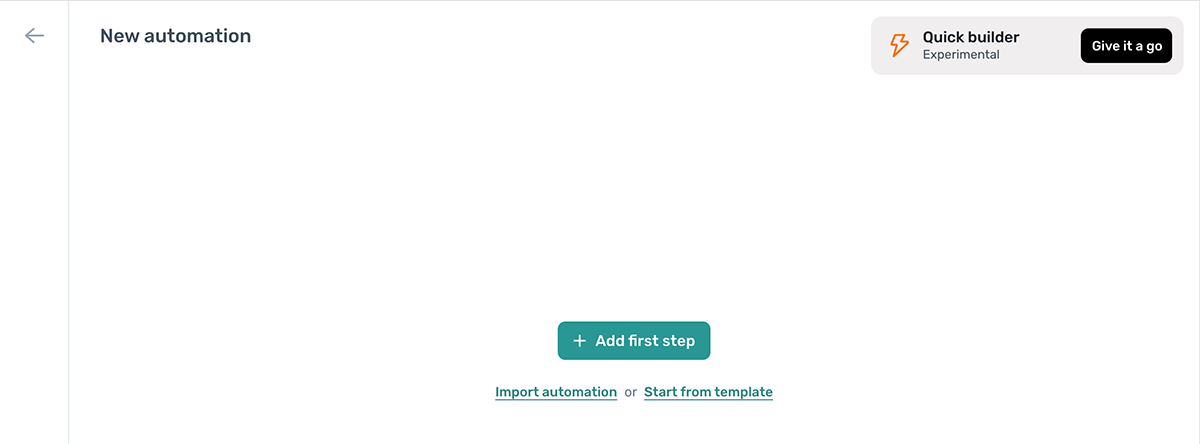
Add first step
To start from scratch, click Add first step. The step finder opens so you can choose your first step.
Import automation
To import a previously shared or downloaded template:
- Click Import automation.
- Click Select file and upload the template.
- Click Confirm to finish.
Start from template
To use a pre-built template:
- Click Start from template.
- Choose what you want to automate.
- Click the template you want to use.
- Click Start setup and follow the guide.
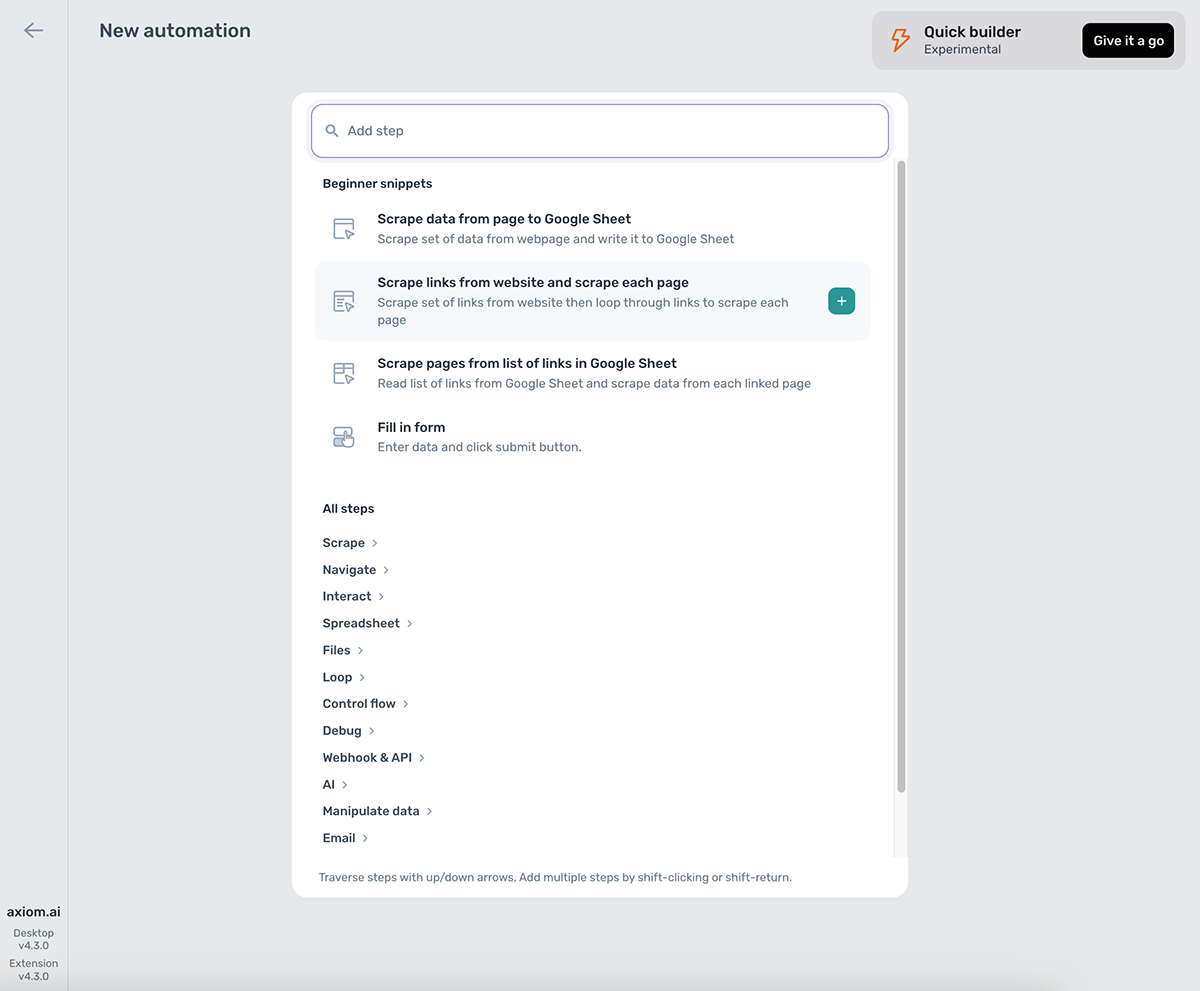
Using the step finder
The step finder is where you search for and add steps to your automation.
Open the step finder
- In an empty automation, click Add first step or press Shift + +.
- To add a step at the bottom of the automation, click Add step or press Shift + +.
- To add a sub-step, click Add sub-step or click between existing sub-steps.
- To add a step above or below an existing step, click between the step borders.
Close the step finder
To close the step finder, click outside its borders or select a step.
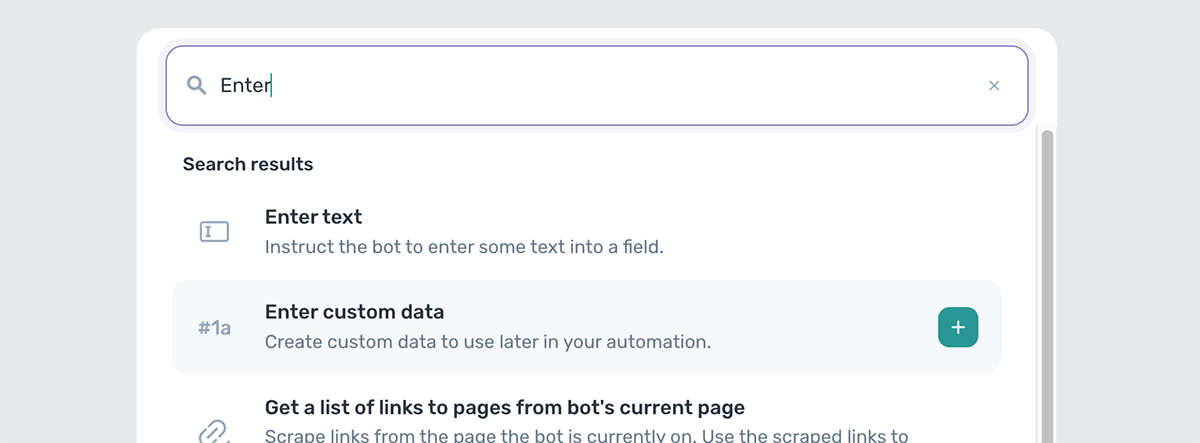
Search for steps
Type a familiar term into the search bar, for example Google Sheet, Click, or Scrape, to find the step you want.
Snippets
Snippets are pre-built combinations of steps for common automation patterns. They appear at the top of the step finder and are a good way to start a new automation.
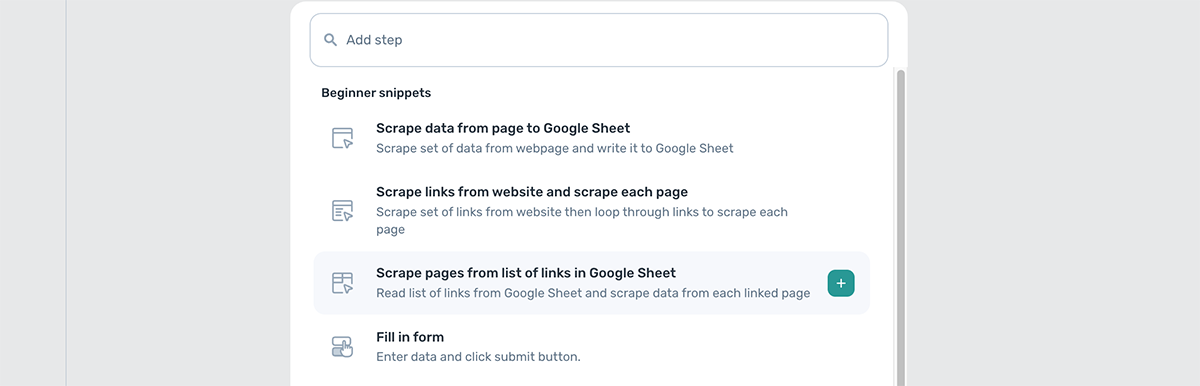
There are four beginner snippets:
- Scrape data from a page to a Google Sheet.
- Scrape links from a website and scrape each page.
- Scrape pages from a list of links in a Google Sheet.
- Fill in a form.
See all steps
To see every available step, click Expand all at the bottom of the step finder. To learn more, see browser action steps or the full steps reference.

Step finder shortcuts
You can interact with the step finder using these keyboard shortcuts:
- Shift + +: open the step finder.
- Return: add the selected step and close the finder.
- Shift + Return or Shift + click: add the selected step and keep the finder open.
- Esc: close the step finder.
- Add multiple steps at once: type the step name followed by an asterisk and a number, for example
enter*8adds eight Enter text steps.
Disable, move, duplicate, delete, and loop steps
You can move, duplicate, or delete any step using the Move toolbar.

- To open the Move toolbar, click the checkbox to the left of any step title.
- To close the Move toolbar, click Deselect.
Move steps
- Tick the checkbox to the left of each step you want to move.
- Click above, below, or between steps, then click Move here.
Duplicate steps
- Tick the checkbox to the left of each step you want to copy.
- Click above, below, or between steps, then click Copy selection here.
Delete steps
- Tick the checkbox to the left of each step you want to delete.
- In the Move toolbar, click Delete.
Move steps into a loop
- Tick the checkbox to the left of each step you want to loop.
- In the Move toolbar, click Loop.
- Select Loop through data.
Disable or enable steps
- Tick the checkbox to the left of each step you want to disable or enable.
- In the Move toolbar, click Disable or Enable.
Working with steps
Every step in axiom.ai needs configuring once it's added. The configuration is usually self-explanatory; for detail on a specific step, see the steps reference.
Step number
The step number shows the step's position in the automation.
Edit a step title
Edit a step's title to keep track of what it does or to add meta information.

Expand or collapse a step
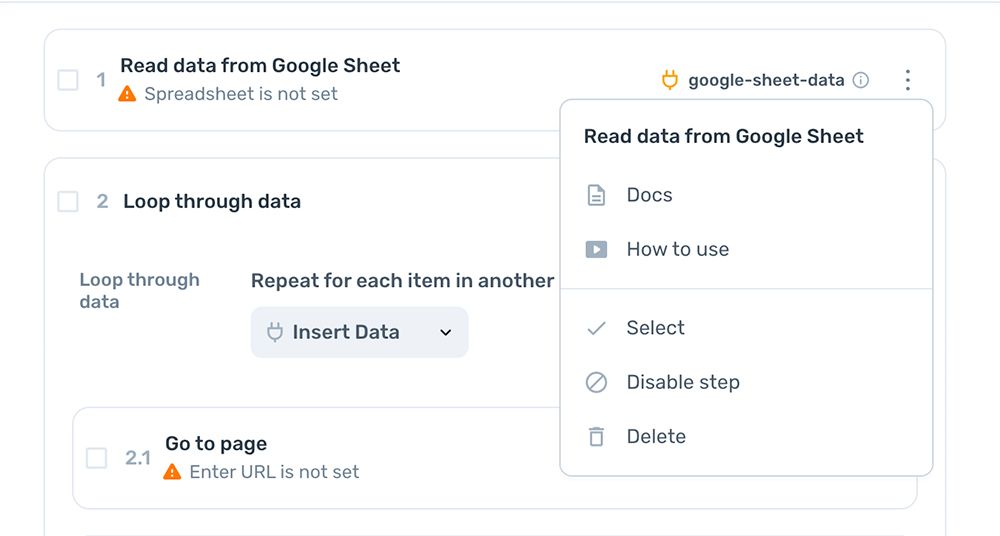
To expand or collapse a step, click the blank space between the step title and the kebab menu.
Disable a step
Click the kebab menu and select Disable step, or use the Move toolbar.
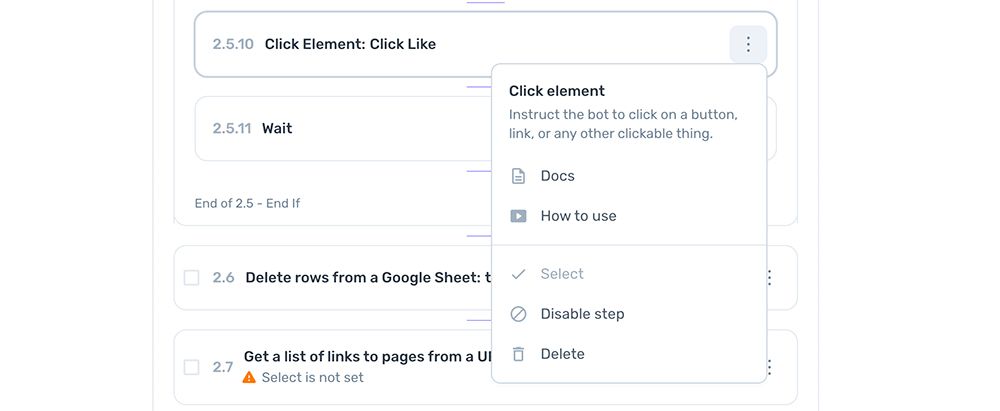
Delete a step
Click the kebab menu and select Delete, or use the Move toolbar.
Select a step to move or copy
Tick the checkbox to the left of the step number, then use the Move toolbar. You can also choose Select or Copy / Move from the kebab menu on the right of the step.
Step output token
Some steps generate tokens that let other steps access their data. A preview of the data appears in the step's footer. To refresh the preview, click the refresh icon in its header.

Run your automation
To run your automation, click Run and choose between cloud and desktop. We recommend testing on desktop. For the trade-offs between the two, see running your automation.
Tip: Run frequently as you build. Catching issues early is much easier than debugging a long automation at the end.
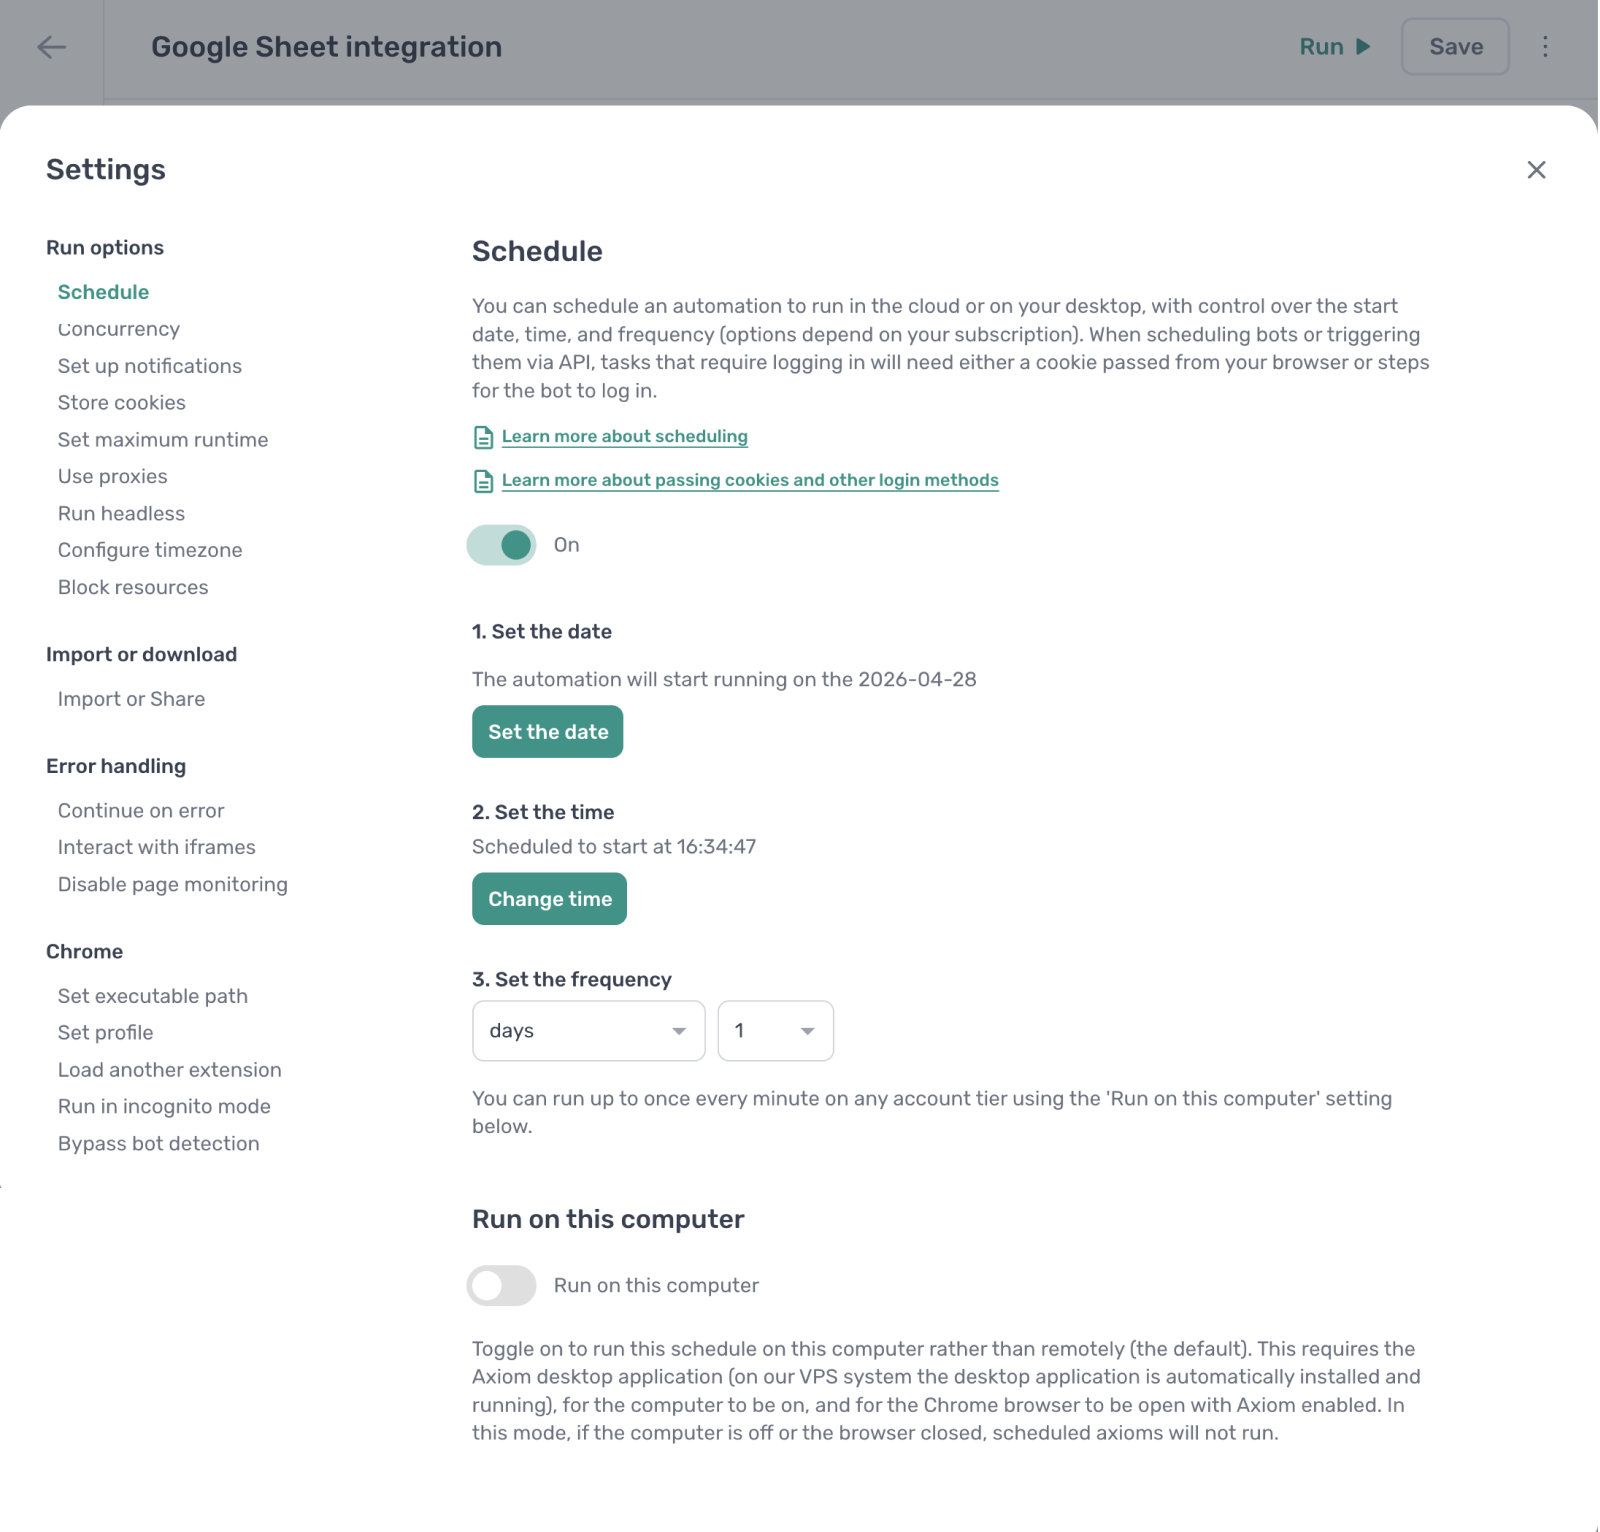
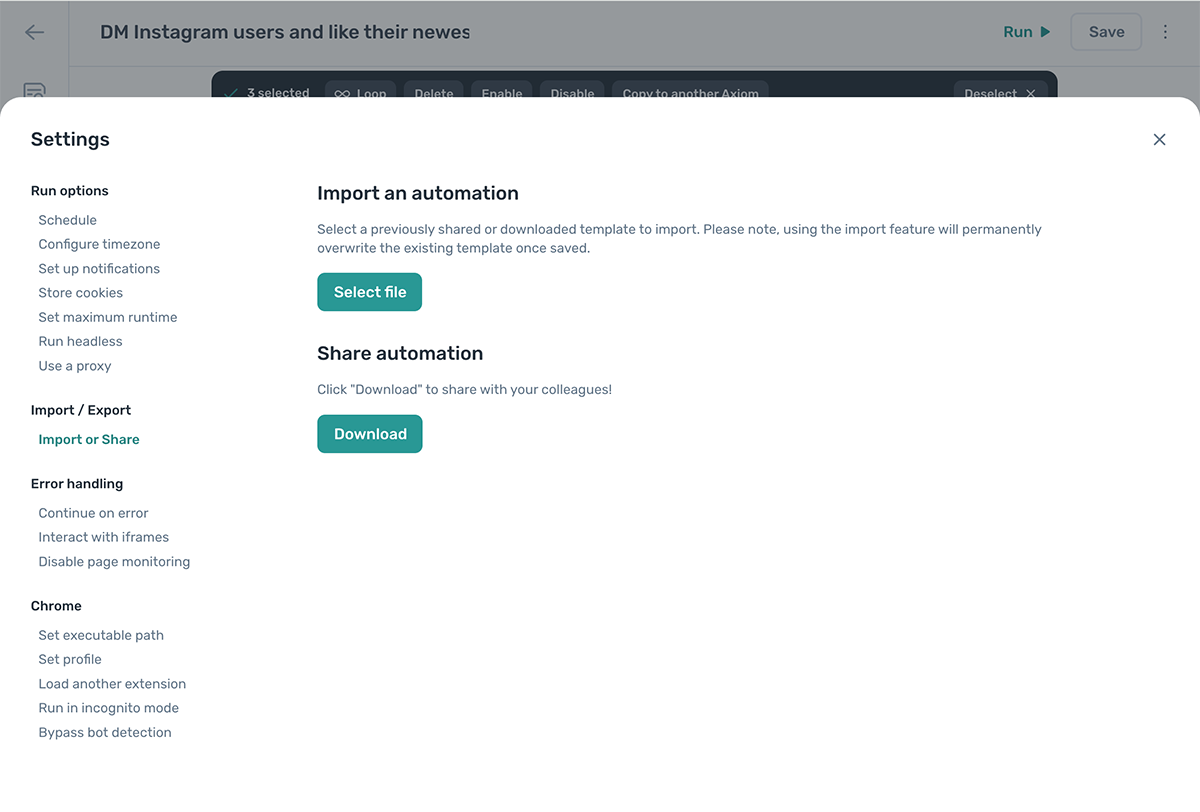
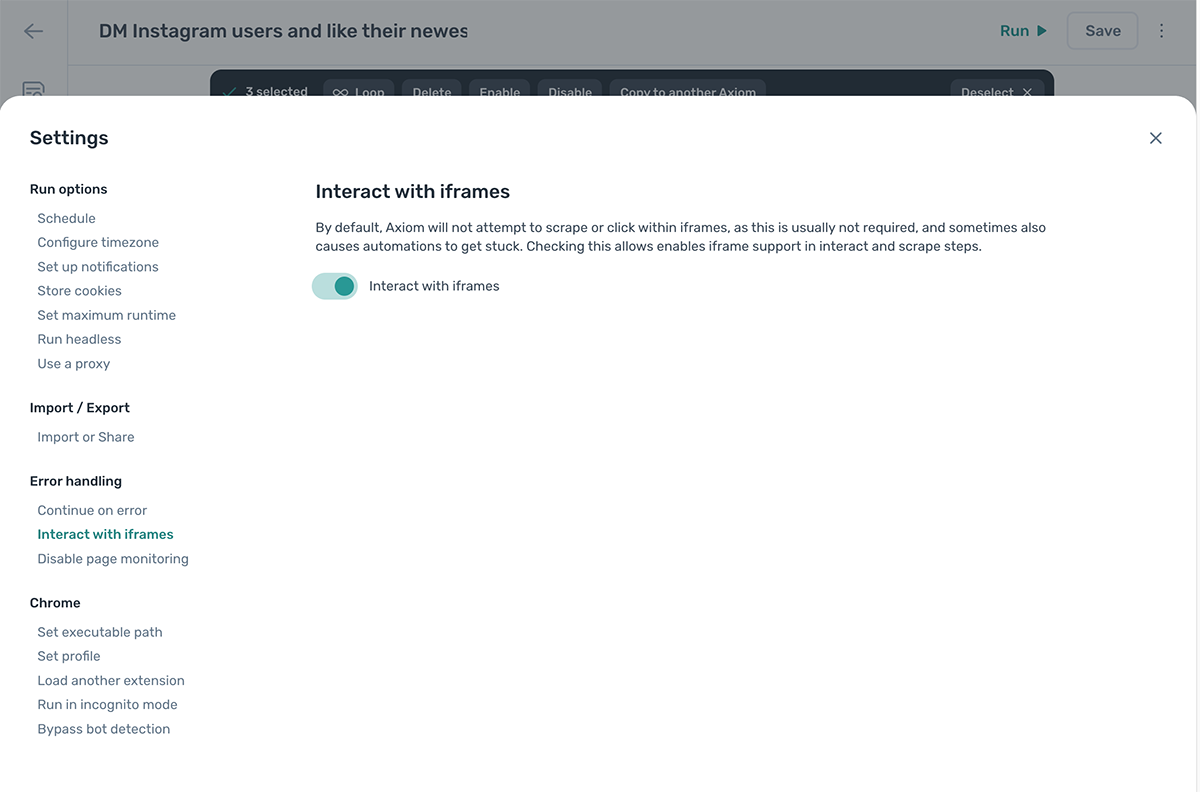
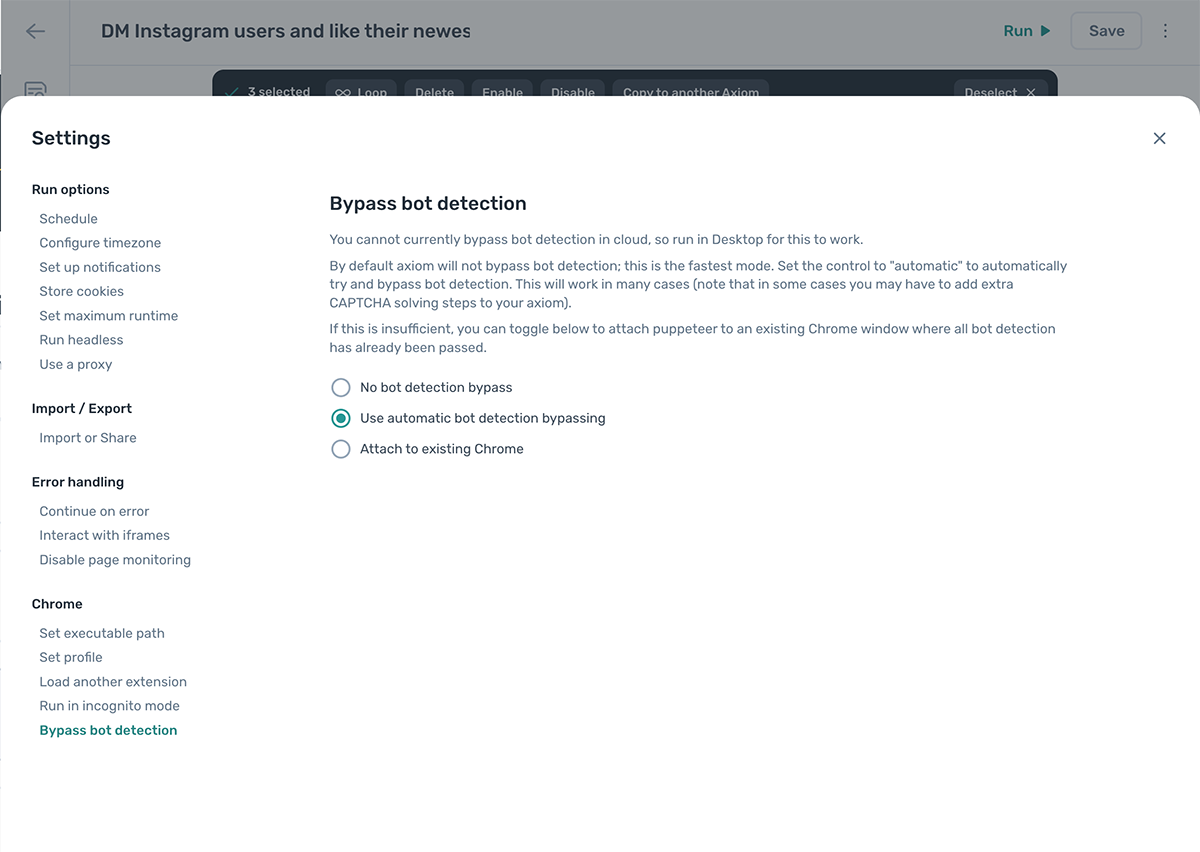
Settings
Each automation has its own settings. Most beginners can ignore them. For details, see the settings reference.
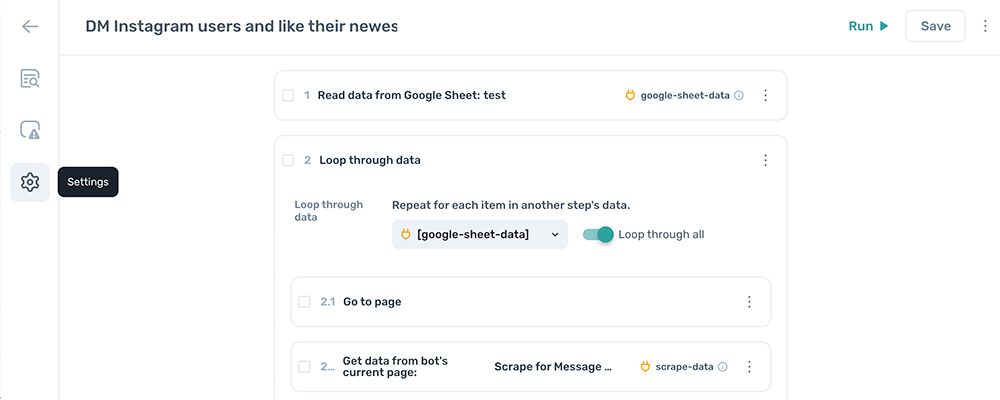
To open the settings panel:
- In the Builder, look at the vertical sidebar on the far left.
- Click the gear icon.
Run options
Import and export
Error handling
Chrome
Undo and redo
The undo and redo options let you step back and forth through your changes, up to 50 actions deep.
To undo or redo a change, click the three dots in the top right next to Save, then select Undo or Redo.
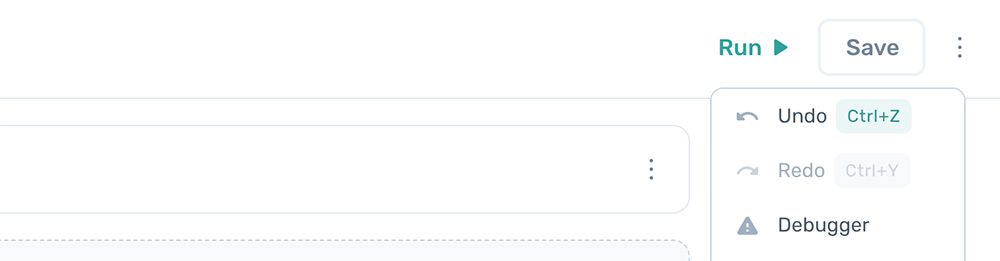
You can also use keyboard shortcuts:
- Ctrl + Z undoes the last action.
- Ctrl + Y redoes the last undone action.