Use the Single Selector
The Single Selector captures the location of an HTML element you want to interact with, like a button or input field, without writing any code. The most direct way to use it is point and click, but you can also match by text, paste a custom CSS selector, or pass selectors in from a data source.
The Single Selector appears in the Click element, Enter text, Click multiple elements, Select list, and file upload and download steps.
Use the Single Selector
Open the step finder, search for a step that uses the tool (for example, Click element), and add it to your automation. Inside the step, click Select to start picking the element.
Point and click
The simplest way to pick an element is point and click. After clicking Select, hover over the page and click the element you want. The selected element is highlighted in orange. To deselect, click the element again.
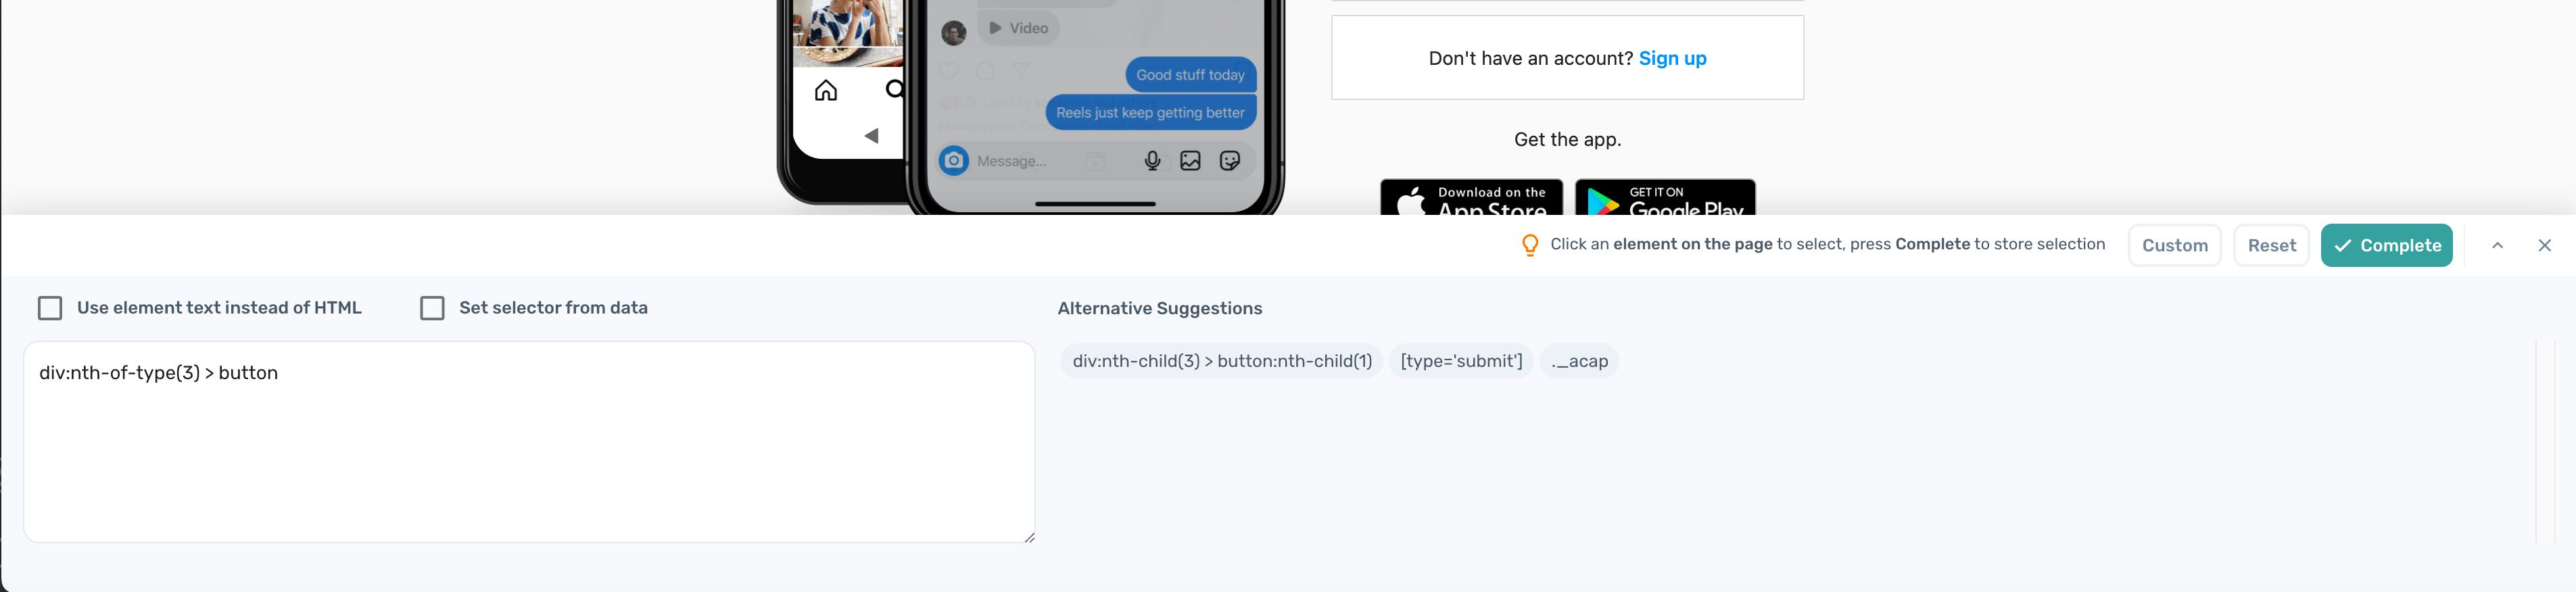
Advanced features
Use a custom CSS selector
Use the custom selector field to type or paste any valid CSS selector. This is useful when the point-and-click mode picks an element whose generated selector doesn't generalise to other pages, or when you already know the selector you need.
For details on writing CSS selectors, see custom CSS selectors.
Match by element text
To pick an element by the text it contains, type the text into the selector. For example, type share to match a button labelled Share.
This is useful when an element doesn't have a stable class or ID, but its visible label stays the same across pages.
Pass selectors from a data source
Selectors can be passed in from a data source, such as a Google Sheet. The automation loops through the selectors in the data source and runs the step against each one.

This pattern is useful for repeating UIs like calendars, where each cell needs a different selector but the action against each is the same.