Use custom CSS selectors
The Single Selector and Multi Selector tools pick elements on a webpage for your automation to interact with. When the default picker doesn't get a unique match, you can supply your own CSS selector instead.
For background on CSS selectors, see Additional resources.
Add a custom CSS selector
You can use custom CSS selectors in both the Single Selector and Multi Selector tools.
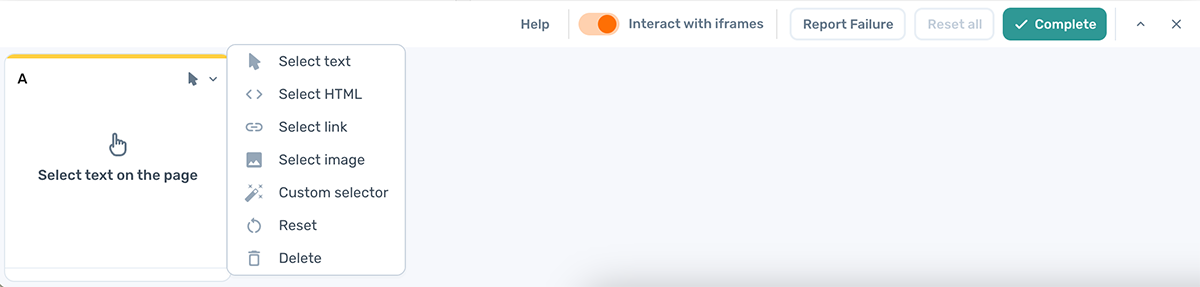
Single Selector
- Open the Selector Tool by clicking Select in an interact step.
- Click Custom and enter your selector in the text box.

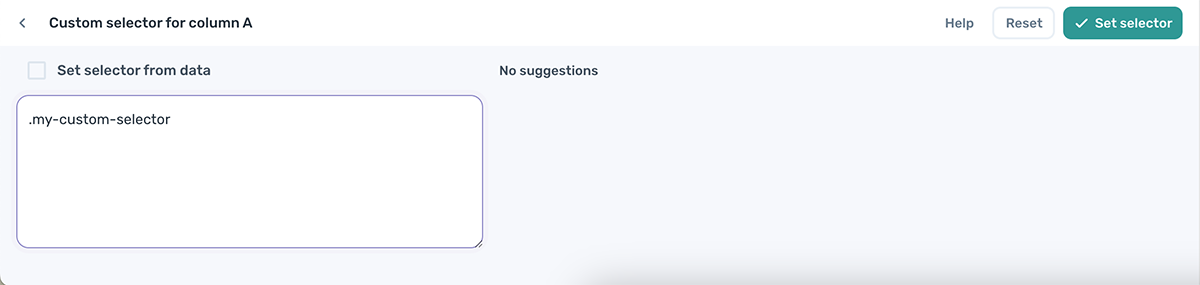
Multi Selector
- Open the Selector Tool by clicking Select in an interact step.
- In the data column you want to target, click the arrow and choose Custom selector.
- Enter your selector in the text box.
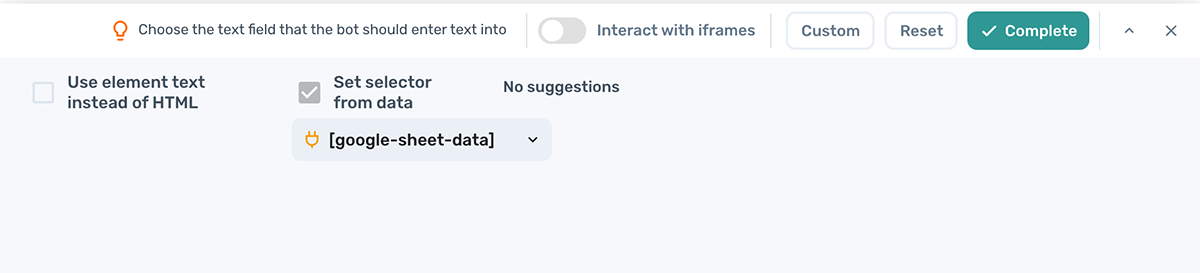
To set the custom selector dynamically from a data variable, click Set selector from data and pick the token that contains the selector. This is useful when you want to loop through several different selectors at runtime.
Loop through custom selectors
Use the Loop through data step to run an interaction against multiple custom selectors in turn. Common use cases:
- Click through multiple buttons on a page.
- Tick a series of checkboxes.
- Walk a list of items, perform actions on each, then move to the next.
- Scrape data from inconsistent layouts where each row needs a different selector.
To set this up:
- Read. Add a Read data from a Google Sheet step to load your list of CSS selectors.
- Loop. Add a Loop through data step using the output of the Read data step.
- Interact. Inside the loop, add your interact step (for example Click element) and configure it using a custom CSS selector. Follow the instructions in Add a custom CSS selector.
- Run. Run the automation and check that each selector matches the right element.
Tip: Use the Edit a row in a Google Sheet step to write scraped data back to the same row as the selector that produced it.
Choose a good selector
A good selector is unique to the element you want, and stable enough to keep working when the page changes. Some sites make this deliberately hard to deter automation.
The examples below introduce the main selector types in the context of axiom.ai. For deeper tutorials, see Additional resources.
To inspect the underlying HTML, right-click anywhere on the page and choose Inspect.
Class-based selectors
HTML:
<h1 class="main-heading">Interest rates cut for first time in over four years</h1>
axiom.ai selector:
.main-heading
ID-based selectors
HTML:
<h1 id="main-heading">Interest rates cut for first time in over four years</h1>
axiom.ai selector:
#main-heading
Attribute-based selectors
HTML:
<input aria-activedescendant="" aria-controls="suggestions" aria-expanded="false" aria-haspopup="listbox" id="searchInput" placeholder="Search the BBC" role="combobox">
axiom.ai selectors (either works):
[aria-controls="suggestions"]
[placeholder="Search the BBC"]
Grouped selectors
When a single selector isn't unique, combine two or more to narrow the match. Try different combinations until the selector picks only the element you want.
Group by class and element:
header .consent-banner-text a
Group by attribute and element:
input[aria-controls="suggestions"]
Group by ID and element:
#main-heading a
Advanced selectors
For more specific cases, CSS pseudo-classes give you finer control:
:not()excludes elements that match a sub-selector. See:not()on MDN.:has()matches elements that contain a descendant matching a sub-selector. See:has()on MDN.
For example, to select list items that don't also have the link class:
p.list-item:not(.list-item.link)
To target an anchor whose href contains checkout-:
a:has([href*="checkout-"])
Use nth-child() to target elements by position
nth-child() selects an element by its position within a parent. This is useful for picking out one specific item from a list, or for looping through every item in a series.
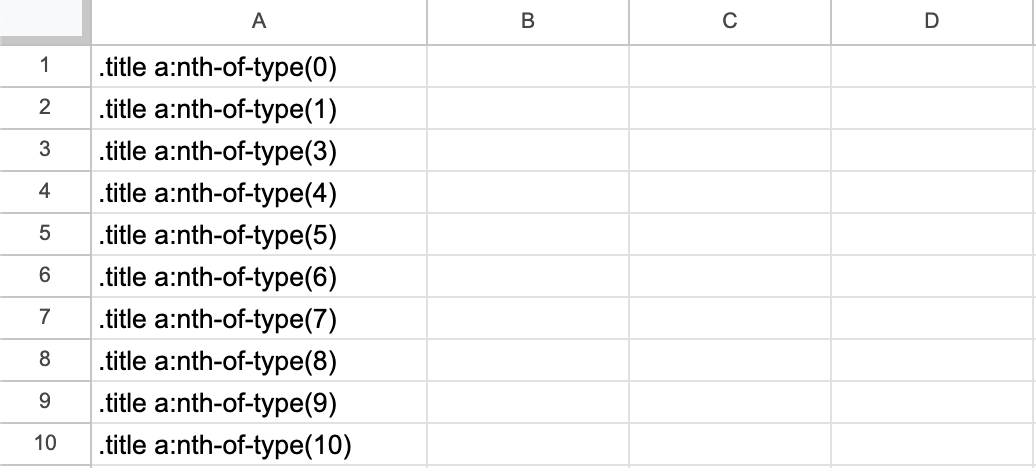
To loop through a series of elements, list each nth-child() selector as a row in a Google Sheet:
| Selector |
|---|
button.download:nth-child(1) |
button.download:nth-child(2) |
button.download:nth-child(3) |
Then use a Loop through data step to set the custom selector on your interact step to each row in turn.