How to connect Airtable to your bots
Connect Airtable to axiom.ai to read a table's records into your automations and write results back to a table. You grant access once from the dashboard, with no personal access token to create, and two steps do the rest: Read data from Airtable and Write data to Airtable.
Connect Airtable
- Open axiom.ai.
- Navigate to Credentials and API key.
- In the Airtable section, click Connect Airtable.
- In Airtable's window, choose the bases axiom.ai may access and allow it.
Only the bases you chose are available to the steps. To add a base later, disconnect and connect again, choosing it this time.
A step added before the connection is made shows Axiom needs permission to interact with Airtable with a Grant permission button, which opens the same window.
Disconnect Airtable
- Open axiom.ai.
- Navigate to Credentials and API key.
- In the Airtable section, click Disconnect Airtable.
Find the base ID and table
Both steps ask for the base and the table. Open the table in Airtable and read them from the address bar:
Base ID: starts withapp, the first part of the path afterairtable.com/, for exampleappAbC123dEf456gH.Table ID or name: either the table's ID, which starts withtbland follows the base ID in the path, or the table's name exactly as shown on its tab, for examplePages.
Read data from Airtable
The Read data from Airtable step reads every record in a table into your automation.
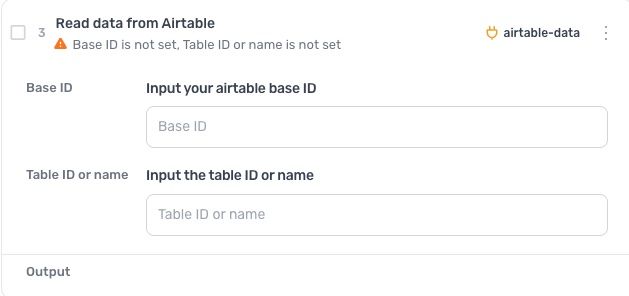
Configuration options:
Base ID: the base's ID.Table ID or name: the table's ID or name.
The step outputs a variable, airtable-data, with one row per record and one column per field, in the order the fields have in the table, with no header row. Every value is text: an attachment becomes its file name, a linked record or lookup becomes its values joined together, and an empty field is blank. Use the variable in a Loop through data step to work through the records one by one, or pass it to any step that accepts data.
Hide a field in Airtable and it is still read. To read a subset of the fields, make a table that holds only those fields.
Write data to Airtable
The Write data to Airtable step writes rows of data into a table as new records.
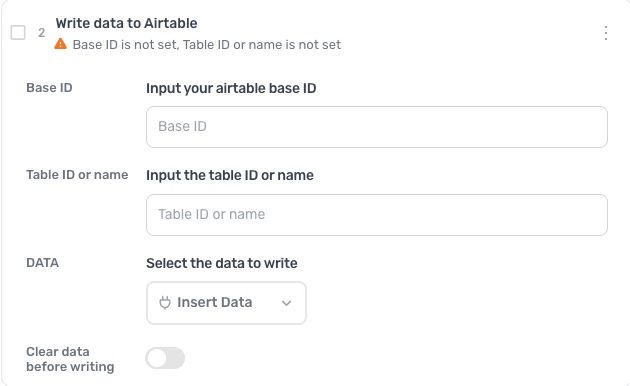
Configuration options:
Base ID: the base's ID.Table ID or name: the table's ID or name.DATA: the variable containing the data to write. Click Insert Data and pick it.Clear data before writing: off by default, which keeps the existing records and adds the new rows. Switch it on to delete every record in the table first, so the table holds only the latest run's data. Point it at a table that holds nothing else.
Each column of the data goes to the field in the same position: the first column to the table's first field, the second to the second, and so on. The step writes only to text fields, so make every field the data reaches a single line text or long text field, in the order the data has its columns. A number, date, checkbox or link field in that position fails the write with Tried to write text to a non-text field.
Records are written ten at a time with a short pause between batches, as Airtable's rate limit requires, so a run writing hundreds of rows takes a little longer at the end. Clearing a table deletes its records ten at a time in the same way.
Build it with the agent
Describe the automation and the Browser Agent builds it, asking for the table's link and reading the table itself to see what is in it. Say which table to read and which to write to, for example Read the URLs from the Pages table in my Airtable and Add the scraped data to Airtable in Results.
The guide scrape a list of URLs from Airtable starts from these lines. To write to fields that are not text, or to name the fields, post data to Airtable with the Airtable API instead, from a script with a personal access token.
Troubleshooting
- Axiom needs permission to interact with Airtable: the connection has not been made. Click Grant permission on the step.
- Could not find the given resource: the base ID or the table ID or name is wrong, or the base was not chosen when Airtable was connected. Check both against the table's address, and reconnect choosing the base if it is missing.
- You do not have permission to access this table: the Airtable account you connected cannot open that base. Connect with an account that can.
- Tried to write text to a non-text field: a field in the data's range is not a text field. Change it to single line text or long text, or write to a table whose fields are all text.
Quick starts: build from description with one click
How to read from and write to Airtable from an automation. Each guide carries a Build from description button: one click opens the extension with the lines filled in and the agent builds it, or follow the steps yourself.
Scrape a list of URLs from Airtable back into Airtable
- Read the URLs from the Pages table in my Airtable
- Open each one and ask me which data to scrape
- Add the scraped data to Airtable in Results
Post data to Airtable with the Airtable API
- Go to the page I give you
- Scrape the details I want from it
- Add each row as a new record in my Airtable table