 Save screenshot locally step
Use this step to save a screenshot of a web page to your computer. It is handy when an automation tests a website or enters data and you want visual confirmation of the result. The file is saved where the automation runs, so it needs the desktop app; in the cloud, use the Save screenshot to Google Drive step instead.
You can use this step to:
- Capture the results of UI tests
- Confirm a web form has been submitted
- Grab a screenshot of data
- Help monitor the status of a web page
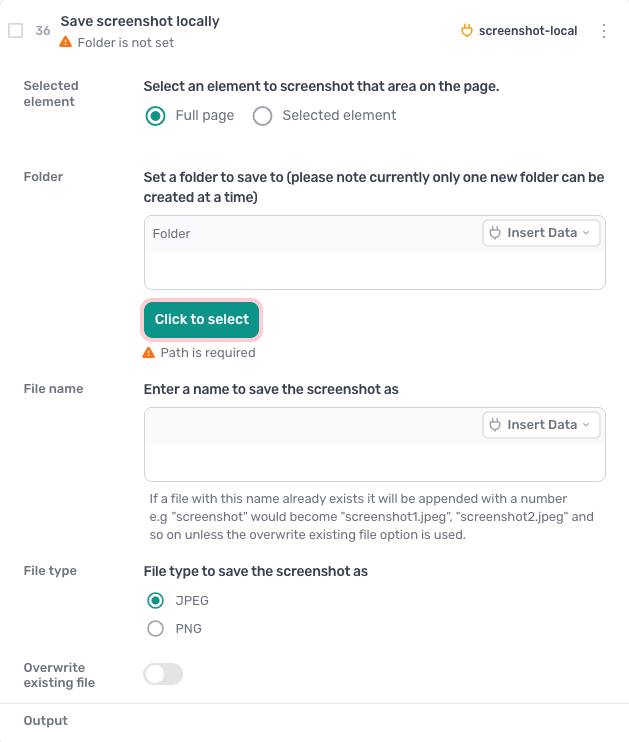
How to configure the Save screenshot locally step
Selected element
Choose Full page to capture the whole page, or Selected element and pick an element on the page to capture that area only.
Folder
Set the folder to save into: click Click to select to pick it, paste its path, or click Insert Data to pass the path in from a data source. Only one new folder can be created at a time.
File name
Enter a name to save the screenshot as, or click Insert Data to take it from a data source. If a file of that name already exists, a number is added to the new one: screenshot becomes screenshot1.jpeg, then screenshot2.jpeg, unless the overwrite option is on.
File type
Choose JPEG or PNG.
Overwrite existing file
Turn the switch on to replace an existing file of the same name rather than numbering the new one.
The step outputs the saved file's path as the [screenshot-local] token.
Guides that use this step
Export a web page as a PDF automatically
- Go to the page I give you
- Save the whole page as an A4 PDF
- Wait for the download to finish
Screenshot a list of websites from a Google Sheet
- Open each website link in column A of my sheet
- Save a screenshot of the page to my computer
- Write today's date in column B of the same row