How to trigger a desktop run using webhooks
# Getting started
You can easily trigger cloud runs from Zapier using our app or webhooks. However, since webhooks cannot trigger desktop runs, you'll need a simple workaround using Google Sheets. Set up your Zap to write a new row to a Google Sheet, then schedule your bot to check the sheet every minute. If it finds a new row, the bot will run. If not, the run will stop.
We will guide you through the steps. Note that the desktop app must be running for this to work. This guide assumes you already have an automation and Zap set up, and this quick hack will help you trigger the run.
# Triggering an Axiom.ai local run via webhooks
Learn how to get started with triggering local automation runs via webhooks.
# Step 1: Set up your Google Sheet
You'll need a blank sheet or a new tab in an existing sheet. The idea is to write a single line of data to the sheet and check if it's present. The data can be a simple string such as "Run."
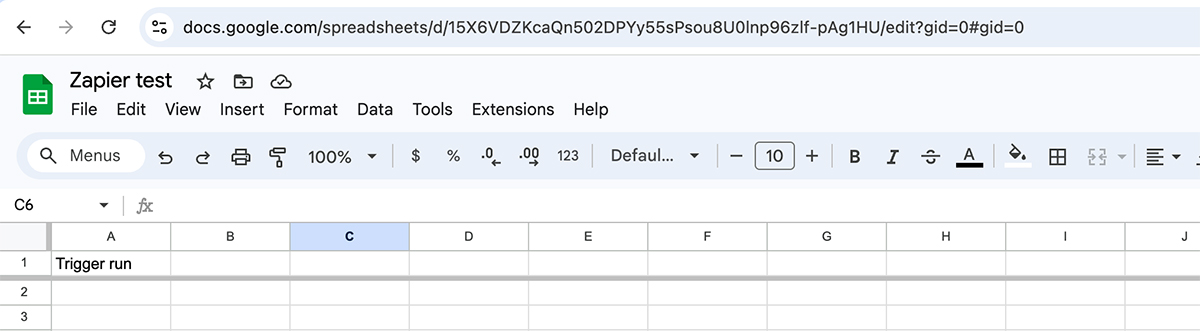
- Google Sheets - Open the spreadsheet where you want to set the headers. Select the first row in column A and enter "Trigger run".
- Freeze the Header Row - To keep the headers visible as you scroll, go to View > Freeze > 1 Row. This keeps the first row in place as you scroll.
# Step 2: Add Google Sheets as an "Action" in your Zap
In your Zap, you'll need to add "Google Sheets" as an action.
- Action - Search for and select "Google Sheets".
- Create Spreadsheet Row - Set as the action event.
- Account - Select your account, and press continue.
- Spreadsheet - Choose the desired spreadsheet.
- Worksheet - Select the correct worksheet.
- Trigger run - Enter the string "Run", and press continue.

Go ahead and test this step in Zapier, it should write "Run" to the second row in column A.
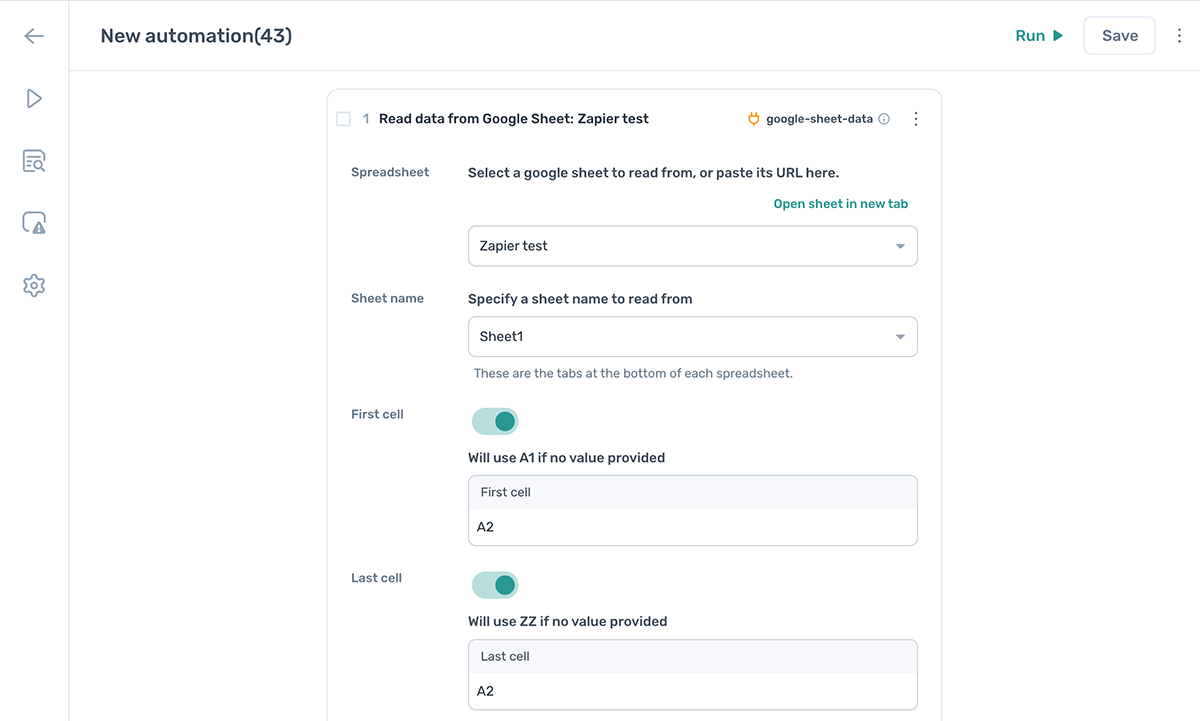
# Step 3: Add a "Read data from a Google Sheet" step
This step will read the row from the Google Sheet. If the sheet is empty, the run will stop and not count. If a row is present, the run will continue.
- Spreadsheet - Search for the Google Sheet you created and select it.
- Sheet name - Choose a sheet tab or leave blank to use the first tab.
- First cell - Set to "2".
- Last cell - Set to "2".
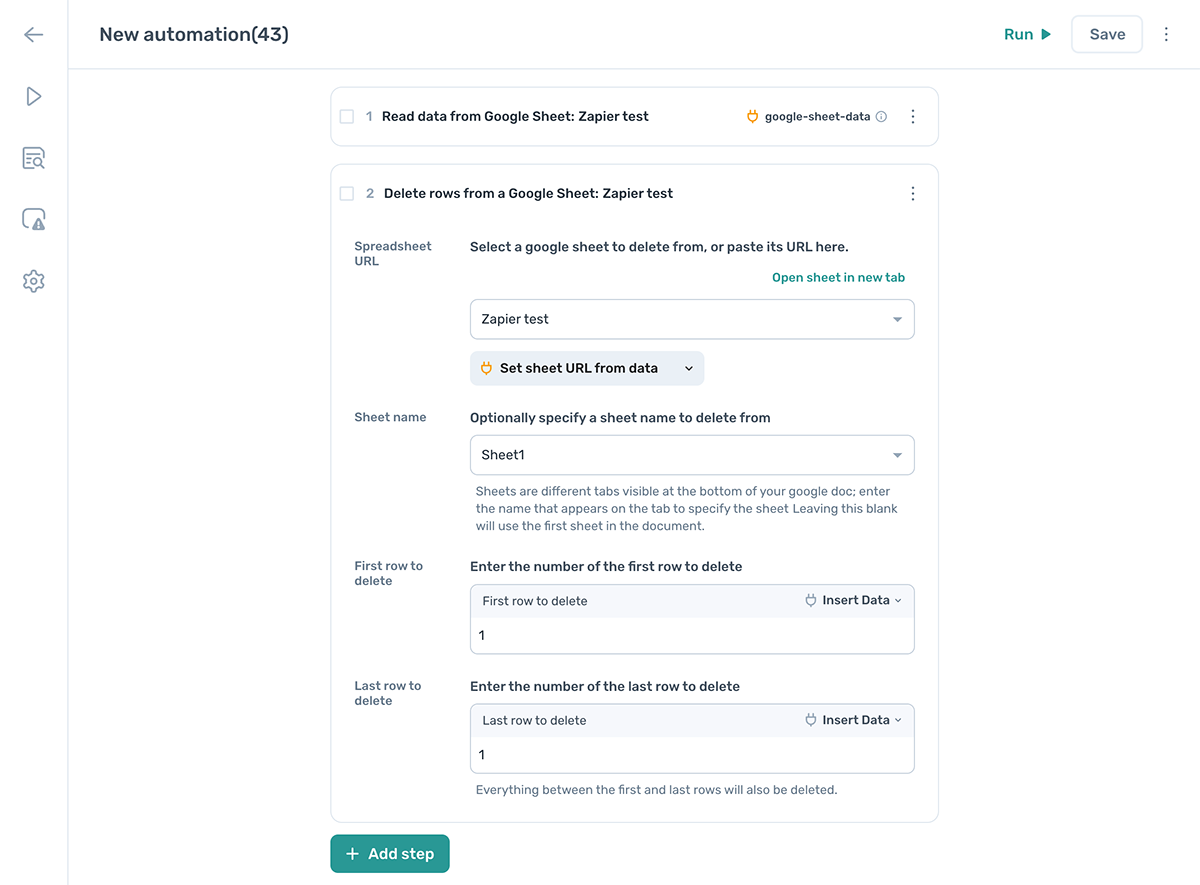
# Step 4: Add the "delete rows from Google Sheet" step
Add this step after the read data from a Google Sheet step. This deletes the row Zapier added, so the bot stops running unless Zapier writes a new row to trigger the bot again.
- Spreadsheet - Search for the Google Sheet you created and select it.
- Sheet name - Choose a sheet tab or leave blank to use the first tab.
- First row to delete - Set to "2".
- Last row to delete - Set to "2".
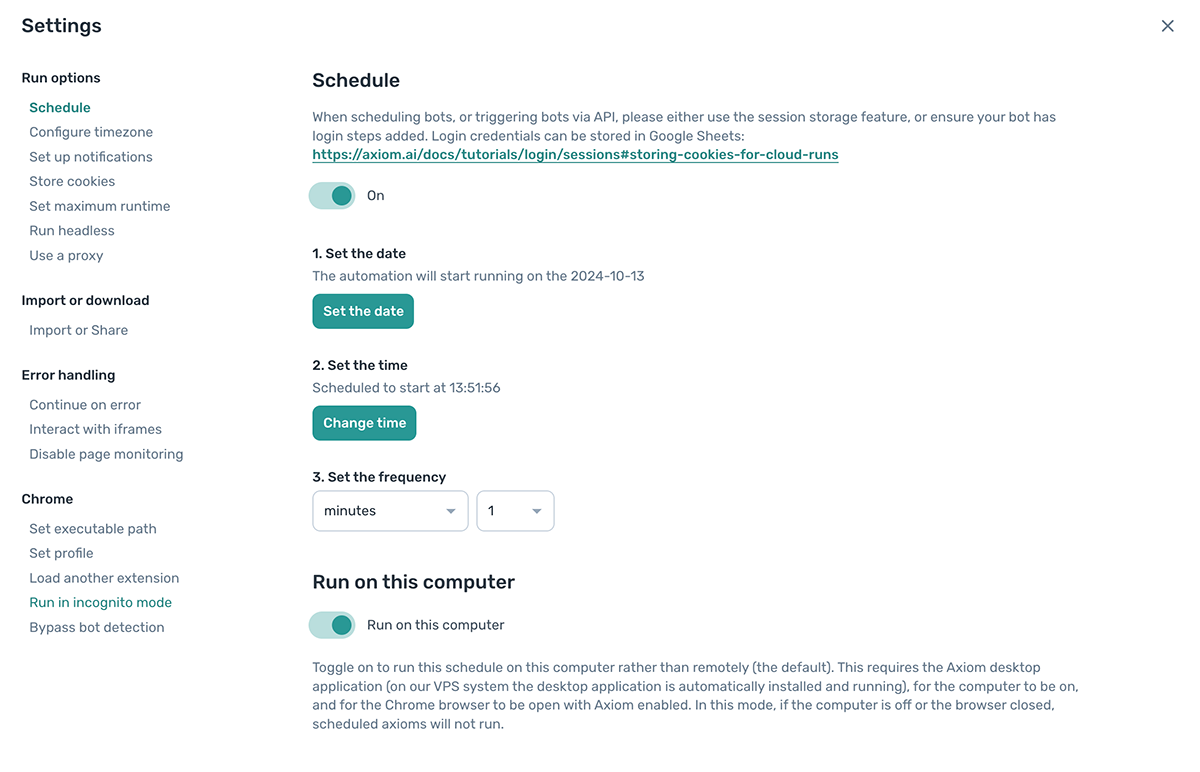
# Step 5: Set up a schedule
Final step, configure your bot to run at your preferred frequency. You can learn more about scheduling in our How to schedule an automation guide.
- Settings - Click the cog in the left-hand vertical menu bar.
- Schedule - Enable scheduling.
- Set time and date - Adjust the time and date to suit your needs.
- Frequency - Set the frequency to minutes. To run every minute, ensure the setting below is on.
- Run on this computer - Enable run on this computer.
# Wrapping up
Webhooks are web-based technology and can trigger cloud runs, but you cannot use the Zapier app to trigger desktop runs with webhooks. However, this simple workaround allows you to trigger desktop runs by writing a row to a Google Sheet and checking if a new row has been added. Keep in mind that the computer must always be on for this to work.
Axiom.ai is a flexible system with many ways to trigger your bots. Here are other great examples using Google Apps Scripts and Apple Shortcuts.