How to automate Instagram DMs with a bot? (updated 2025-26)
Want to boost engagement or share offers with your followers? You can now automate Instagram DMs without writing a single line of code using a bot. We’ve just updated and tested the template, so you can get set up and start automating DMs with a single click.
In this guide, you'll learn how to make a bot that automates direct messages on Instagram without a single line of code. What's more, you'll pick up skills that empower you to automate just about anything on the web. How awesome is that? 🚀
Read on if you want to learn or just dive in and install the updated template.
Why would you build a bot to automate Instagram direct messages?
Wouldn't it be great if you could sit back and let your computer do all your work for you? Well, now you can! Get all the engagement of a personal DM while expending all the effort of falling asleep in your chair.
Let’s be real though, there’s a bit of a learning curve to setting up a bot. Even so, we reckon it’s worth it. One member of our community put it like this: “If you don’t have a bit of time to invest this is not for you if you do this is the best thing you will ever encounter LEGIT!”.
If you’ve used a tool like Zapier before, then you should find it no sweat to program a bot for Instagram without coding. This guide takes you through the steps for creating a bot that will automate your most tedious Instagram tasks!
What exactly is a Insta DM bot?
A bot is like a robot's software cousin. A bot, like a physical robot, requires instructions to understand how to do the job. In this case, you'll give the bot a set of instructions instructing it in the ancient art of automating Instagram direct messages.
Check out our blog on what are bots to learn more.
How are Instagram bots made?
With axiom.ai's no-code bot builder, you can create bots for Instagram direct messages without having to code. Use a simple point and click interface to create as many bots as you want!
If you follow the steps below, you'll have a working bot by the end of this article.
How do bots automate DMs on Instagram?
Your bot will automate the same web actions you use to send an Instagram DM. Bots operate in the same manner as humans: opening a browser window, visiting a user's profile, and clicking the DM button.
Will my Instagram account get blocked if I automate DMs?
It could if you’re not careful and respectful! Instagram limits direct messaging, so if you created an army of bots automating Instagram 24/7, you would be blocked.
We believe that bots should be used responsibly and should not be used to spam websites or degrade the experiences of other users. To avoid being blocked, familiarise yourself with Instagram's rate limits and do not exceed them. Don't use Axiom to take advantage of the system!
Let’s learn how to build an Instagram DM bot!
Install Axiom in your chrome browser
If you haven’t yet installed Axiom, and created an account please goto the chrome store and install Axiom now.
By the way, we give all new users 2 hours of runtime. This means you can build and run this bot a few times on us 🙂
Set up your Google Sheet
Create a new Google Sheet. You can do this in your Chrome browser by entering the shortcut 'sheet.new', presuming you already have an account. Name your sheet something like 'Instagram DM’ then add profile links.
Launch Instagram and open axiom.ai
First, open your Chrome browser and log into Instagram. Then launch Axiom and click the '+ New Automation' button. You'll now begin combining steps to create your Instagram automation.
Click 'Add the first step' to start, or why not use a Insta template?
To build your bot from scratch, click on 'Add the first step'. This will open the Step Finder, so you can start adding steps to your bot.
Follow this link to use the automate DMs template.
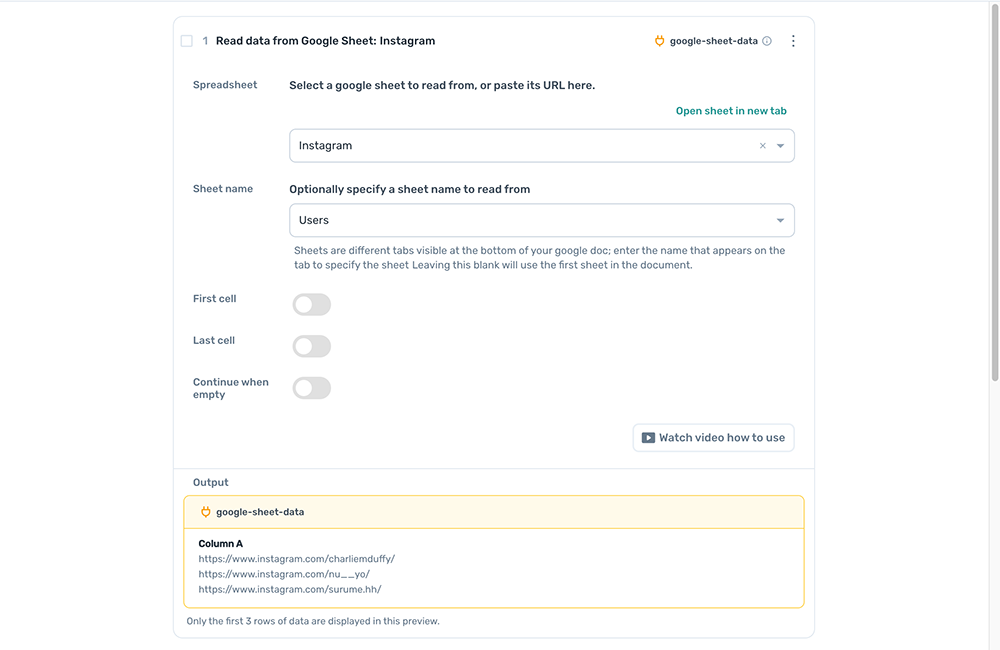
1. Add your first step, ‘Read data from a Google Sheet’
Using the Step Finder search for ‘Read data from a Google Sheet’ and click on it. The step will be added to Axiom for you to configure.
- In the field called 'Spreadsheet', you can search for the Google Sheet you created by name. Once found, click on it to select.
- For 'Sheet name' click on the drop-down and select the tab containing the Instagram profile links
2. Add a ‘Loop through data’ step
Click the 'Add a new step' button below the ‘read’ step. Using the Step Finder click on 'Loop through data' to add the step.

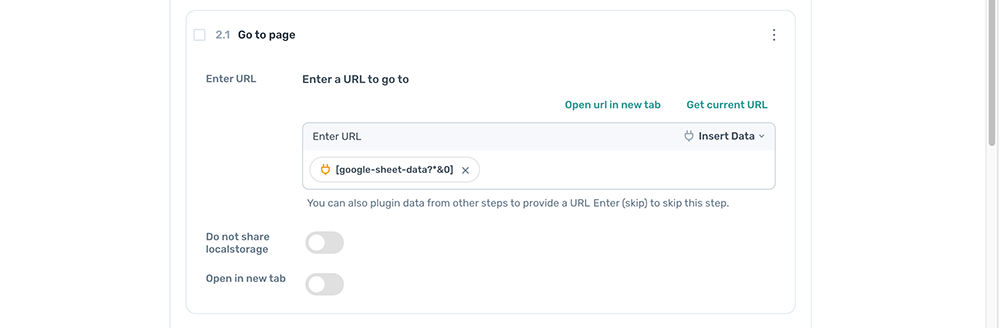
2.1. Add ‘Go to page’ step
Click the 'Add sub-step' button inside the 'Loop through data’ step. Using the Step Finder search for 'Go to page' and click to add.
- Enter URL - Click 'Insert data', select google-sheet-data choosing the column with the Instagram profile links
2.2 Add ‘Get data from bot's current page’ step
Click the 'Add sub-step' button inside the 'Loop through data’ step. Using the Step Finder search for 'Get data from bot's current page' and click to add.
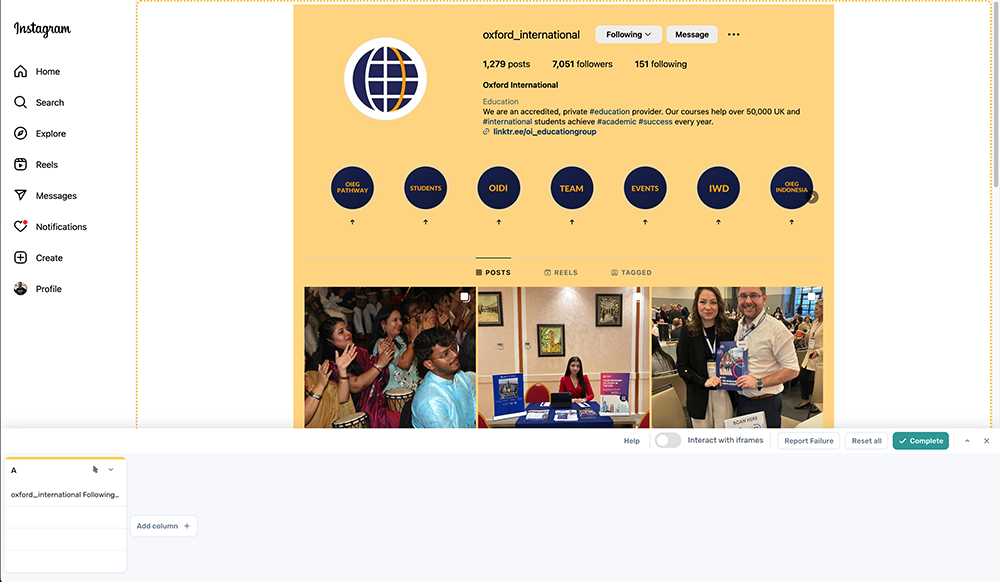
- On an Instagram profile page - Click 'Select' and highlight column with the header and post in it, see image above
- Max Results - Set to one
- Configure scraper - # of attempts when results not found set to one

Tried the automate DMs template?
2.3 Add an ‘IF condition’ step
Click the 'Add sub-step' button inside the 'Loop through data’ step. Using the Step Finder search for 'If condition' and click to add.
- Set 'Data to check' - Select Scrape data
- Condition to check - Using words enter 'Message' into the input field
- Reverse condition - True
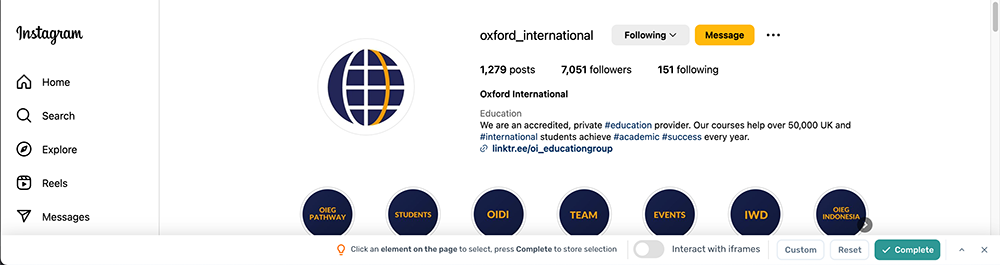
2.3.1 Add a 'Click Element' step
Click the 'Add sub-step' button inside the 'If Condition’ step. Using the Step Finder search for 'Click Element' and click to add.
- On an Instagram profile page - Click 'Select' and highlight the 'Message' button
2.3.2 Add a 'Wait' step
Click the 'Add sub-step' button inside the 'If Condition’ step. Using the Step Finder search for 'Wait' and click to add.
- Set a time in milliseconds - Enter 1000
2.3.3 Add a 'Click Element' step
Click the 'Add sub-step' button inside the 'If Condition’ step. Using the Step Finder search for 'Click Element' and click to add. This step is to close the pop up that only appears when you run the automation.
- Click 'Select'
- Next, click 'Custom' in the toolbar
- Tick, 'Use element text instead of html'
- Input 'Not Now' and press complete
- Tick, Optional click

2.3.4 Add a 'Wait' step
Click the 'Add sub-step' button inside the 'If Condition’ step. Using the Step Finder search for 'Wait' and click to add.
- Set a time in milliseconds - Enter 1000
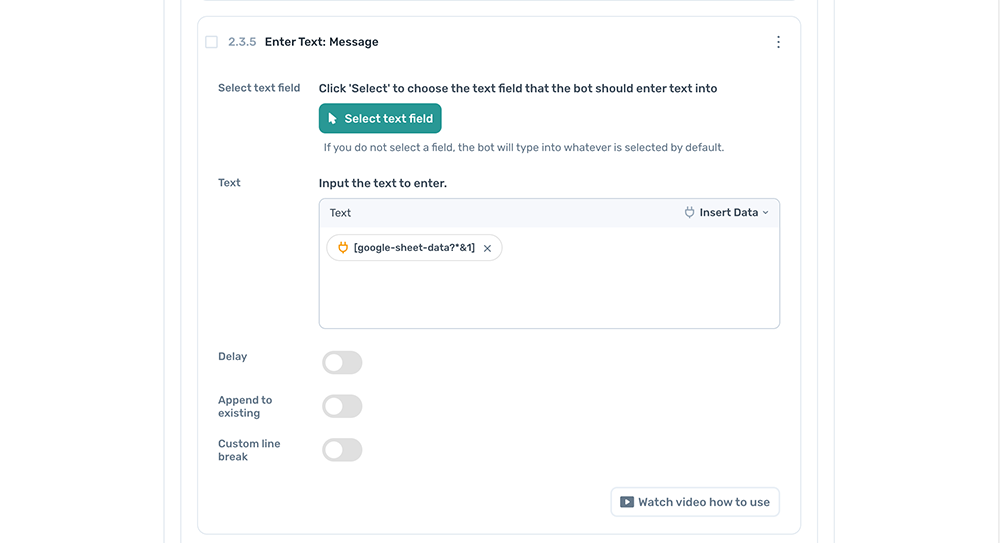
2.3.5 Add a 'Enter Text' step
Click the 'Add sub-step' button inside the 'If Condition’ step. Using the Step Finder search for 'Enter Text' and click to add. No need to select the input as the cursor is positioned in the input when the Instagram DM page loads.
- Text - Click 'Insert data' select google-sheet-data choosing the column with the message you wish to send
Stuck? Have you tried the automate DMs template.
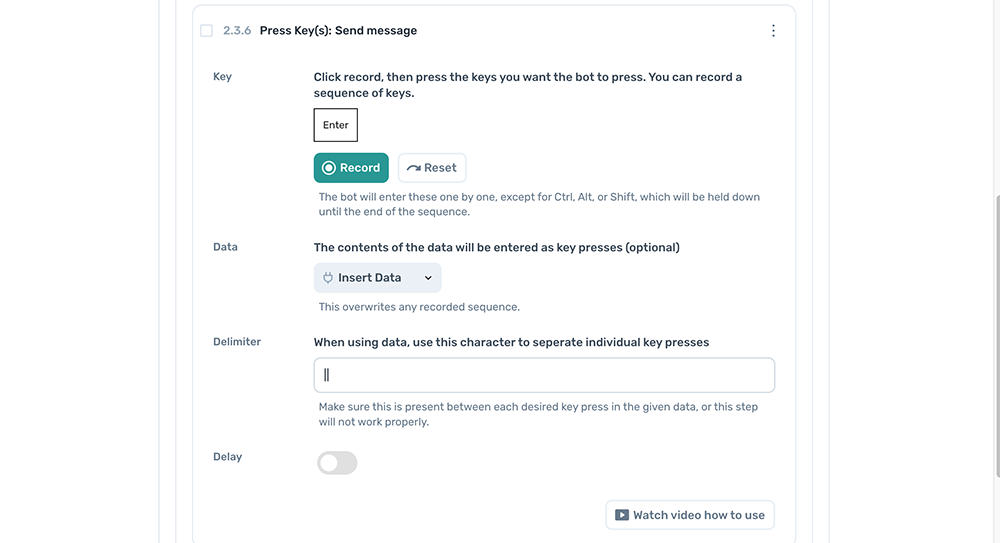
2.3.5 Add a 'Press Key(s)' step
Click the 'Add sub-step' button inside the 'If Condition’ step. Using the Step Finder search for 'Press Key(s)' and click to add.
- Key - Click 'Record' and press Return
2.4 Add a 'Delete rows from a Google Sheet' step
Click the 'Add step' button inside the 'loop step’ step. Using the Step Finder search for 'Delete rows from a Google Sheet' and click to add.
- In the field called 'Spreadsheet', you can search for the Google Sheet you created by name. Once found, click on it to select.
- For 'Sheet name' click on the drop-down and select the tab containing the Instagram profile links

Well done! The bot is ready to test 👍
Try sending a DM on Instagram to see if it’s working the way you want
Before you do a test run, make sure you’ve disabled the sub-step ‘Key press’ to stop the DM’s from being sent. If not, do that now.
It's best practice to test every bot to check it’s production-ready. With the ‘Post’ button disabled, you can do a test run that will not send a post.
We recommend test running your bot with the desktop app, but you can also do it in the cloud.
Make sure that you confirm your message is successfully entered and the logic is working as you expect.
Go ahead and click ‘run’. Get ready for some magic.
Fix any issues with your automation
If you experience any issue with the bot not clicking buttons, try re-selecting the button or text input or follow this link to use the New one-click setup automate DMs template.To change the selection, move the cursor slowly over the object and re-select.
The 'Click' step also has a handy feature that allows you to select the button by the text, which can resolve many issues. Just click the “Use element text” button and see if that helps you out.
Don't forget we have excellent customer support. If you need help, get in touch. (/customer-support)
Conclusion
You have learned how to use an Instagram direct message bot, sure, but you also have the knowledge to do so much more! Now that you have used an 'Interact' step, automated clicks and key presses, you can build a bot to automate virtually any web app. Remember those jumps steps too - with those in your pocket you’ll be a bot master in no time. Go you!