Automate posts to Instagram
Do you spend much of your working day on Instagram, posting across multiple accounts? If so, this guide is perfect for you. In a few simple steps, we’ll teach you how to build a bot that will post to Instagram for you - without a single line of code. What's more, you will pick up a skill that empowers you to automate just about anything on the web. How awesome is that? ✋

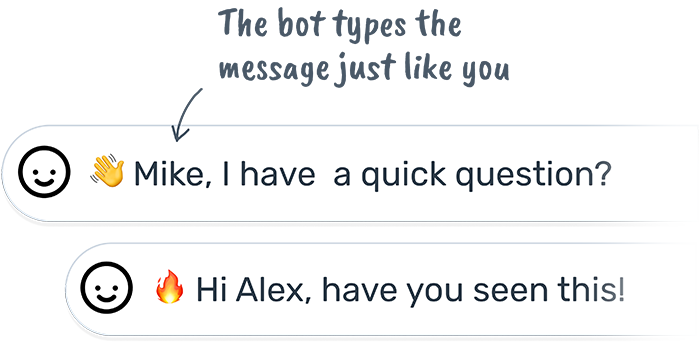
Try our NEW Instagram DM bot with a one-click setup; just add a sheet
# Why build a bot for automatic posting on Instagram?
Have you ever seen a bot do your work? You can sit back and watch it working its magic on your screen. Before you know it, you’ll find your Instagram posts up and attracting likes - all without touching the keyboard.
There’s a learning curve to building bots to automate the browser. If you’ve used Zapier, then Axiom will be easy for you to pick up. If you’re a newbie, this guide takes you through the steps to program a bot without a single line of code. Once you’ve mastered that, you can start automating a whole range of tedious tasks!
# What is a bot?
A bot is the software cousin of the robot. Like a robot, its job is to do the tedious work for us. Just like a physical robot, it needs instructions, so it knows how to do the job. In this case, you’ll give the bot a set of instructions that tells it how to automate posting to Instagram.
Check out our blog on bots click here to learn more.
# How are bots made?
You make bots by combining steps to replicate your actions using Axiom’s no-code bot builder. You can build as many bots as you want for any web-based application, not just Instagram.
If you are completely new to this, keep following the guide and by the end you’ll have made a working bot.
# How do bots automate posting on Instagram?
The bot you’re about to make will automate the same web actions you perform to create an Instagram post. Bots work just like you: they open the browser window, click on the new post button, upload an image and insert the text before finally clicking the post button to complete the task.
# Will my Instagram account get blocked?
The short answer is no, Instagram does not currently limit posting. However, if you created an army of bots automating Instagram 24/7, then yes, you would be blocked. And to be honest, you would deserve it.
We believe bots should be used responsibly and shouldn’t be used to spam websites and degrade other users' experiences. To avoid getting blocked, read about Instagram’s rate limits (opens new window) and don’t exceed them. Don’t use Axiom to abuse the system.
# Let’s dive in and make a bot to automate Instagram posting
Before we you start, please note you need to use Axiom’s desktop app as this automation requires files to be uploaded, Click here to install. Currently, bots can only work with files on the desktop. If you would like to see this feature on the cloud or elsewhere, please vote here.
# 1. Install Axiom in your chrome browser
If you haven’t yet installed Axiom, and created an account please goto the chrome store and install Axiom now (opens new window).
By the way, we give all new users 2 hours of runtime. This means you can build and run this bot a few times on us 🙂
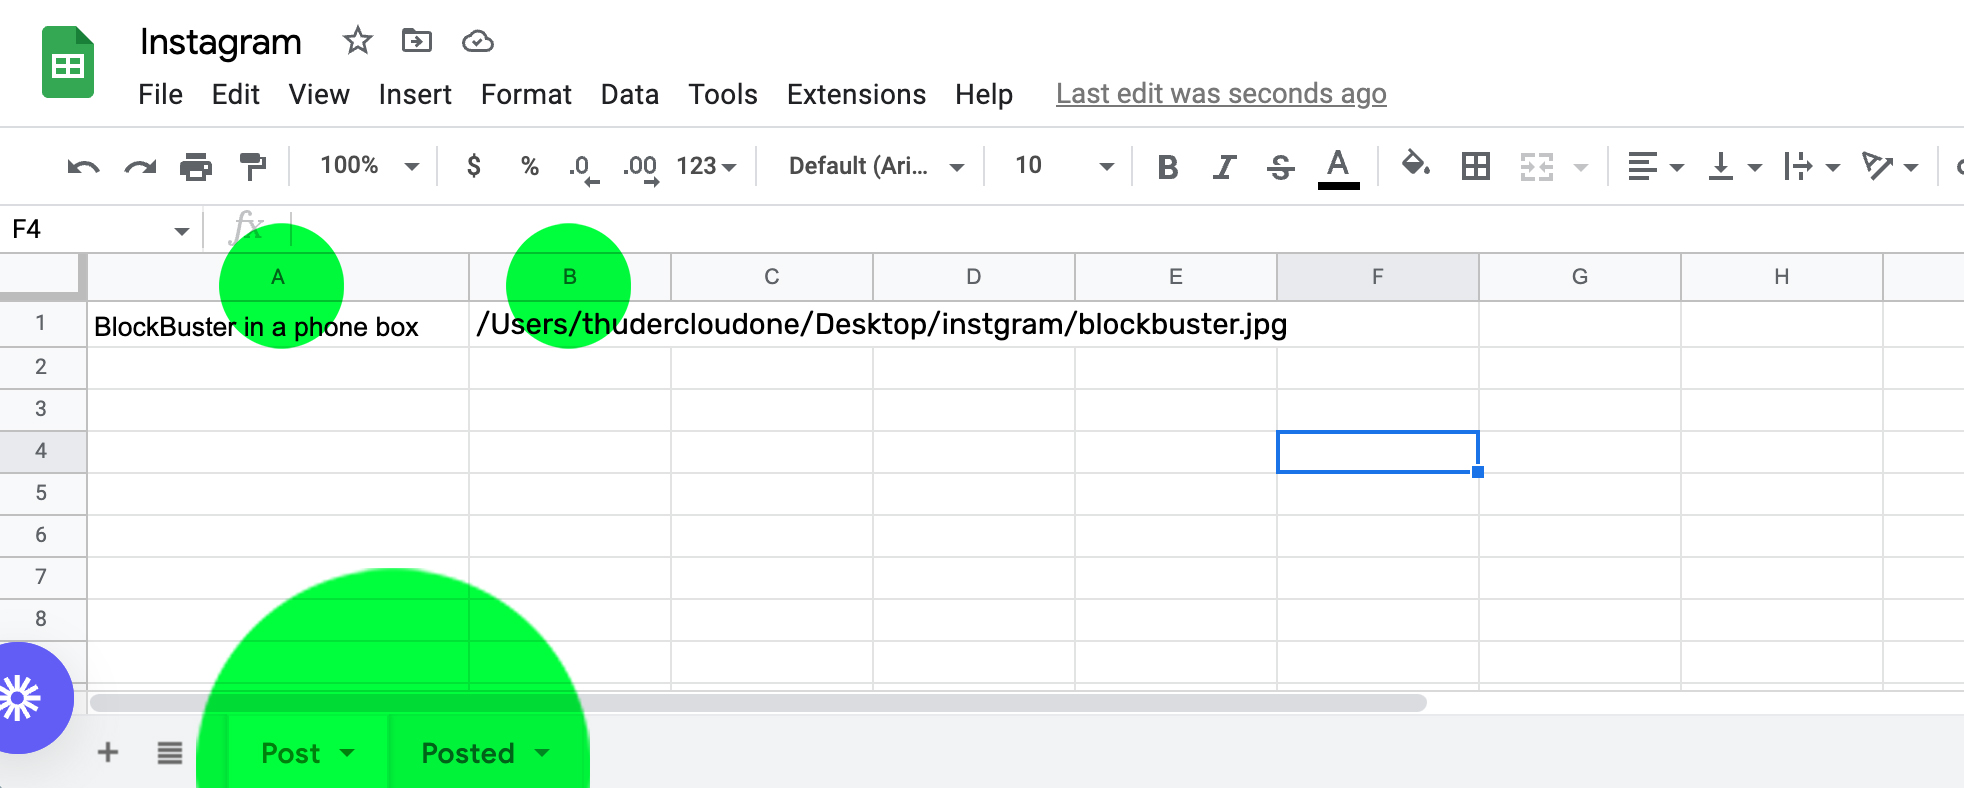
# 2. Set up your Google Sheet
Create a new Google Sheet. You can do this in your Chrome browser by entering shortcut 'sheet.new'.
First name your sheet 'Automate posting on Instagram’, then add two new tabs to the sheet titled 'Post' and 'Posted.’
Set up your sheet on the first ‘Post’ tab as seen below. Add some dummy posts for testing the bot and add the image path and name.
# 3. Launch Instagram and open Axiom
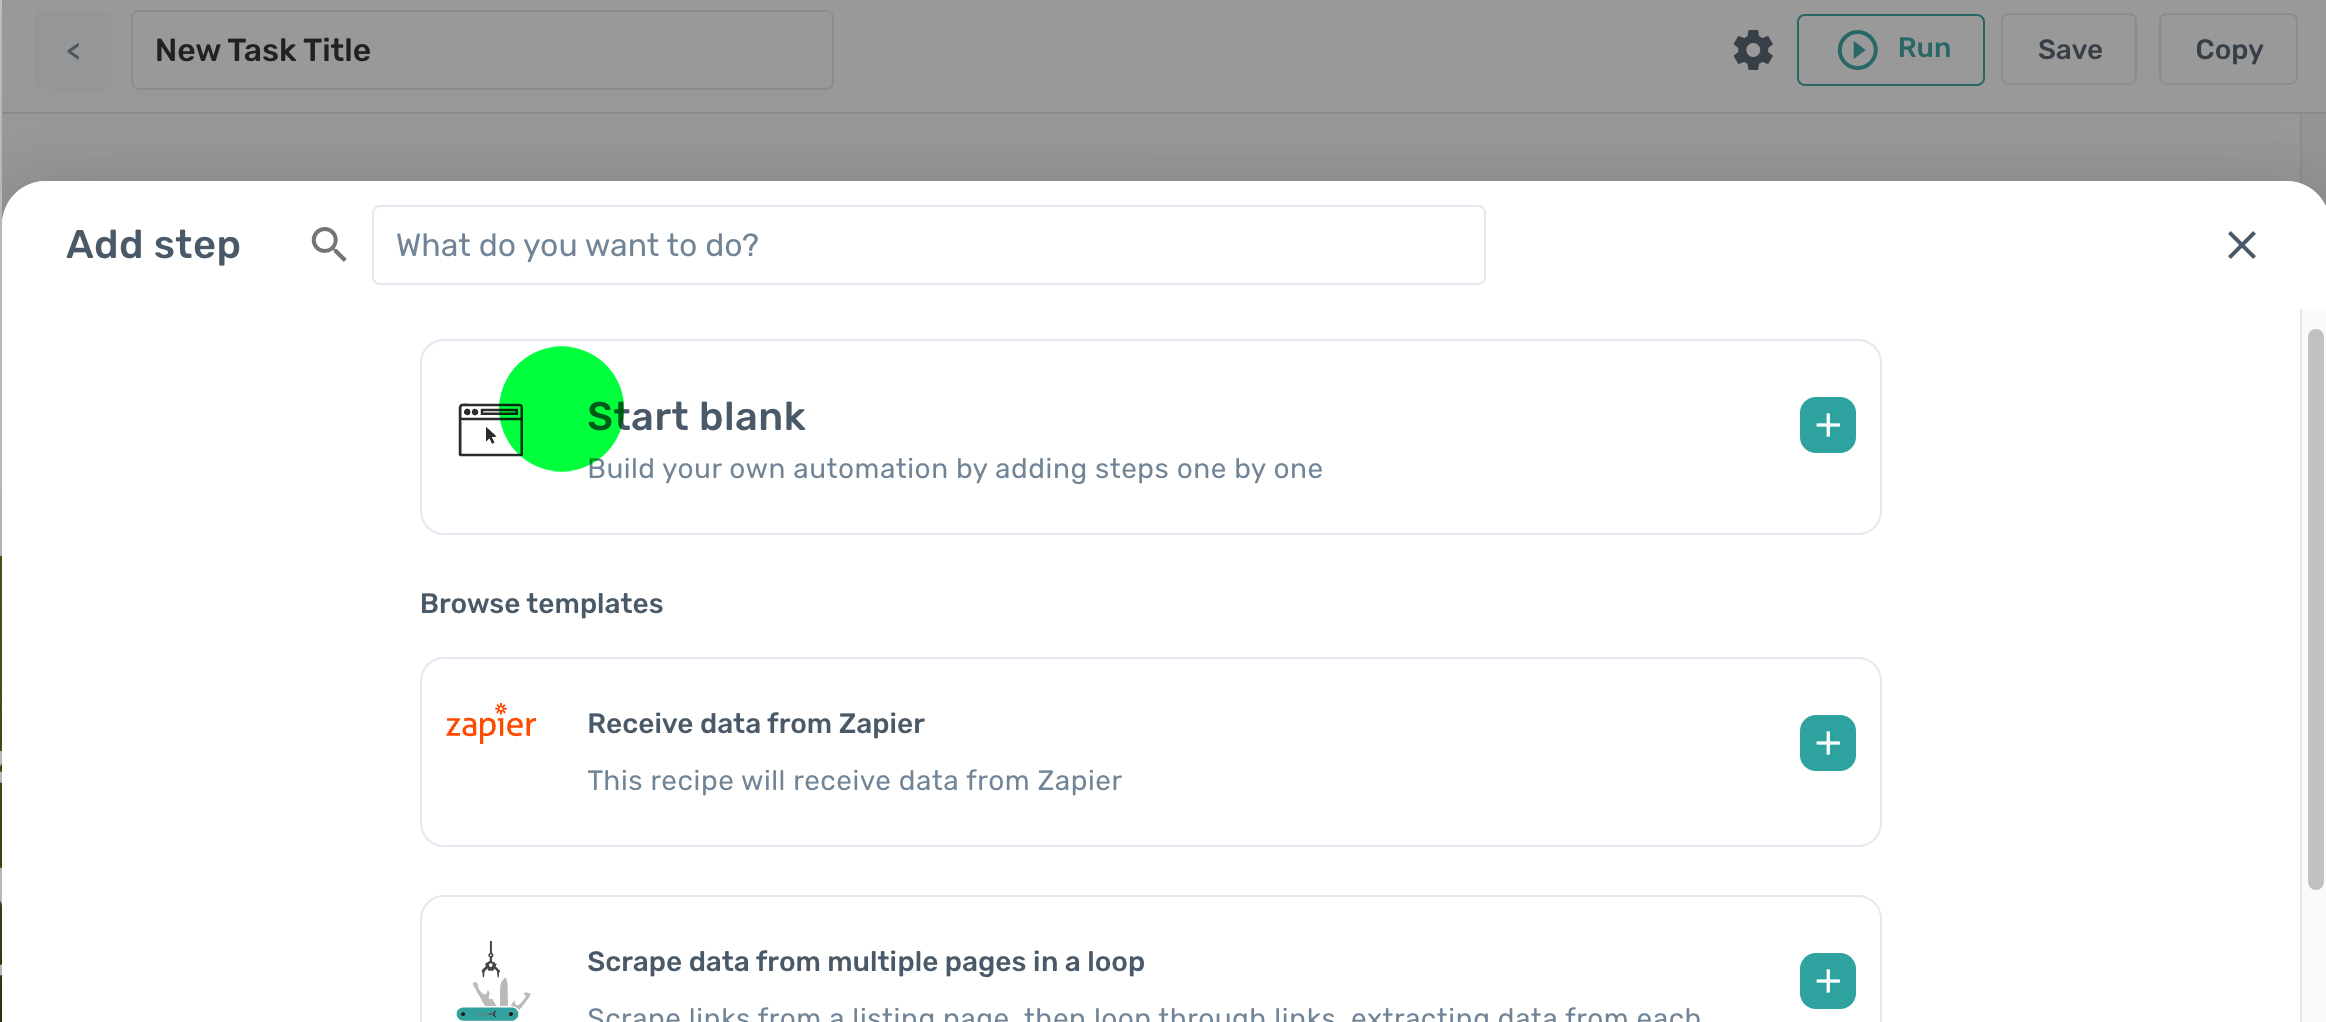
First, log in to Instagram in your chrome browser. Then open up Axiom and click the '+ New Automation' button. You’re now going to start combining steps to build your automation.
# 4. Start from blank
To build your bot from scratch, click on 'Start blank.' You can make as many bots as you want.
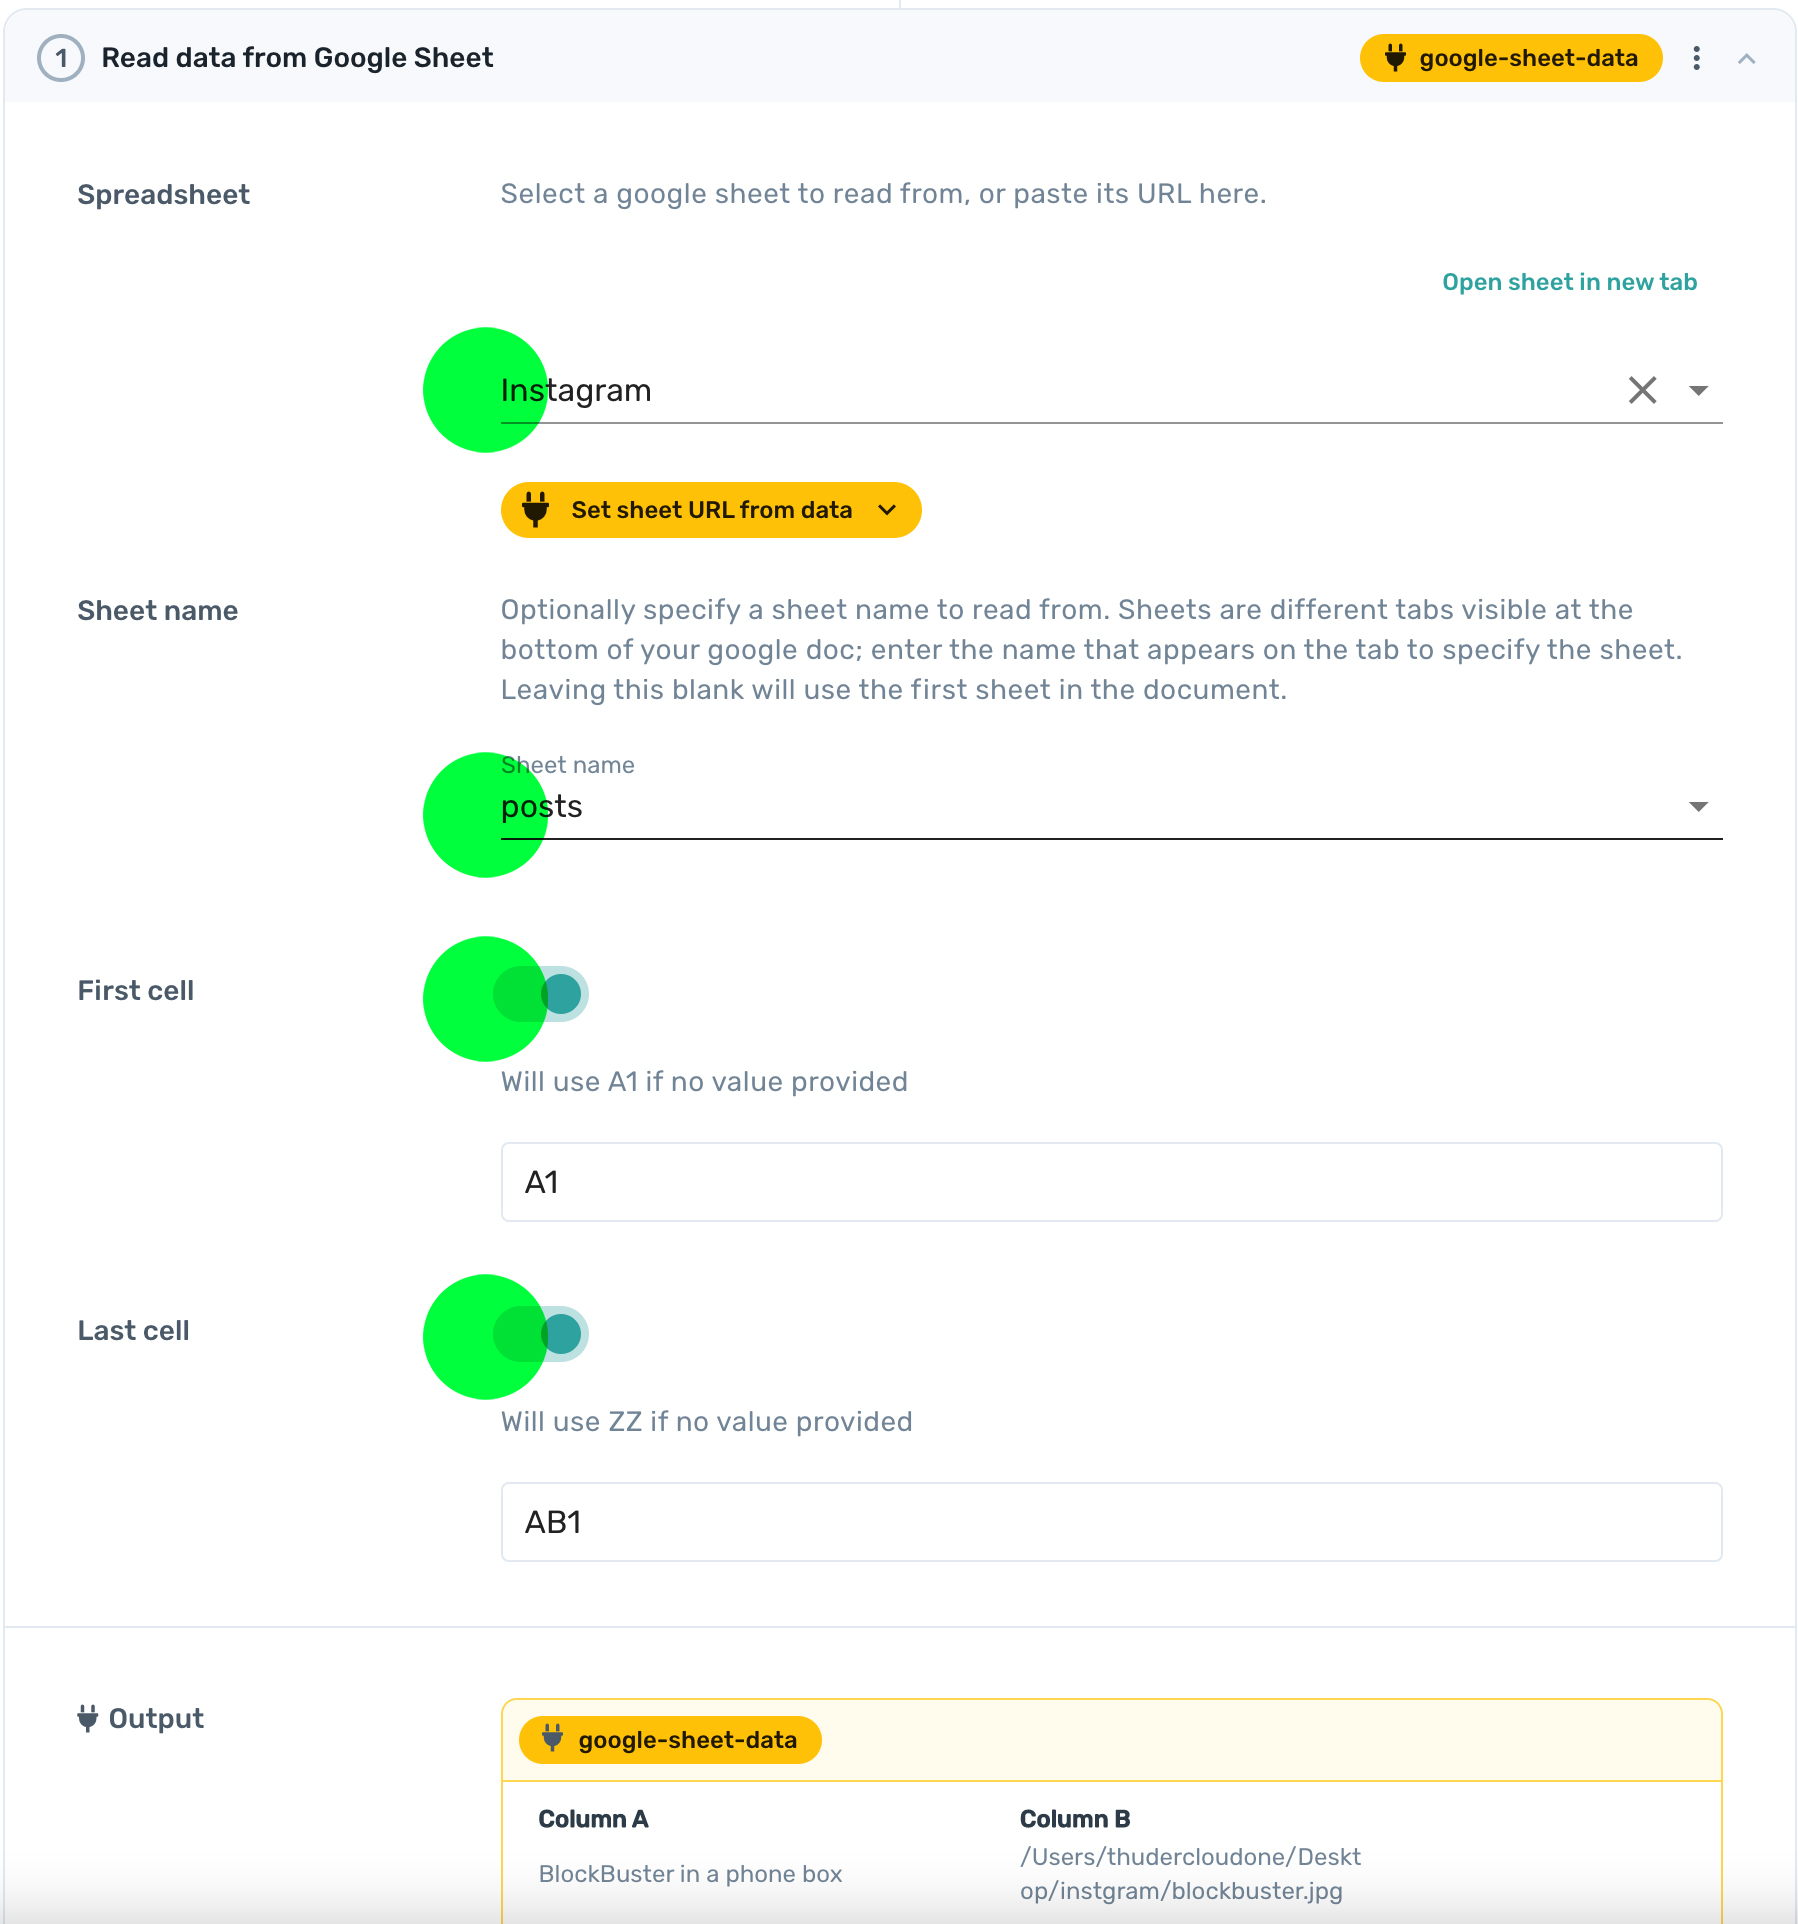
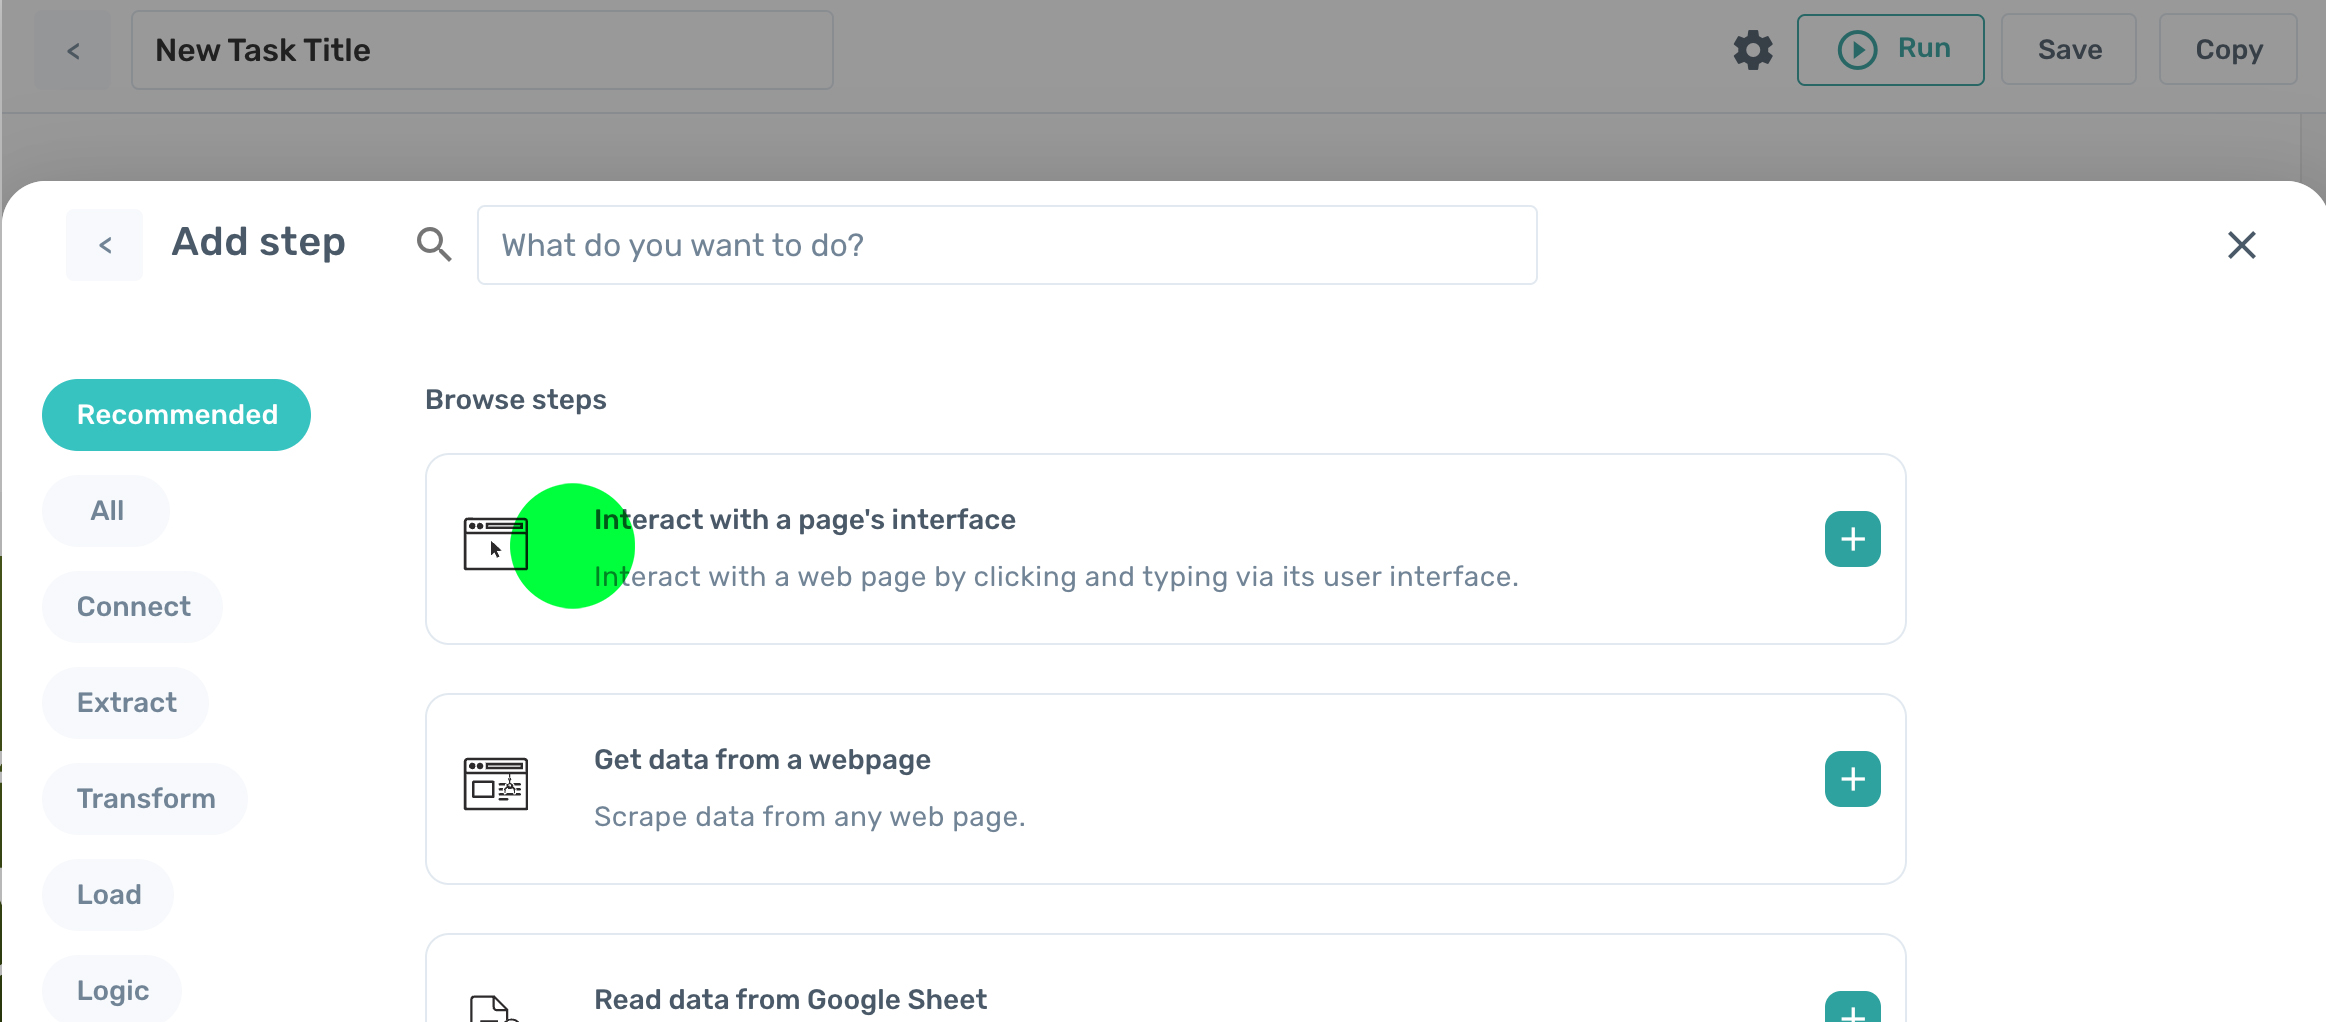
# 5. Add your first step, ‘Read data from a Google Sheet’
Using the Step Finder click ‘Read data from a Google Sheet’. The step will be added to Axiom for you to configure.
In the field called 'Spreadsheet', you can search for the Google Sheet you created. Once found, click to select.
For 'Sheet name' click on the drop-down and select the tab 'Post' with the test data.
On the first cell, toggle the switch and enter 'A2'. This setting tells the bot where to start reading data. In the example below, you would start with 'My first automated post' as the column titles fill row one.
On the last cell, click the toggle switch and enter 'AC2'. You have limited the bot to read a single row. If you wanted to post two posts concurrently, you could change the setting to AC3.
If you want to learn more about Google Sheet steps watch these videos.
# 6. Loop through data
Click ‘Add a step’ below the ‘read’ step. Using the Step Finder click on 'Loop through data' to add the step.
In the ‘Go to Url’ field enter ‘https://www.instagram.com/ (opens new window)’
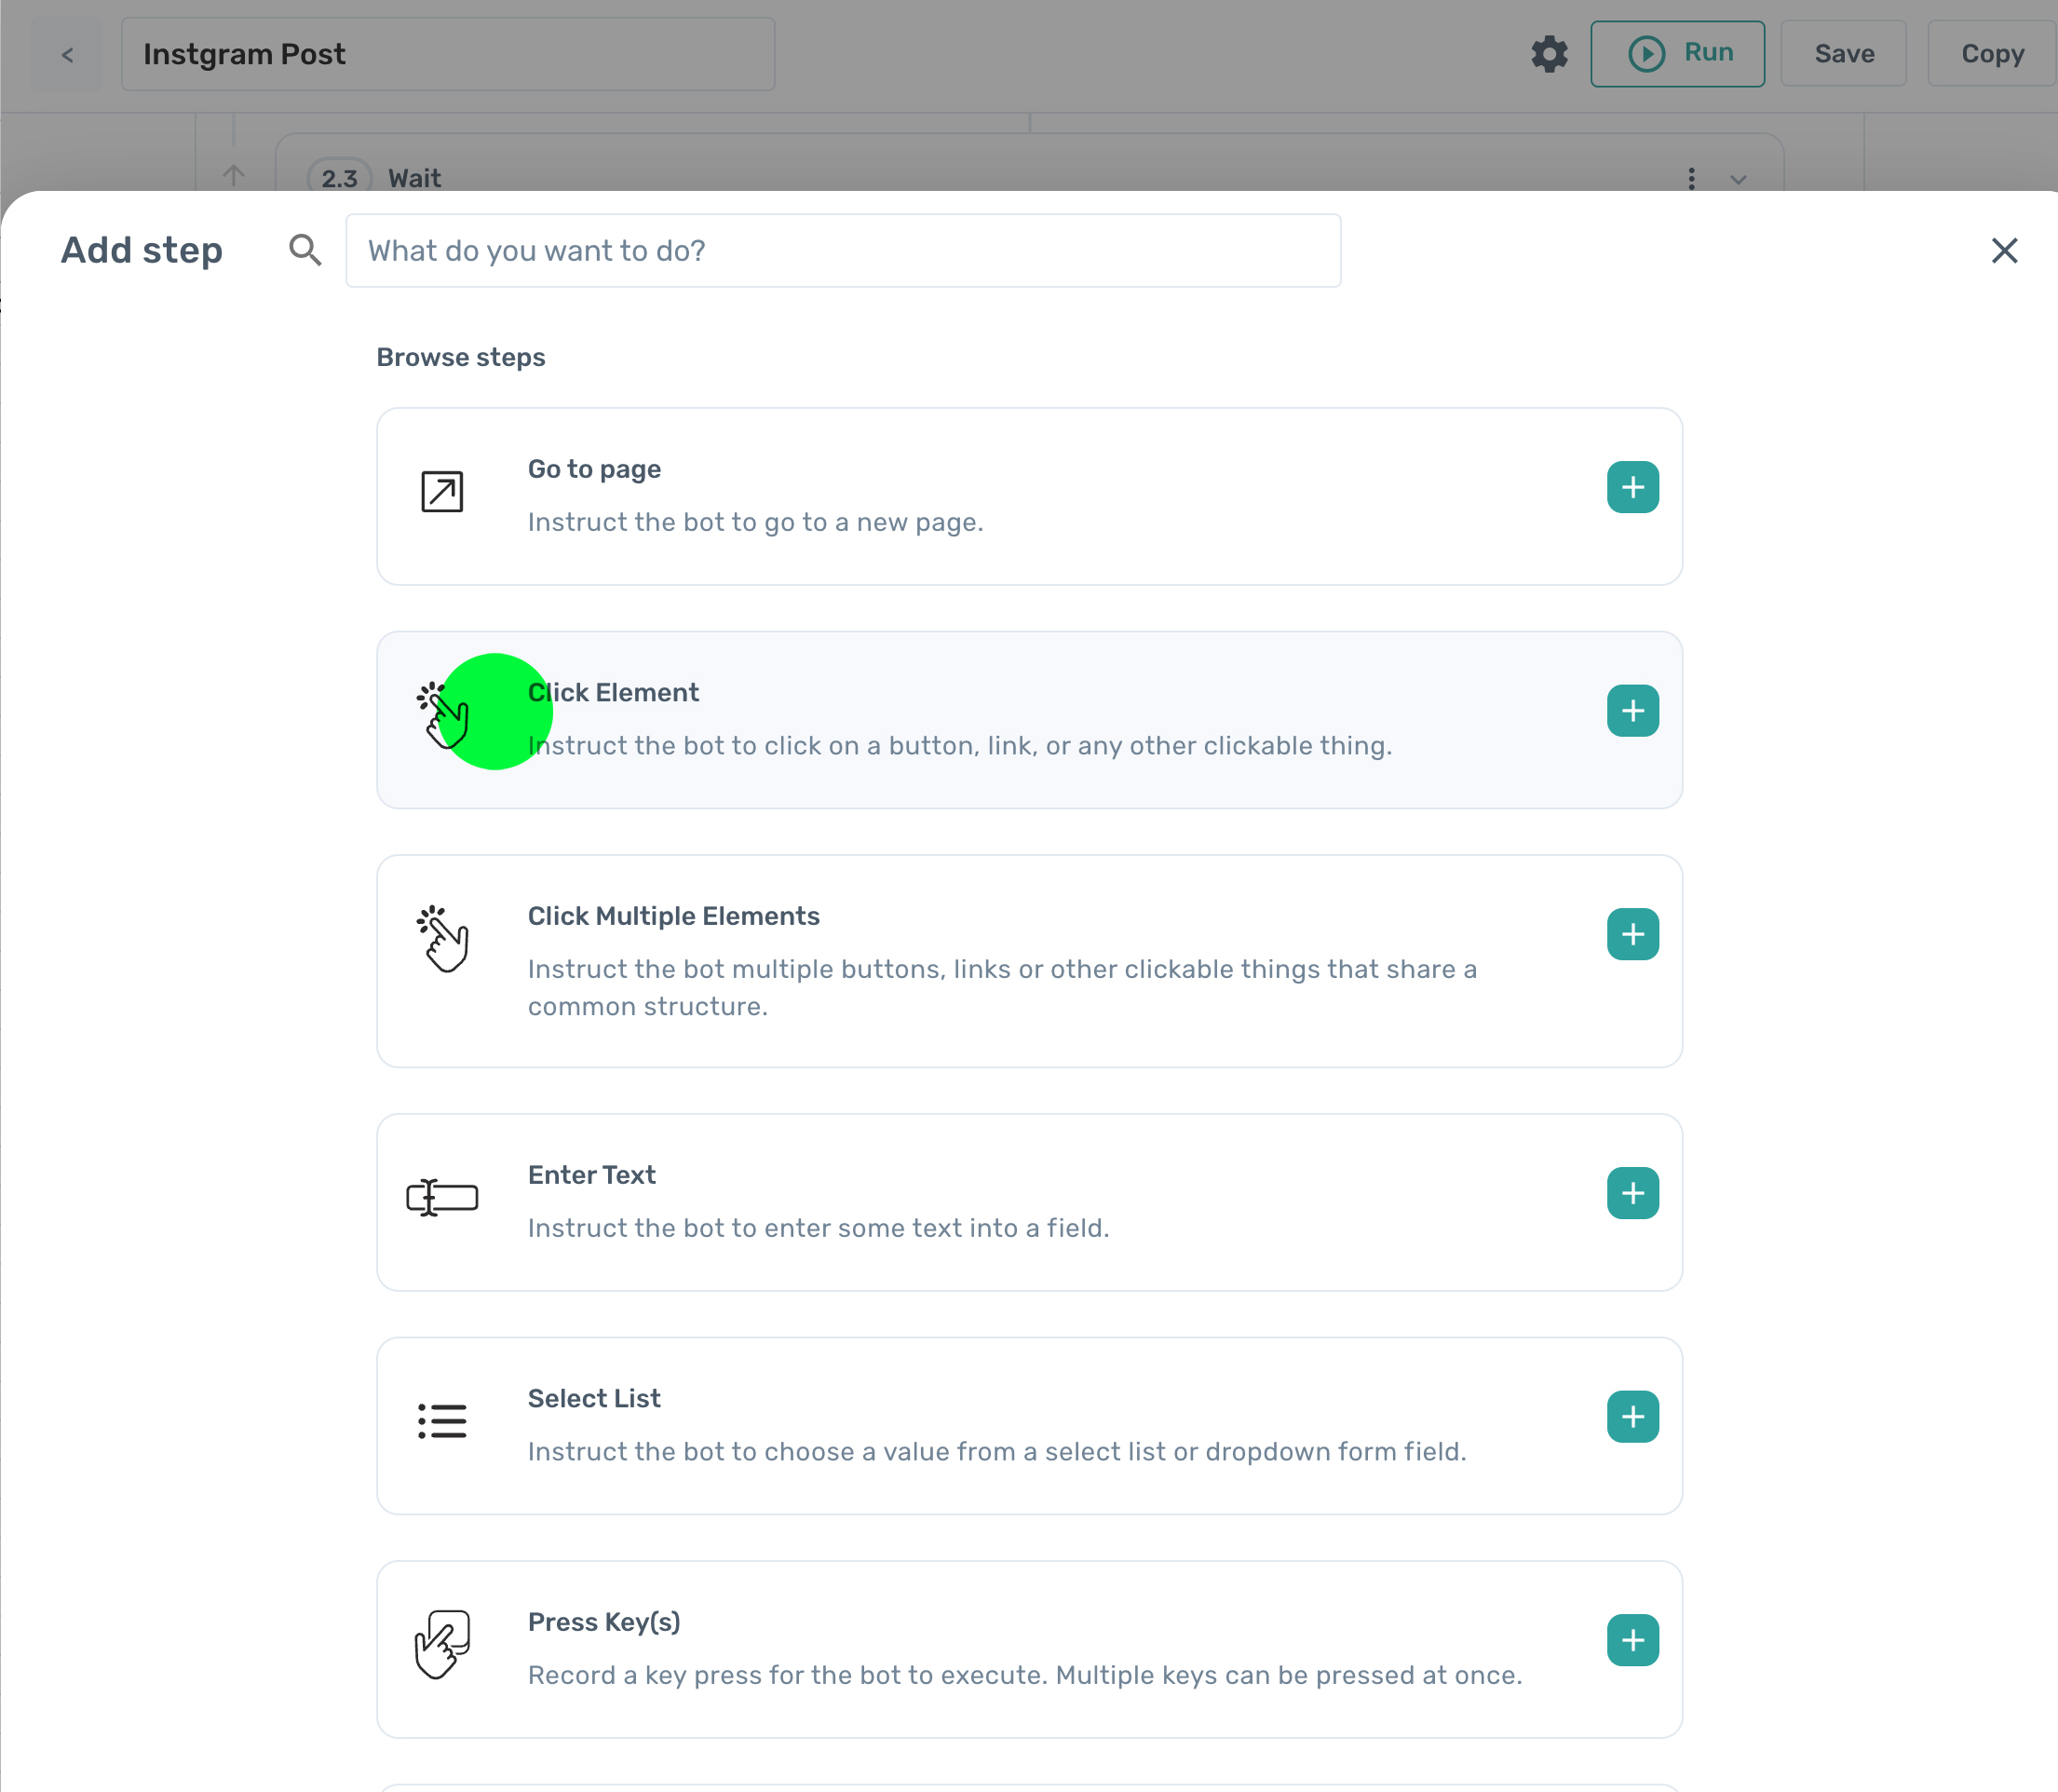
Inside the Interact step, click on the 'Add a sub step' button. The Interact step features a set of sub steps for automating browser actions like clicking a button.
Add the 'Click element' sub step.
Then, click on 'Select' and use our selector tool to highlight the ‘Create a new post’ button on Instagram and click confirm.
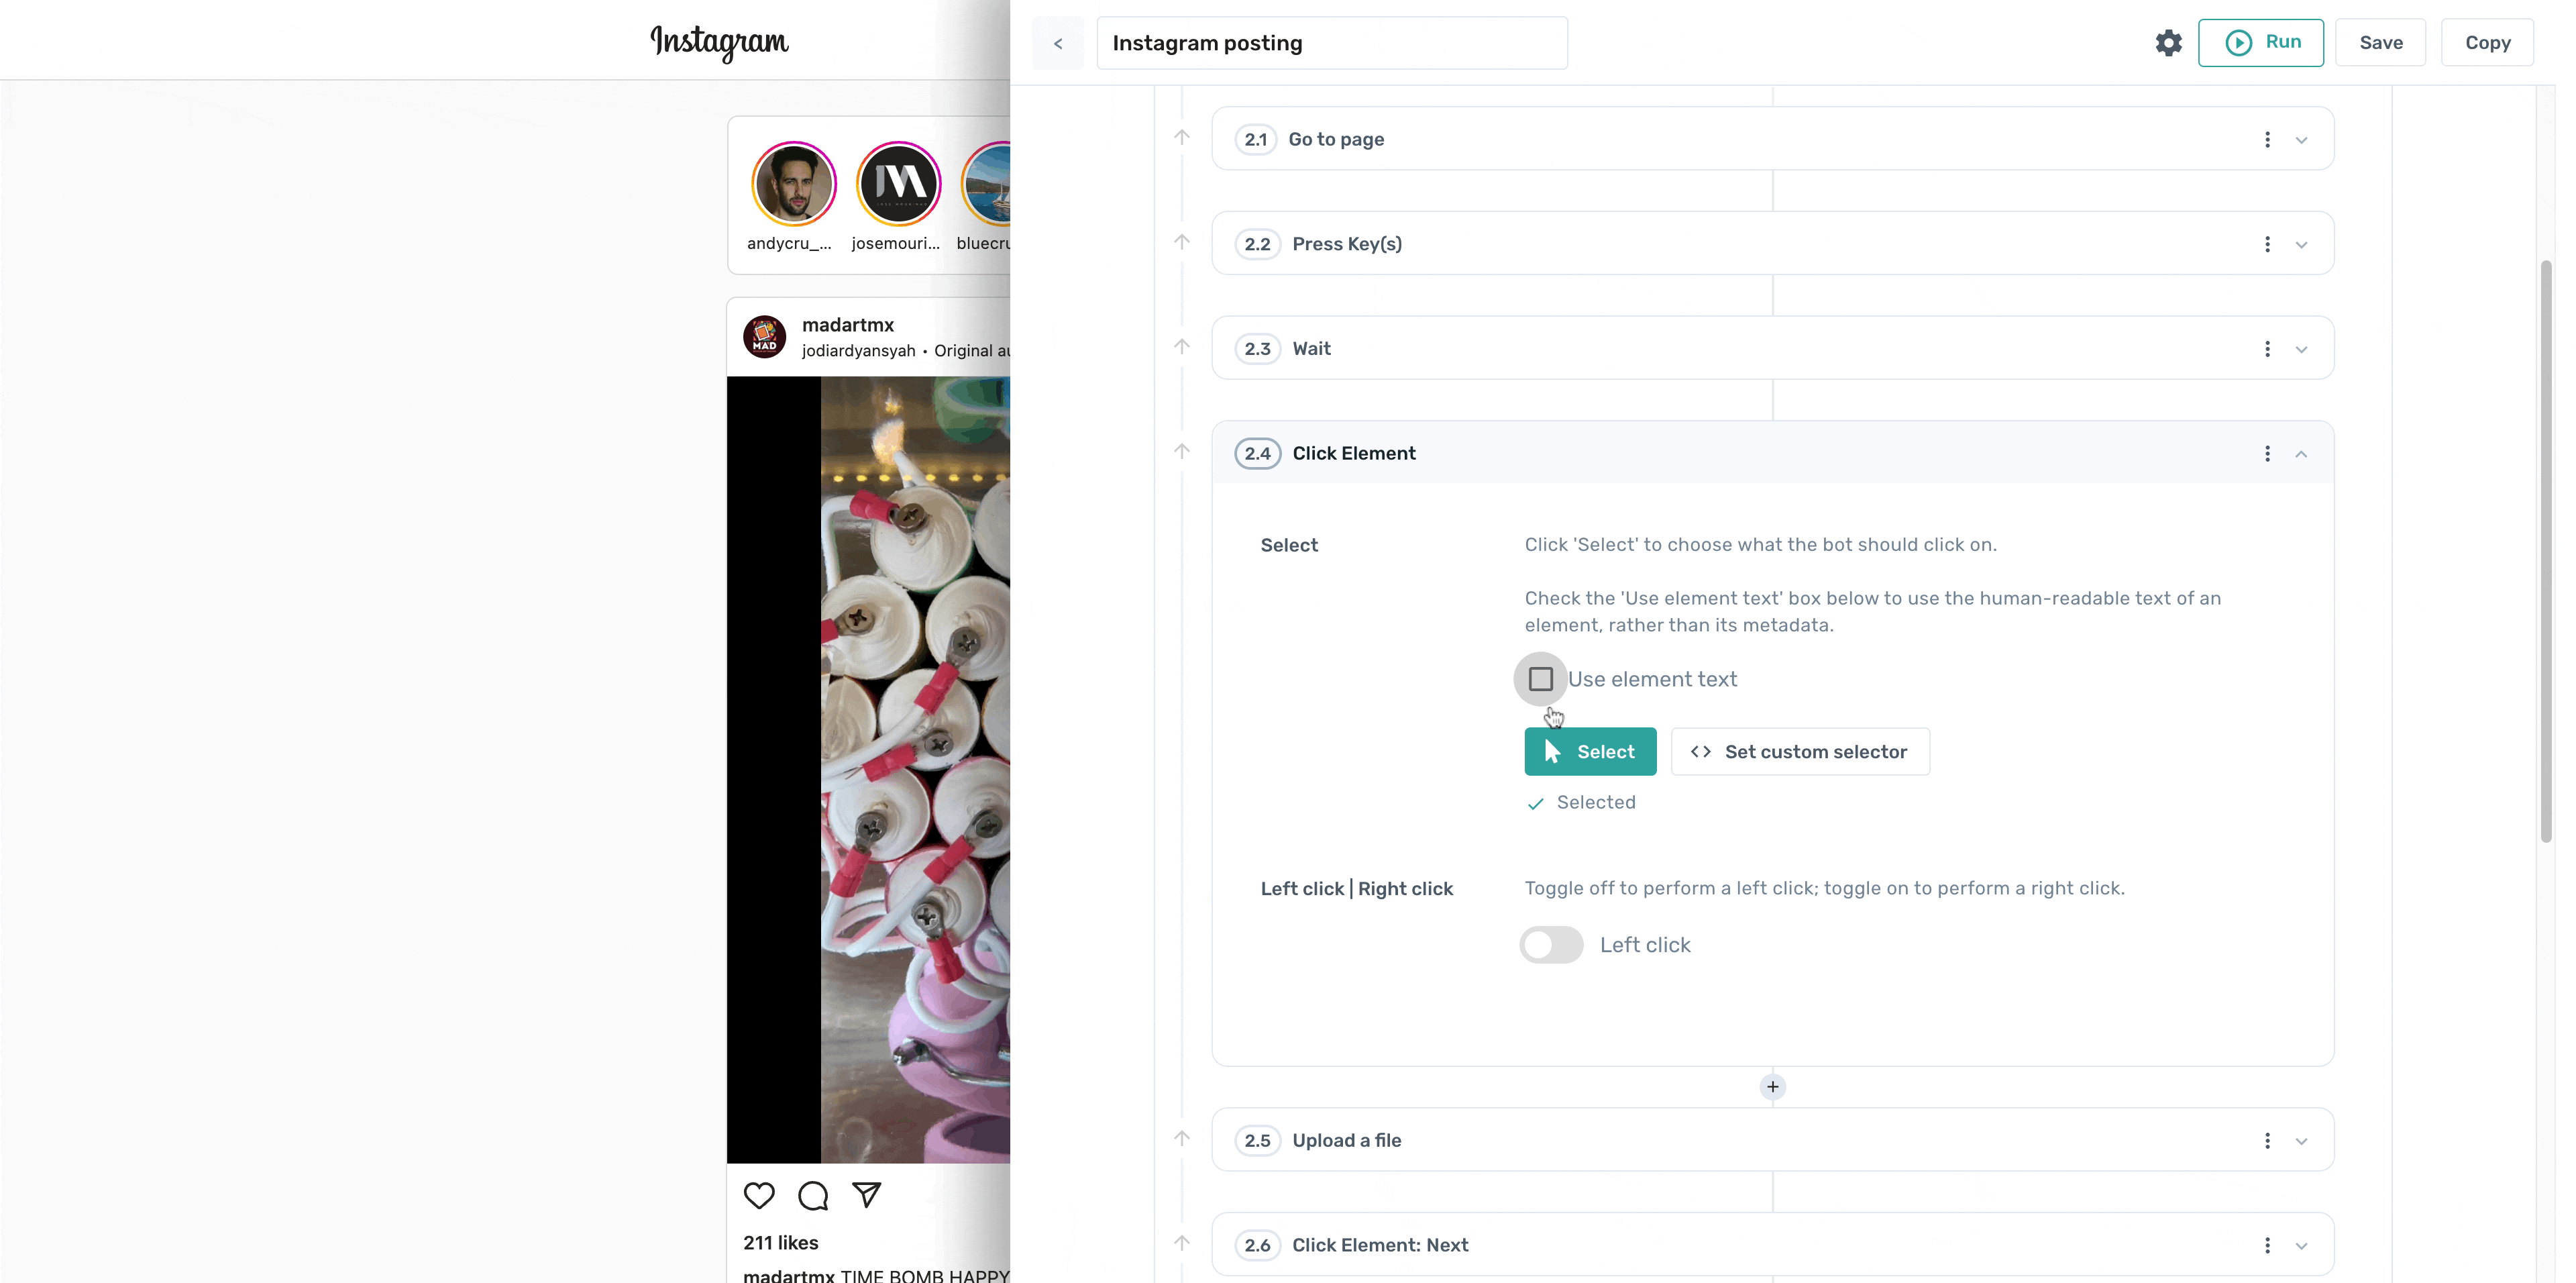
Well done, you have automated a web action.
# 7. Add further sub steps

Add an 'Upload file’ sub step and select the button 'Select from computer' in the Instagram pop-up window.
In 'File path' click on the yellow stadium 'Insert data' and select Google-Sheet-Data. A data preview will open. Select column C with the image path and save and close the preview.
Add a second 'Click element' sub step. Select the ‘next’ button.
Use a third 'Click element' sub step. Select the ‘filter’ button.
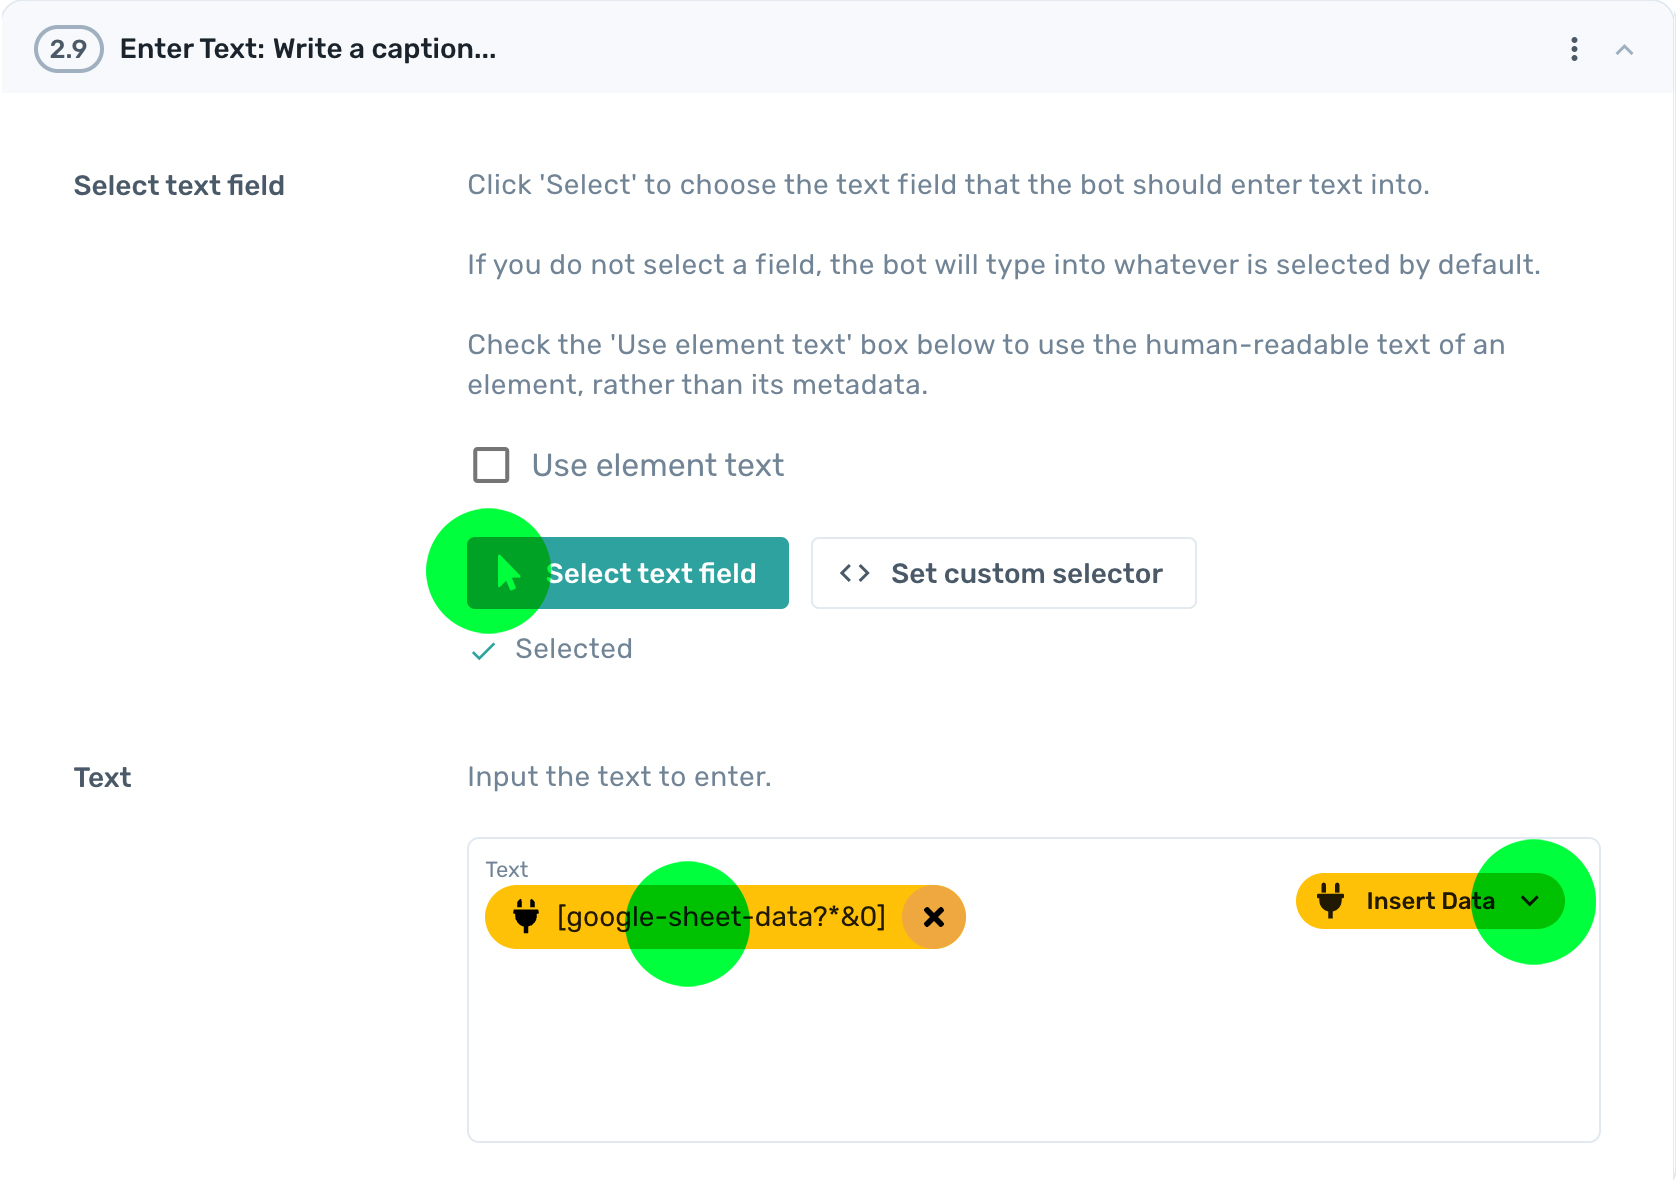
Next, add a new sub-step called 'Enter text' and select the ‘Caption’ text field.
Now pass your caption from the sheet into the ‘Enter text’ step. Next, click on the yellow stadium 'Insert data' and select Google-Sheet-Data. A data preview will open. Select column A and save and close the preview.
Add an 'Upload file’ sub step and select the button 'Select from computer' in the Instagram pop-up window.
Add one more ‘Click element’ to click Instagram’s ‘Post’ button.
Important
When you see the text ‘Do you want to click this element now?’ click cancel so that the post does not send.
You can disable this step by clicking on the menu to the left and selecting "Disable step" from the drop down. This stops you from accidentally sending messages before you're ready!
You’re almost ready to test the bot.
# 8. Add a new step ‘Write data to a Google Sheet’
Add a new step (not a sub step) below the ‘Interact’ step by choosing ‘Write data to a Google Sheet’.
In the ‘Spreadsheet url’ field, search for the sheet you previously created.
For ‘Sheet Name’, select the tab called 'Posted'. This tab will keep a record of the posts sent.
To do this in 'Data' select ‘Google-Sheet-data’.
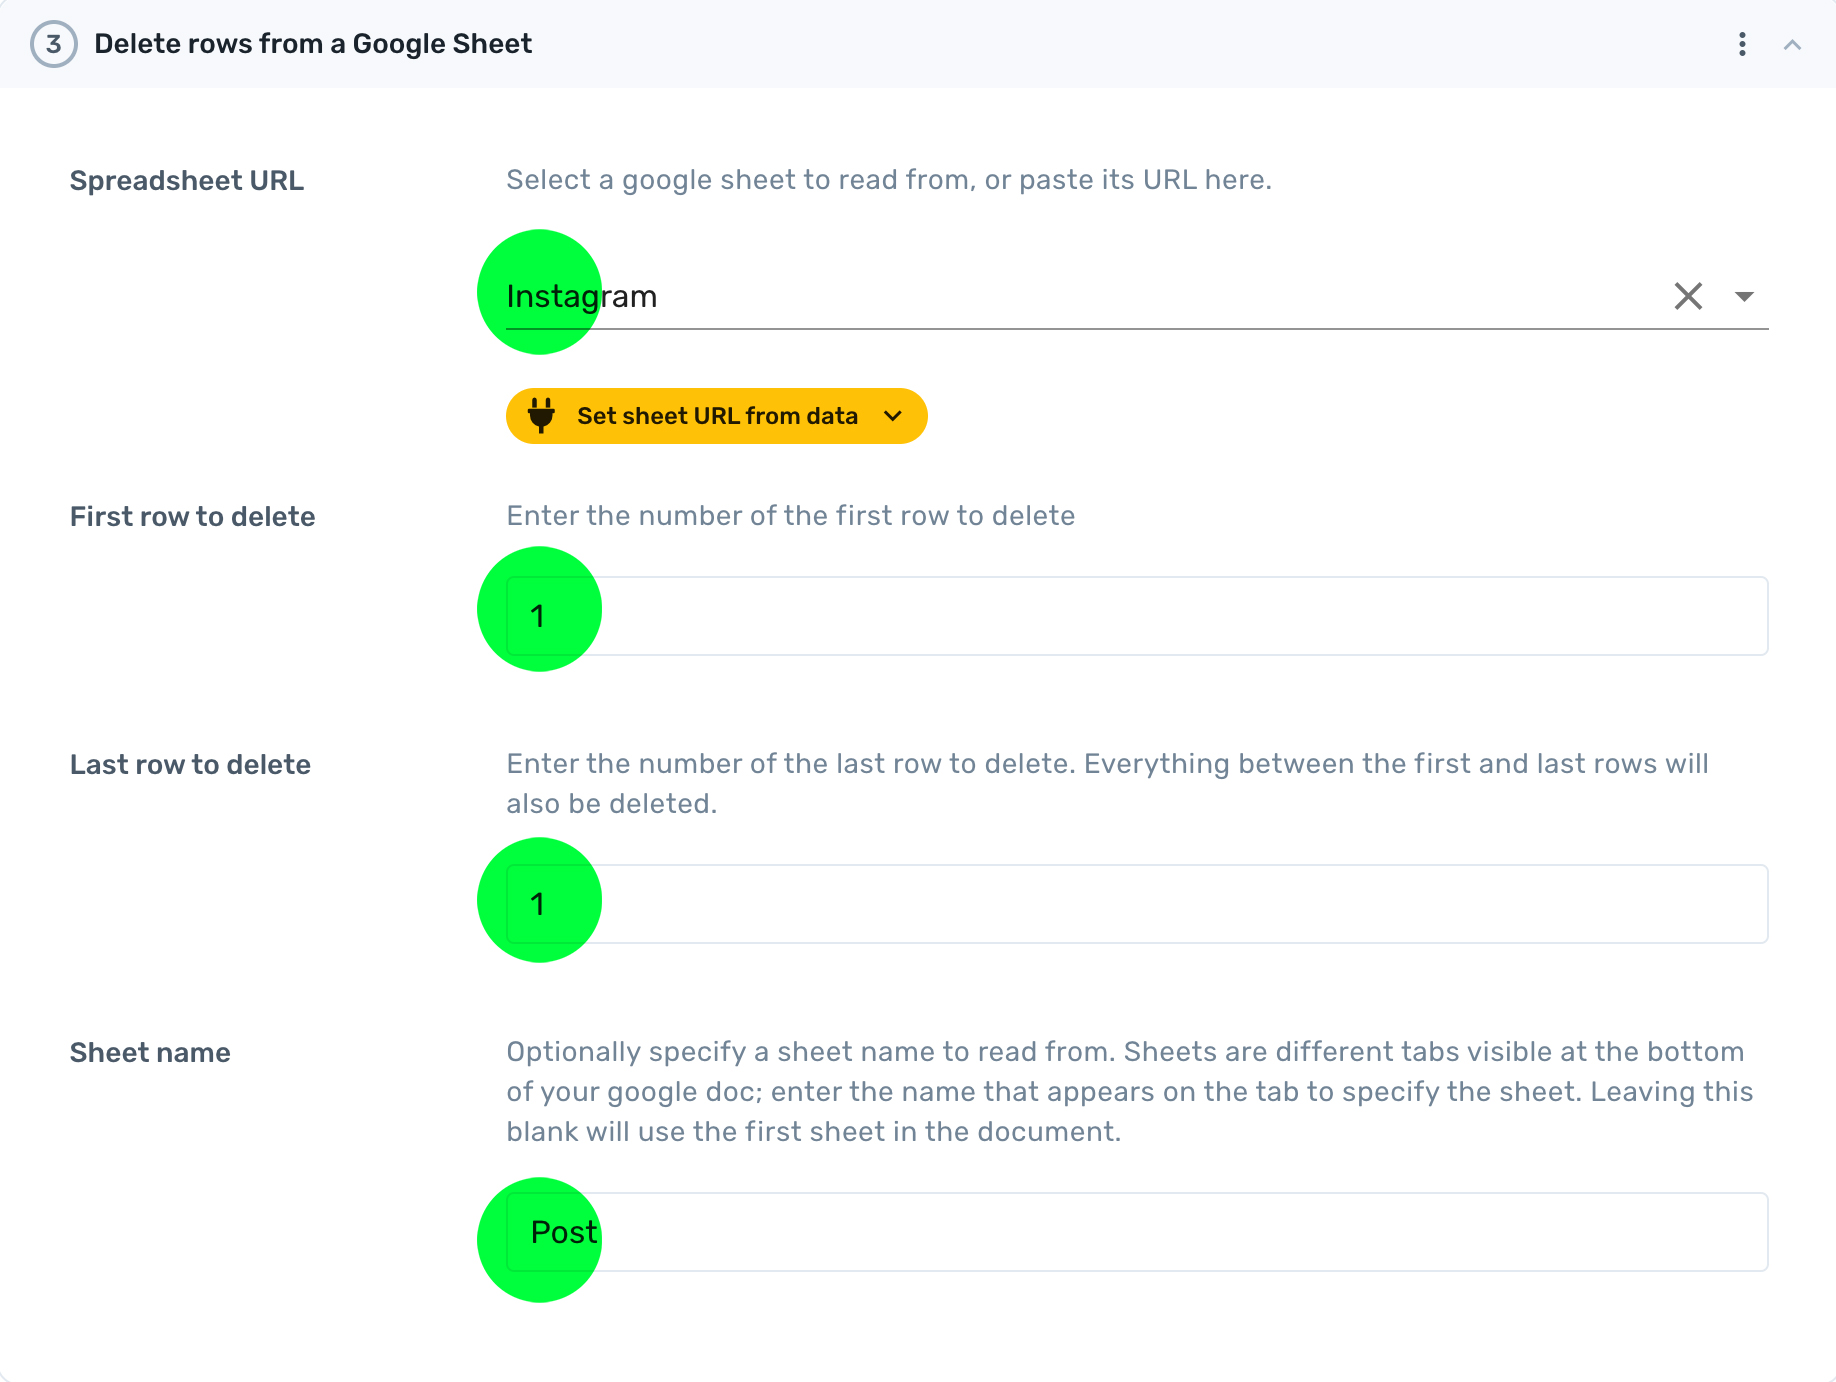
# 9. Delete rows from a Google Sheet
Add the step ‘Delete rows from a Google Sheet' to delete the row of data that has been used to create the post. This is to prevent it from being repeated.
Using the Step Finder, search for and click ‘Delete rows from a Google Sheet’ in 'Spreadsheet url' to add the spreadsheet.
Then, in ‘First row to delete’ enter the number ‘1’ and repeat this in ‘Last row to delete’.
Set the ‘Sheet name’ to 'Post'.
Well done! The bot is complete and ready to test 👍
# Test run
Before you do a test run, check that you disabled the sub-step that clicks ‘Post’. If not, make sure you do this now.
It's best practice to test every bot to check it’s production-ready. With the ‘Post’ button disabled, you can do a test run that will not send a post.
We recommend test running your bot with the desktop app, but you can also do it in the cloud.
Things to check for:
- Does the image upload into the post?
- Is the Instgram filter clicked?
- Is the caption entered into the post?
Go ahead and click ‘run’. Get ready for some magic.
# Debugging your bot
If you experience any issue with the bot not clicking buttons, try re-selecting the button or text input. To change the selection, move the cursor slowly over the object and re-select.
The Click step also has a handy feature that allows you to select the button by the text, which can resolve many issues.
Don't forget we have excellent customer support. If you need help, get in touch.
# Conclusion
Now you can run your bot on the desktop app as often as you like. You have a working bot to automate a repetitive task on Instagram that you built yourself. That's pretty awesome! What’s your next bot going to be?
If you would like to schedule this bot, vote for ‘File management for the Cloud (opens new window)’ on our product roadmap.
# If you are interested in automating Instagram you may want to visit these pages:
Automate Instagram Direct Messages blogAutomate Instagram posts videoHow to Automate Instagram actions for beginners videoAutomate Instagram posting without code landing page