Clean up your cluttered inbox with browser automation
You should be commended for your bravery in making it all the way to Part III of this tutorial series! Bravo! 👏
Parts I and II were all about getting comfortable with Axiom's interface and capabilities. Now that you've arrived at Part III, it's time to solidify all of these core concepts and get a feel for what a browser bot can look like as its behavior becomes more complex.
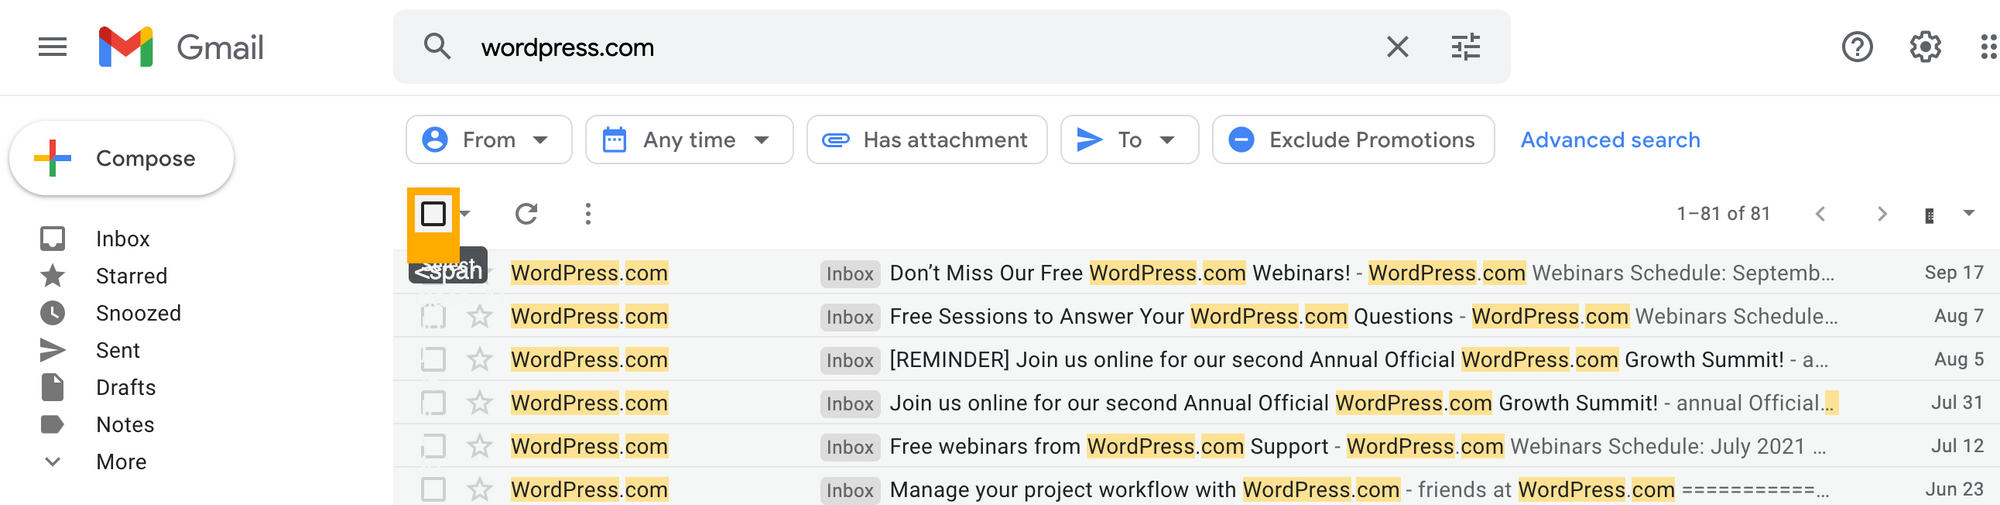
In fact, this bot is deceptively simple on the surface: it searches for keywords in your Gmail inbox and deletes emails that match those terms. This is handy if you have certain newsletters or spam subscriptions that have taken over your inbox and need to be eradicated.
But the possibilities that it opens up are profound! You'll be pulling in data from external sources (Google Sheets in this case); sequentially clicking on elements on the page; and even recording keystrokes for the bot to perform.
# 1. Get ready to build.
his tutorial assumes that you already completed Parts I & II, and as such, you've already done the prerequisite work of installing Axiom and familiarizing yourself with how to get started.
If needed, you can review these introductory steps in the first half of Part I.
# 2. Create a new Google Sheet.
Before you begin building your bot, you'll need to create a new spreadsheet in Google Docs. This Sheet will contain the keywords you want the bot to search for in Gmail.
Navigate to https://docs.google.com/spreadsheets/ (opens new window) and sign in if needed.
Start a new Blank spreadsheet.
Add each keyword to a new row in column A of the spreadsheet.
Give the Sheet a memorable name—how about Cluttered Inbox Keywords?
# 3. Connect Axiom to Google Sheets.
Now we're ready to fire up Axiom.
If you haven't connected Axiom to your Google Docs account before, you'll need to do this next. (You can skip ahead to Step 4 if you've already done this.)
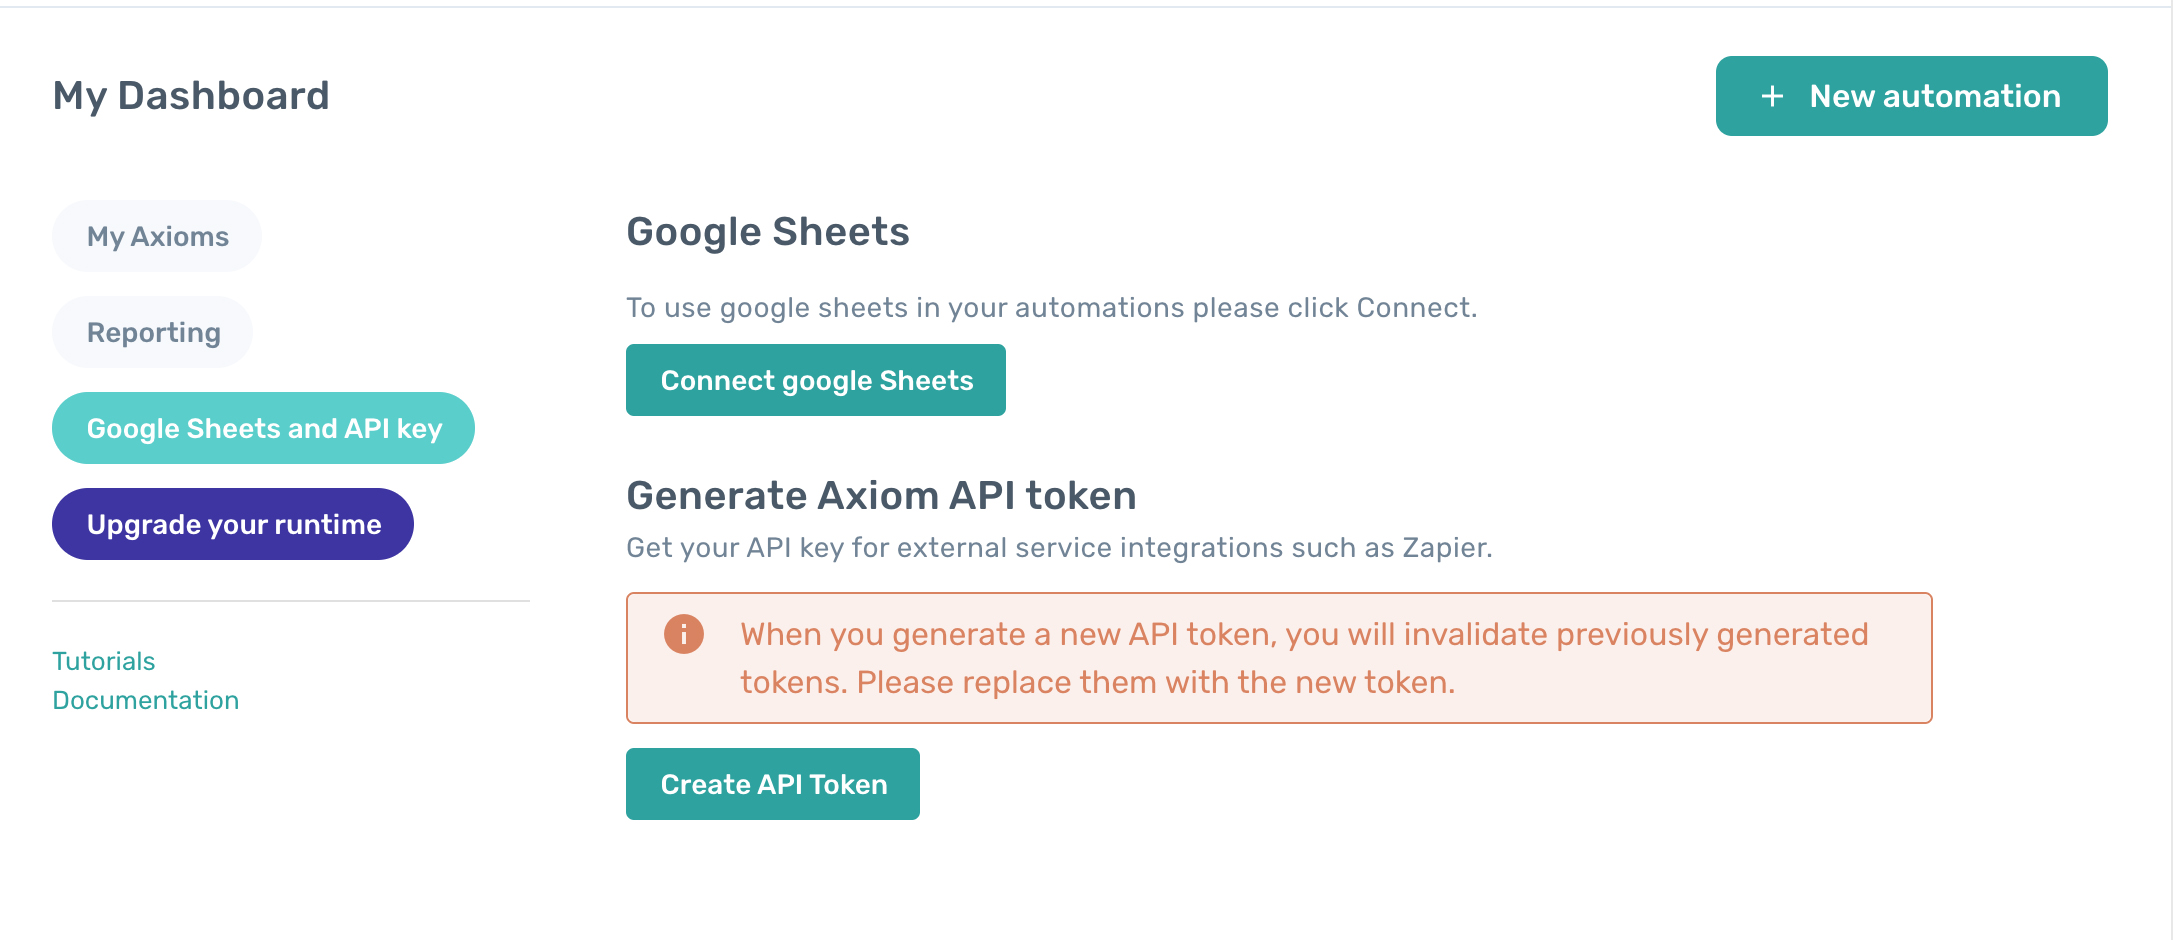
In the dahsboard left hand side menu, click on the button labeled Google Sheets and API Key
This will open a new page, next click on Connect Google Sheets a browser window will open and ask you to sign in with Google.
After signing in, click Allow on the form that follows to give Axiom permission to interact with your Google Docs.
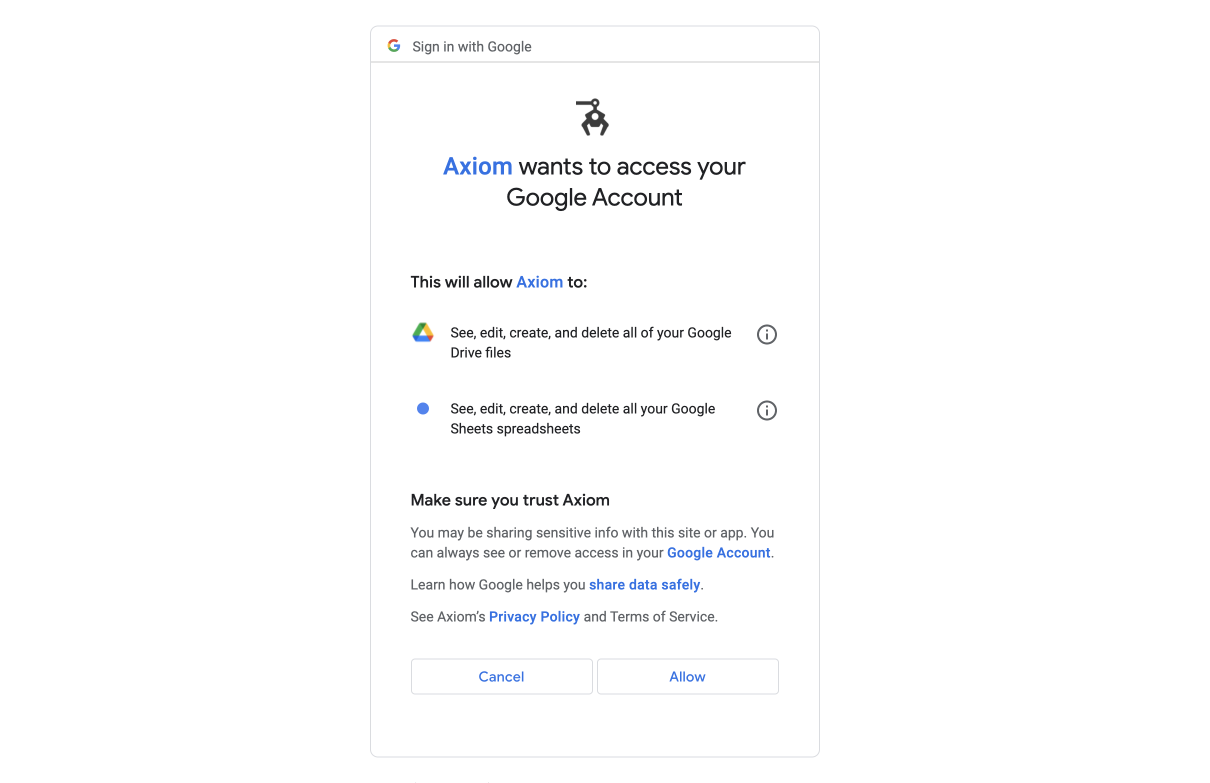
Once confirmed, a new tab will pop up to let you know the authentication was successful. You can close this tab.
Note that Google will likely send you a Security alert email as further confirmation that you have granted access to Axiom. You can safely disregard this email.
# 4. Create a new Axiom.
Click Create New Axiom on the dashboard, then once again. Select Start blank.
# 5. Add the Interact step
Select Loop through data as the first step in this automation process.
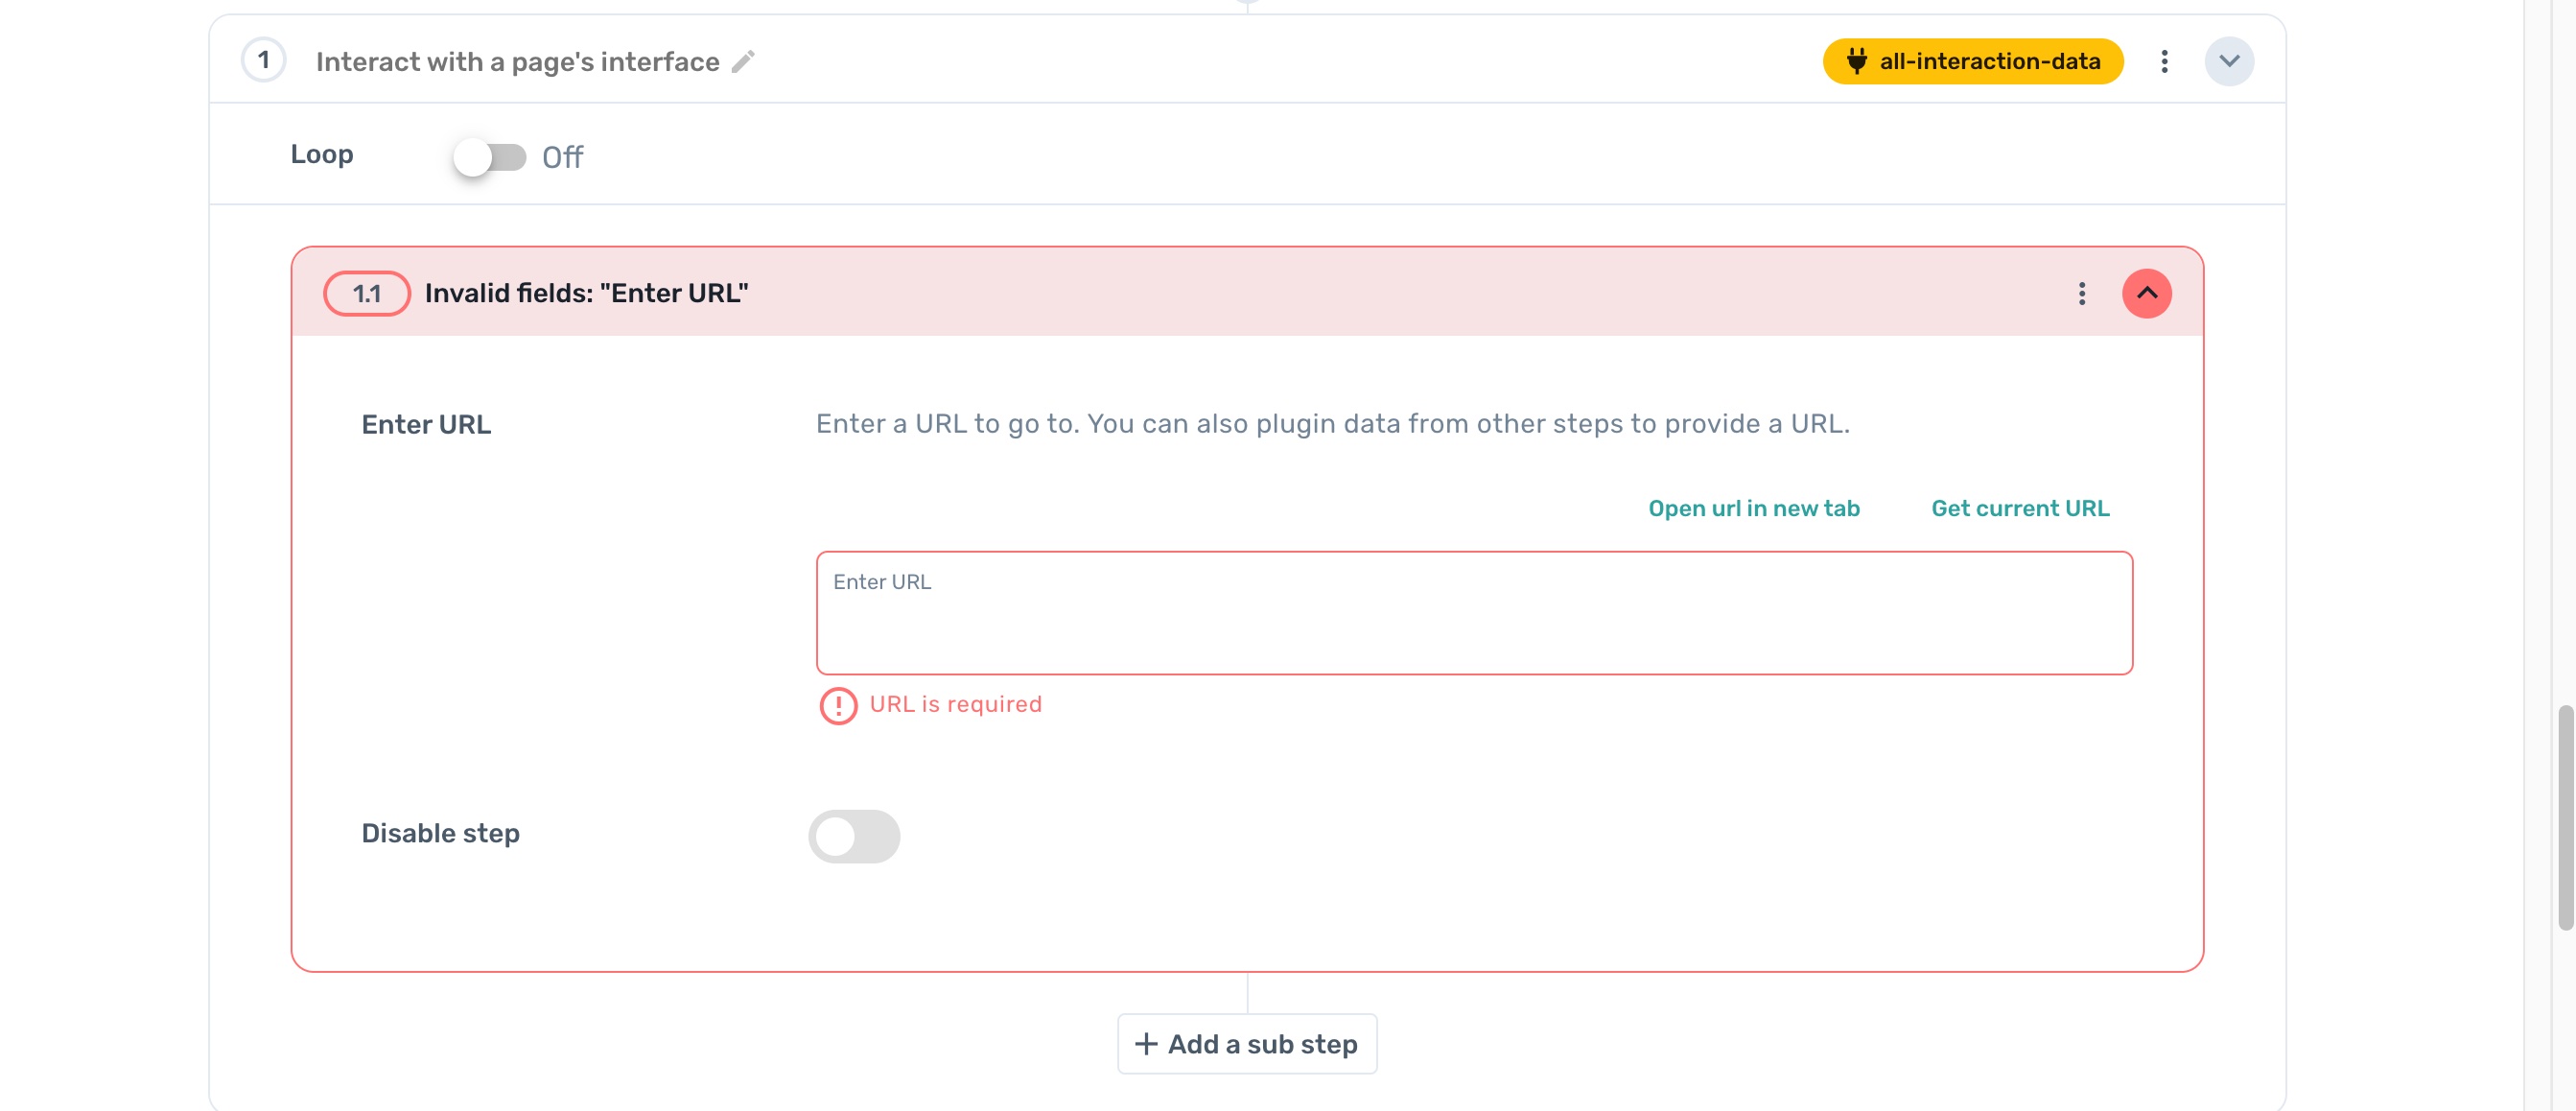
In the url field insert the link to your Gmail inbox—which.
# 6. Get search terms from Google Sheet.
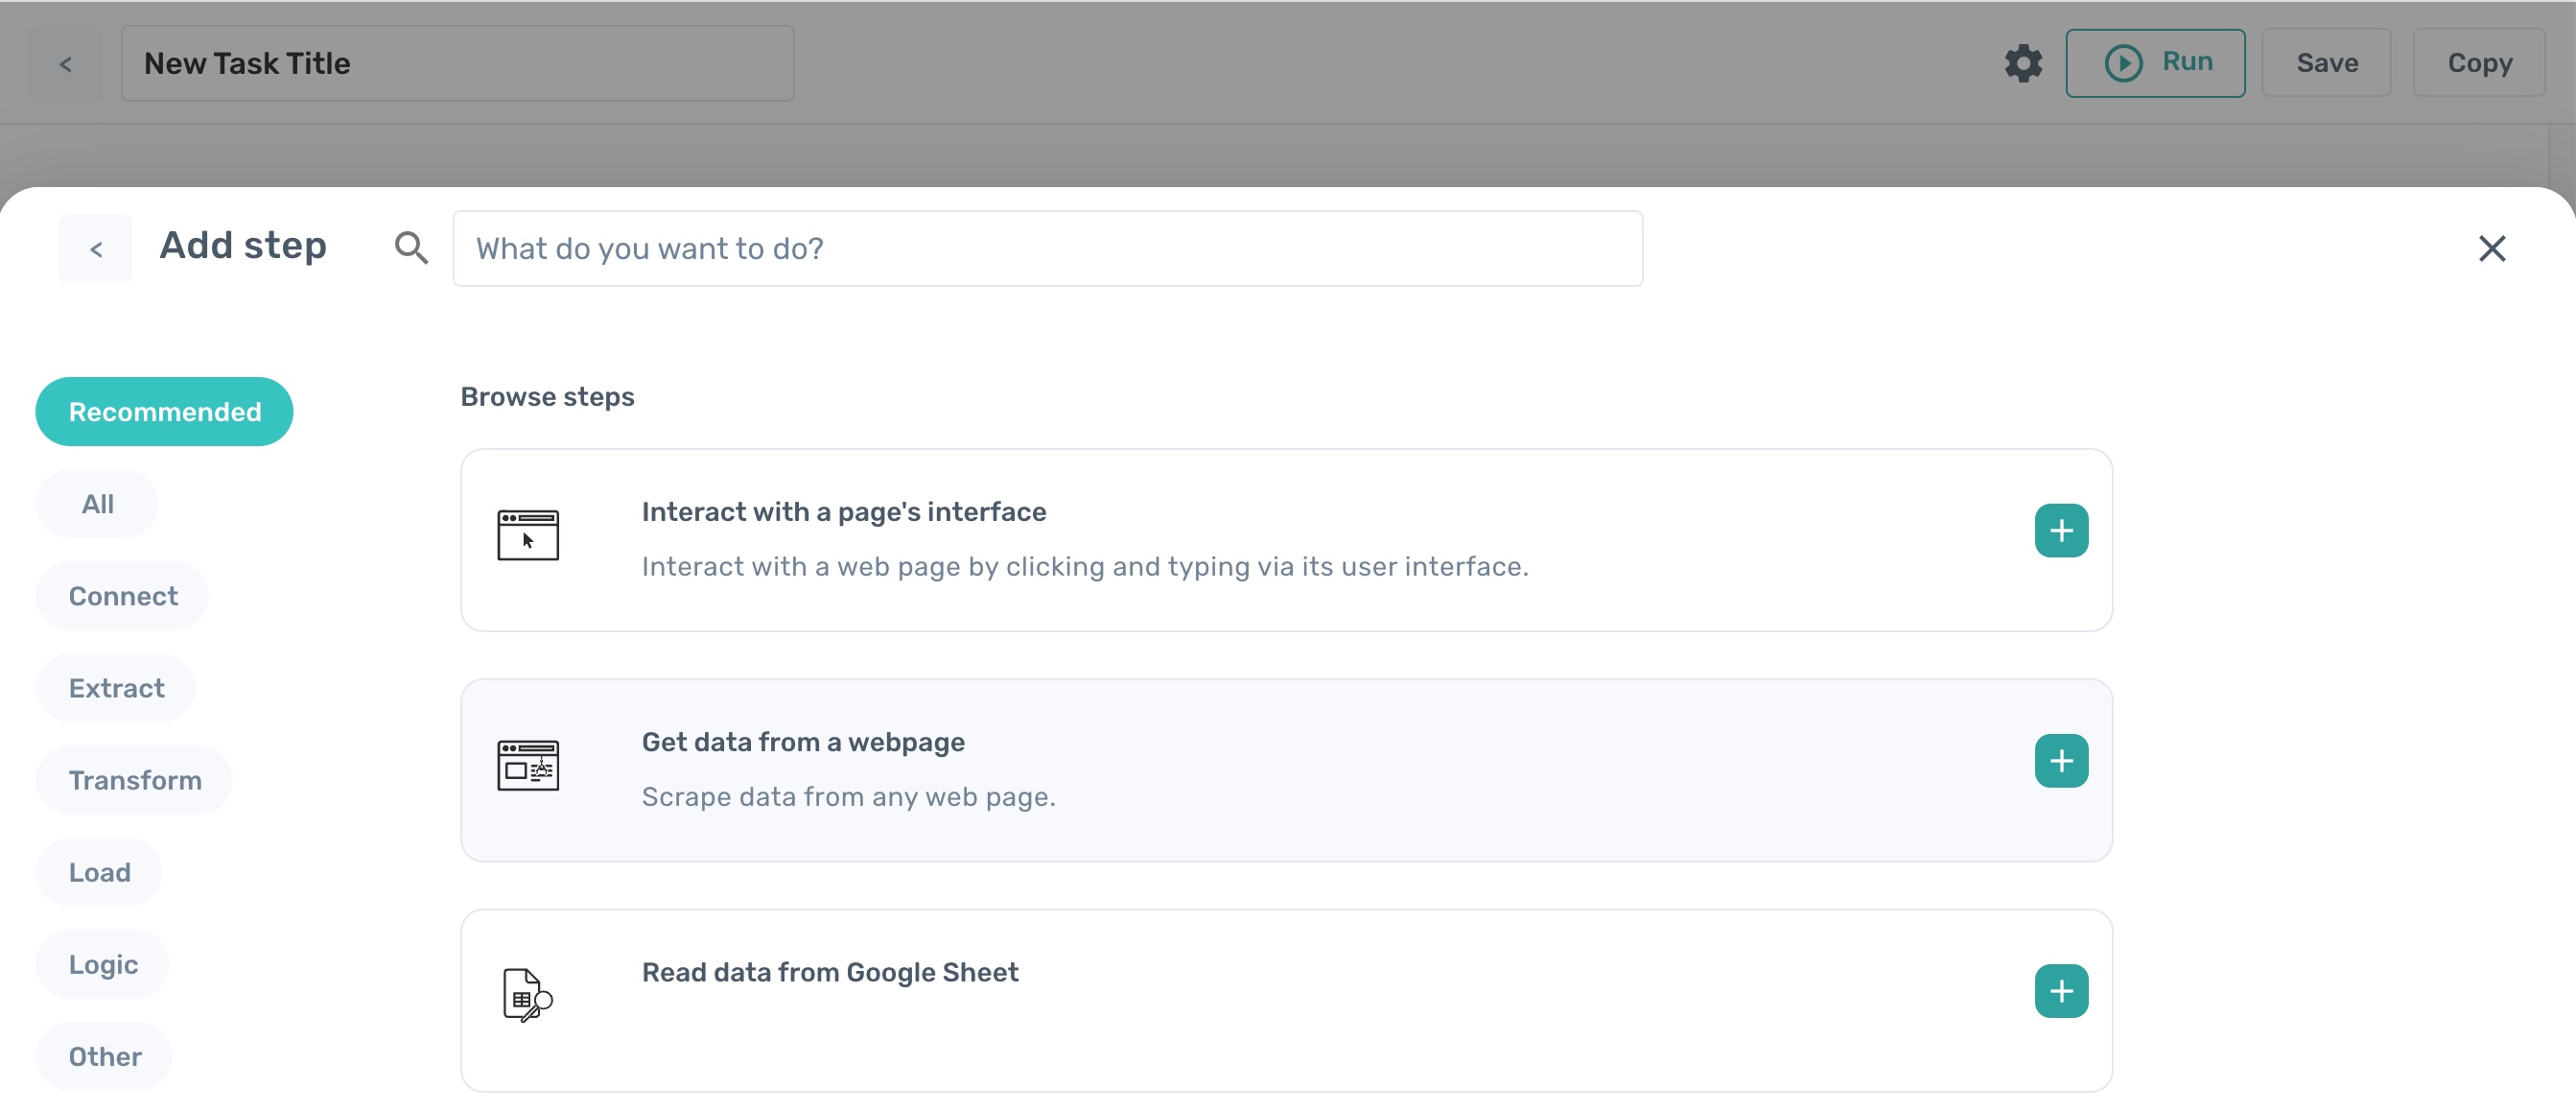
Click on the + sign above Step 1 - Interact to add Step 2.
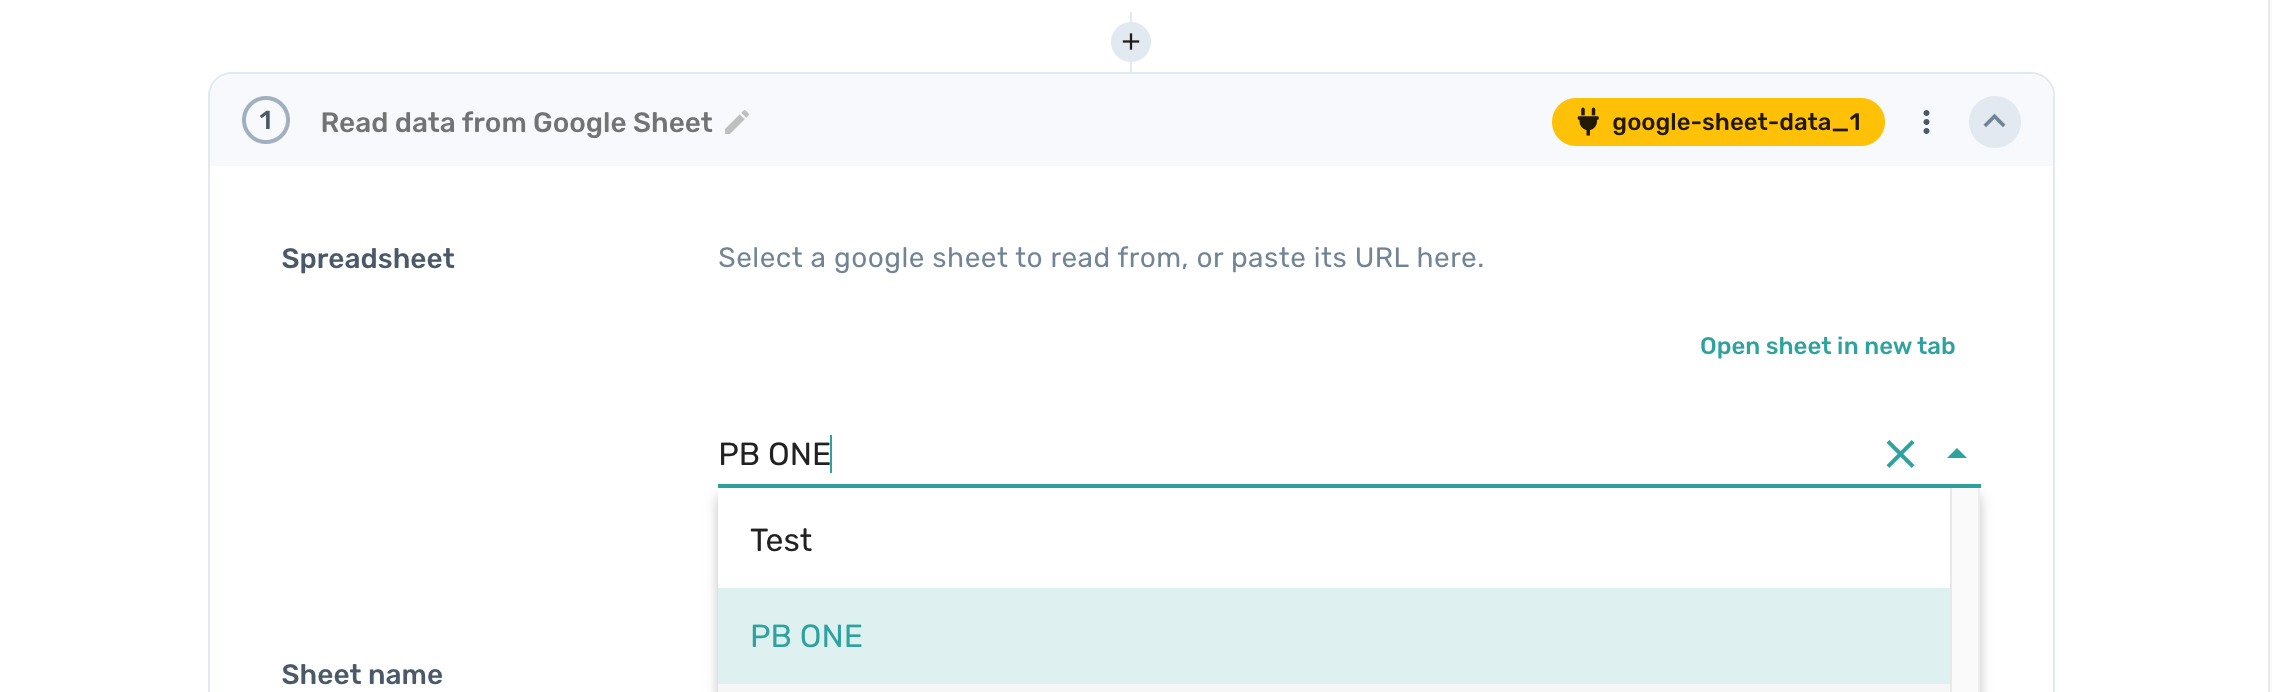
Scroll down the list and select Read data from Google Sheet.
Then simply search for the sheet you made and select it.
# 7. Define how Axiom will interact with Gmail.
Click back into the Interact step
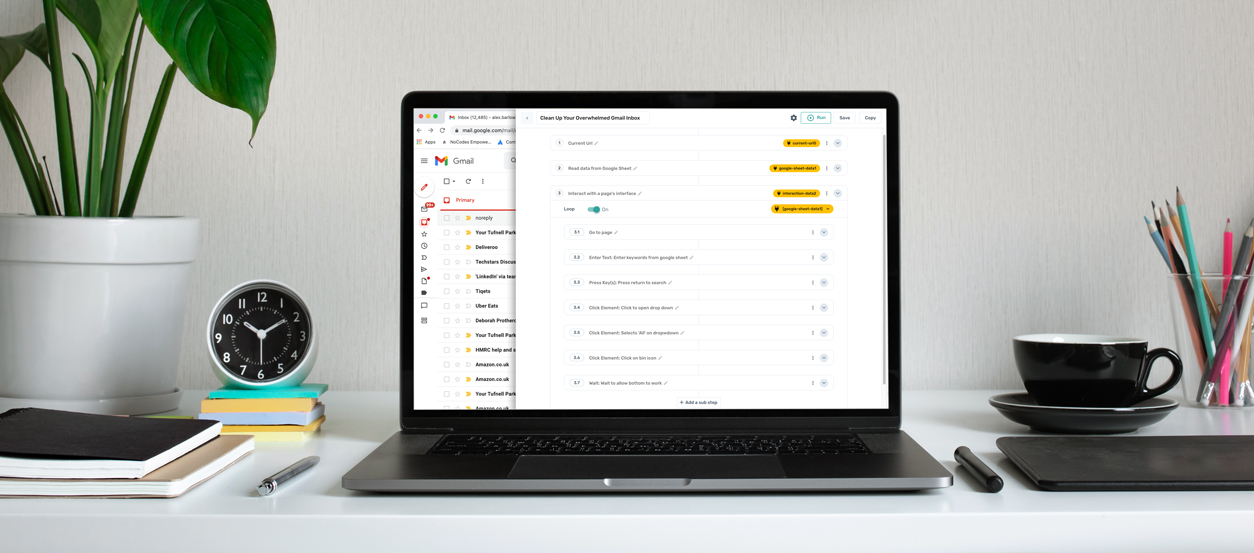
Though this is technically the final step, it contains several sub-steps that will define exactly how the browser bot will interact with your Gmail inbox.
Each of the following sub-steps I - V will be nested within Step 2
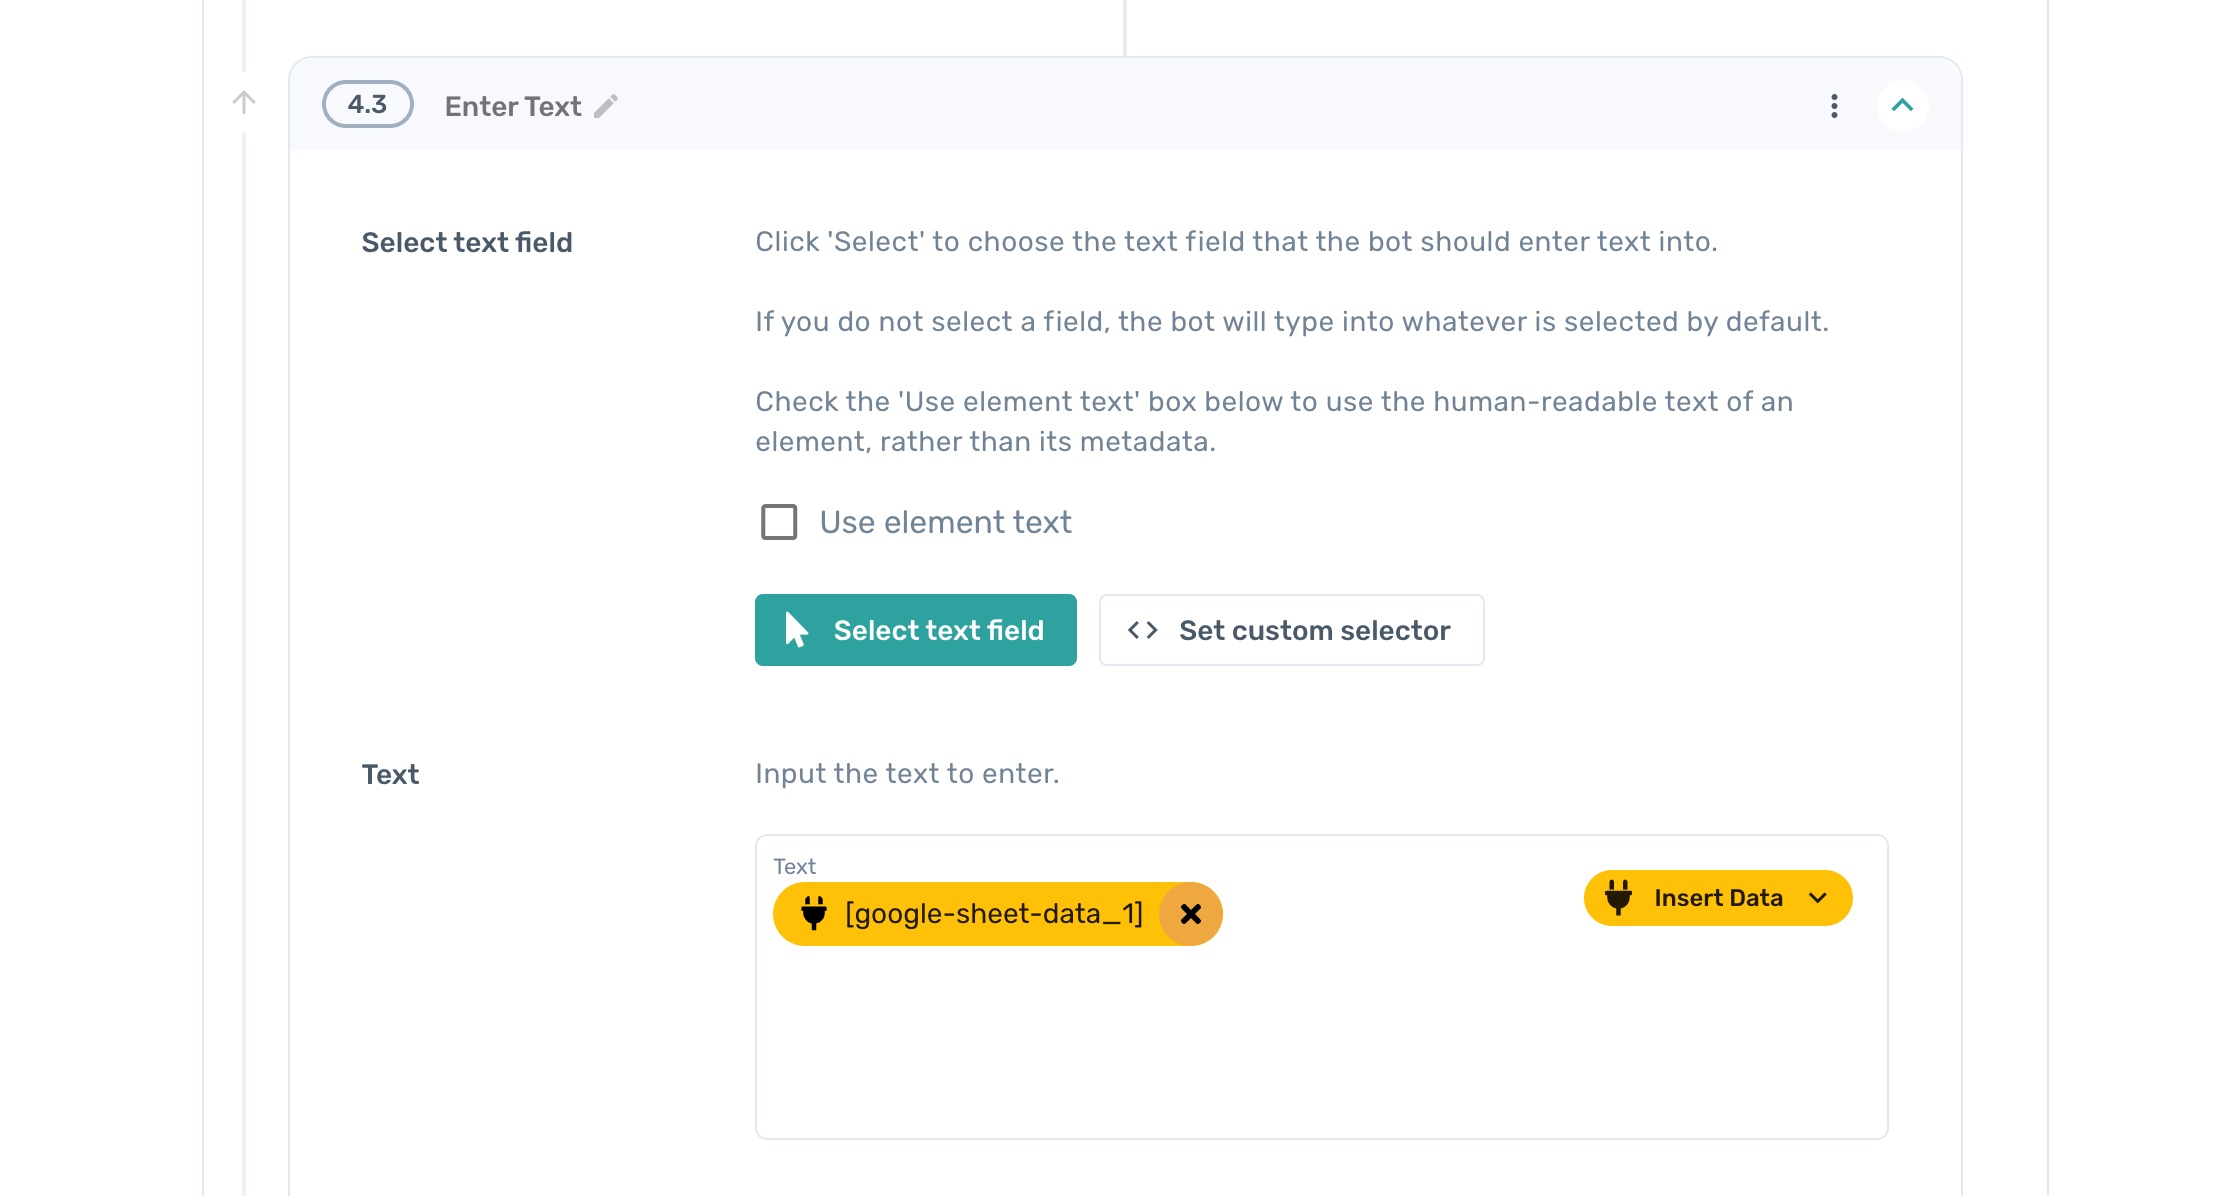
# I. Enter Text: Plug in keywords from Google Sheet
Add another step and select Enter Text.
Click the button labelled Select text field. In your Gmail inbox, select the Search bar at the top of the screen. Click Confirm in the bottom-right corner.
Plug the [google-sheet-data1] data into the URL field.
# II. Press Key(s): Press return to search
For the third step, select Press Key(s).
This gives you the option to record a keystroke on your keyboard that the bot will perform when the time comes.
Click the Record button; press Enter on your keyboard; then click Stop Recording.
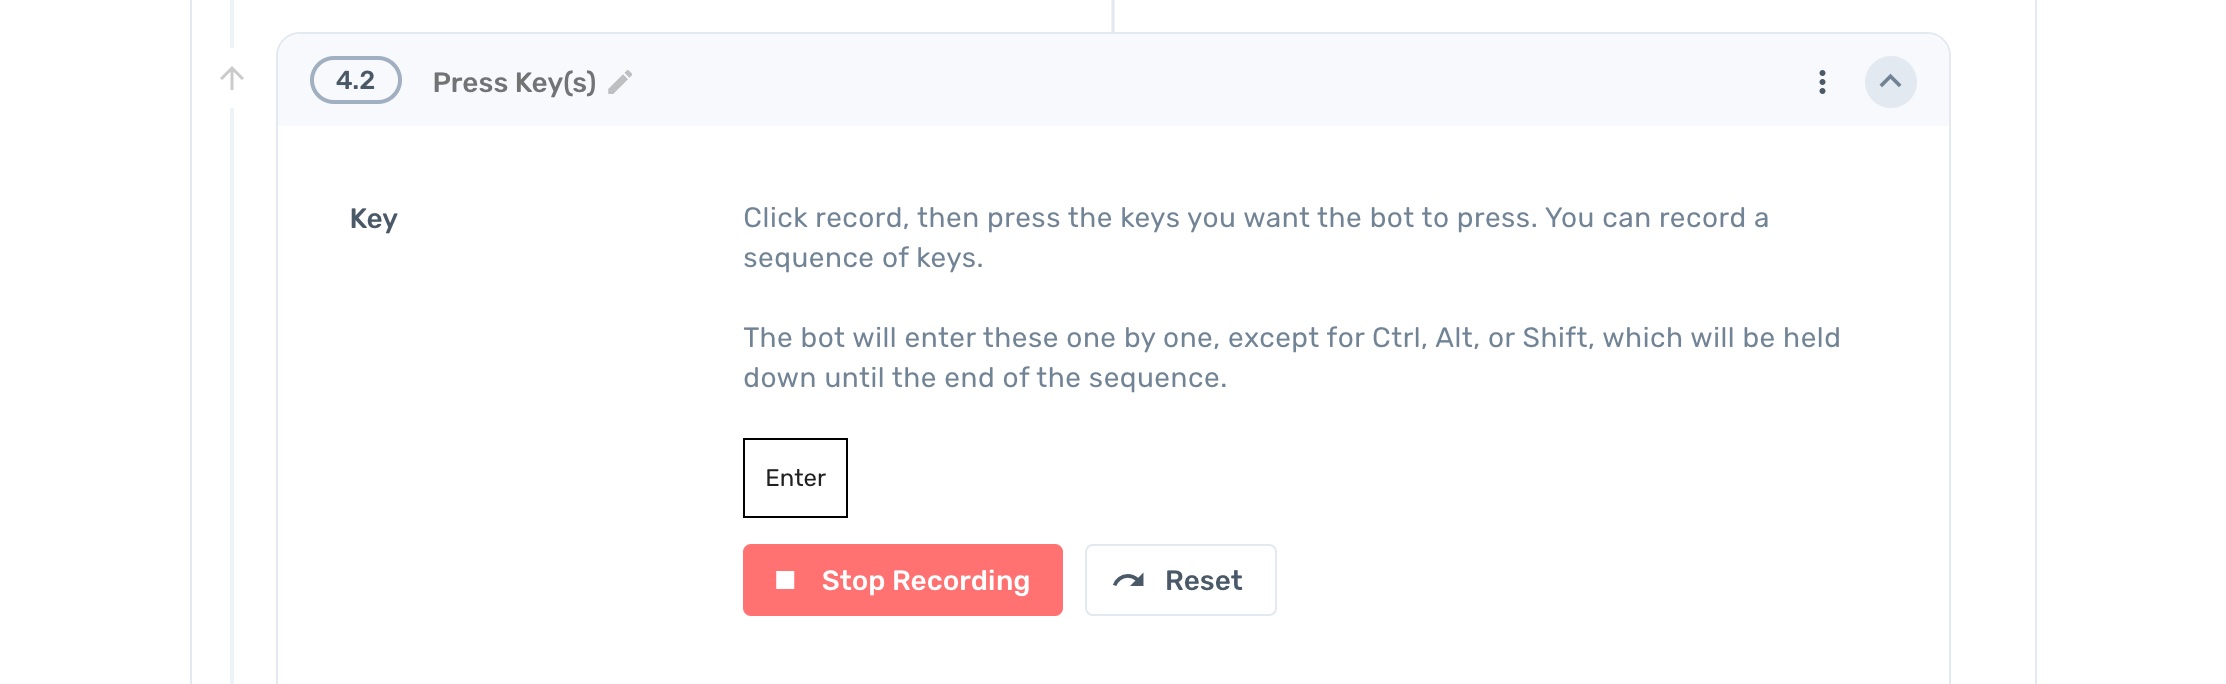
During the automation process, this keystroke will initiate searching your inbox for the keywords pulled in from the previous step.
# III. Click Element: Click to open dropdown
Add another sub-step within Step 3: Click Element.
Click the Select button in the Axiom interface to be taken back to your Gmail inbox.
In Gmail, click on the Select box, which is located directly below the Search bar in your inbox.
Click Confirm in the bottom-right corner of the screen.
# IV. Click Element: Click on Delete icon
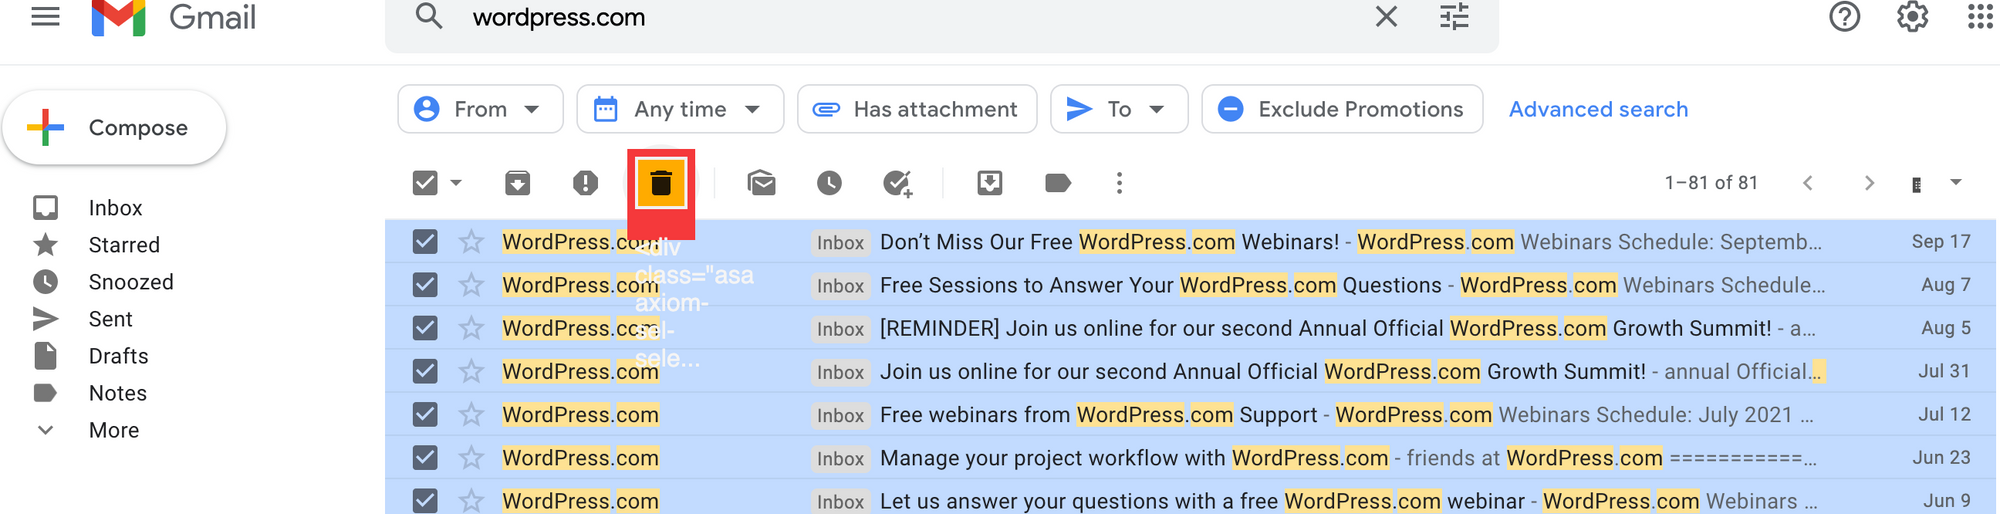
Add another Click Element sub-step as before. This time, with the Select button checked, click on the Delete icon to select it as the click for this step.
Click Confirm one last time, and your bot is now ready to run!
When your automation sequence is complete, it should look like this:
Click the Play button to run your new bot! 🎉
# Epilogue: Where to go from here
You've learned a lot through these three introductory tutorials—in fact, you're now equipped with all the requisite knowledge to pull off some pretty sophisticated automated tasks with Axiom.
The bots we've built together are typical examples of how an individual might apply automation to their daily routine. But how might you apply what you've learned to your core business processes?
In Part II, you saw how to scrape data from a collection of cooking recipes. Consider other kinds of data you might need to gather:
- customer details
- shipping addresses
- pricing information
In Part III, you learned how to click on elements on a page, how to pull in data from a spreadsheet, and how to record keystrokes for a bot to perform. How else could you put this functionality into action?
- logging into multiple platforms (e-commerce provider, CRM, CMS)
- gathering data from multiple sources
- entering data into selected fields
- updating inventory lists
This is really just the tip of iceberg in terms of what's possible with a tool like Axiom.
For more inspiration to get the gears turning in your mind, visit our Recipes page here:
And if you ever get stuck while building the browser bot of your dreams, please don't hesitate to contact us for one-on-one help or take a look at are Documentation. If you want to learn how to send a Gmail blast with bot read our blog.