How to loop through data in cells
When automating web apps, you often need to select more than one option within a dropdown or checkbox group. This is common when entering product data into ecommerce backends, such as assigning colours, size ranges, or other product variants. I recently used this approach while automating workflows for Printful and WooCommerce, where multiple selections are required to correctly configure products.
In the example below, we will open a dropdown and select multiple checkbox entries. The same approach can be adapted to many other use cases.
Let’s dive in.
How to set up your data
In this example, I am using a Google Sheet. To loop through multiple values stored inside a single cell, you must separate them using a delimiter. I typically use a comma, but any consistent delimiter will work as long as it is used consistently across the sheet.
For example, in column C you might store sizes like this:

When to use this method
Use this approach when:
- You need to tick multiple checkboxes.
- You need to select multiple dropdown options.
- You are automating product variants, tags, permissions, or categories.
What steps we will use
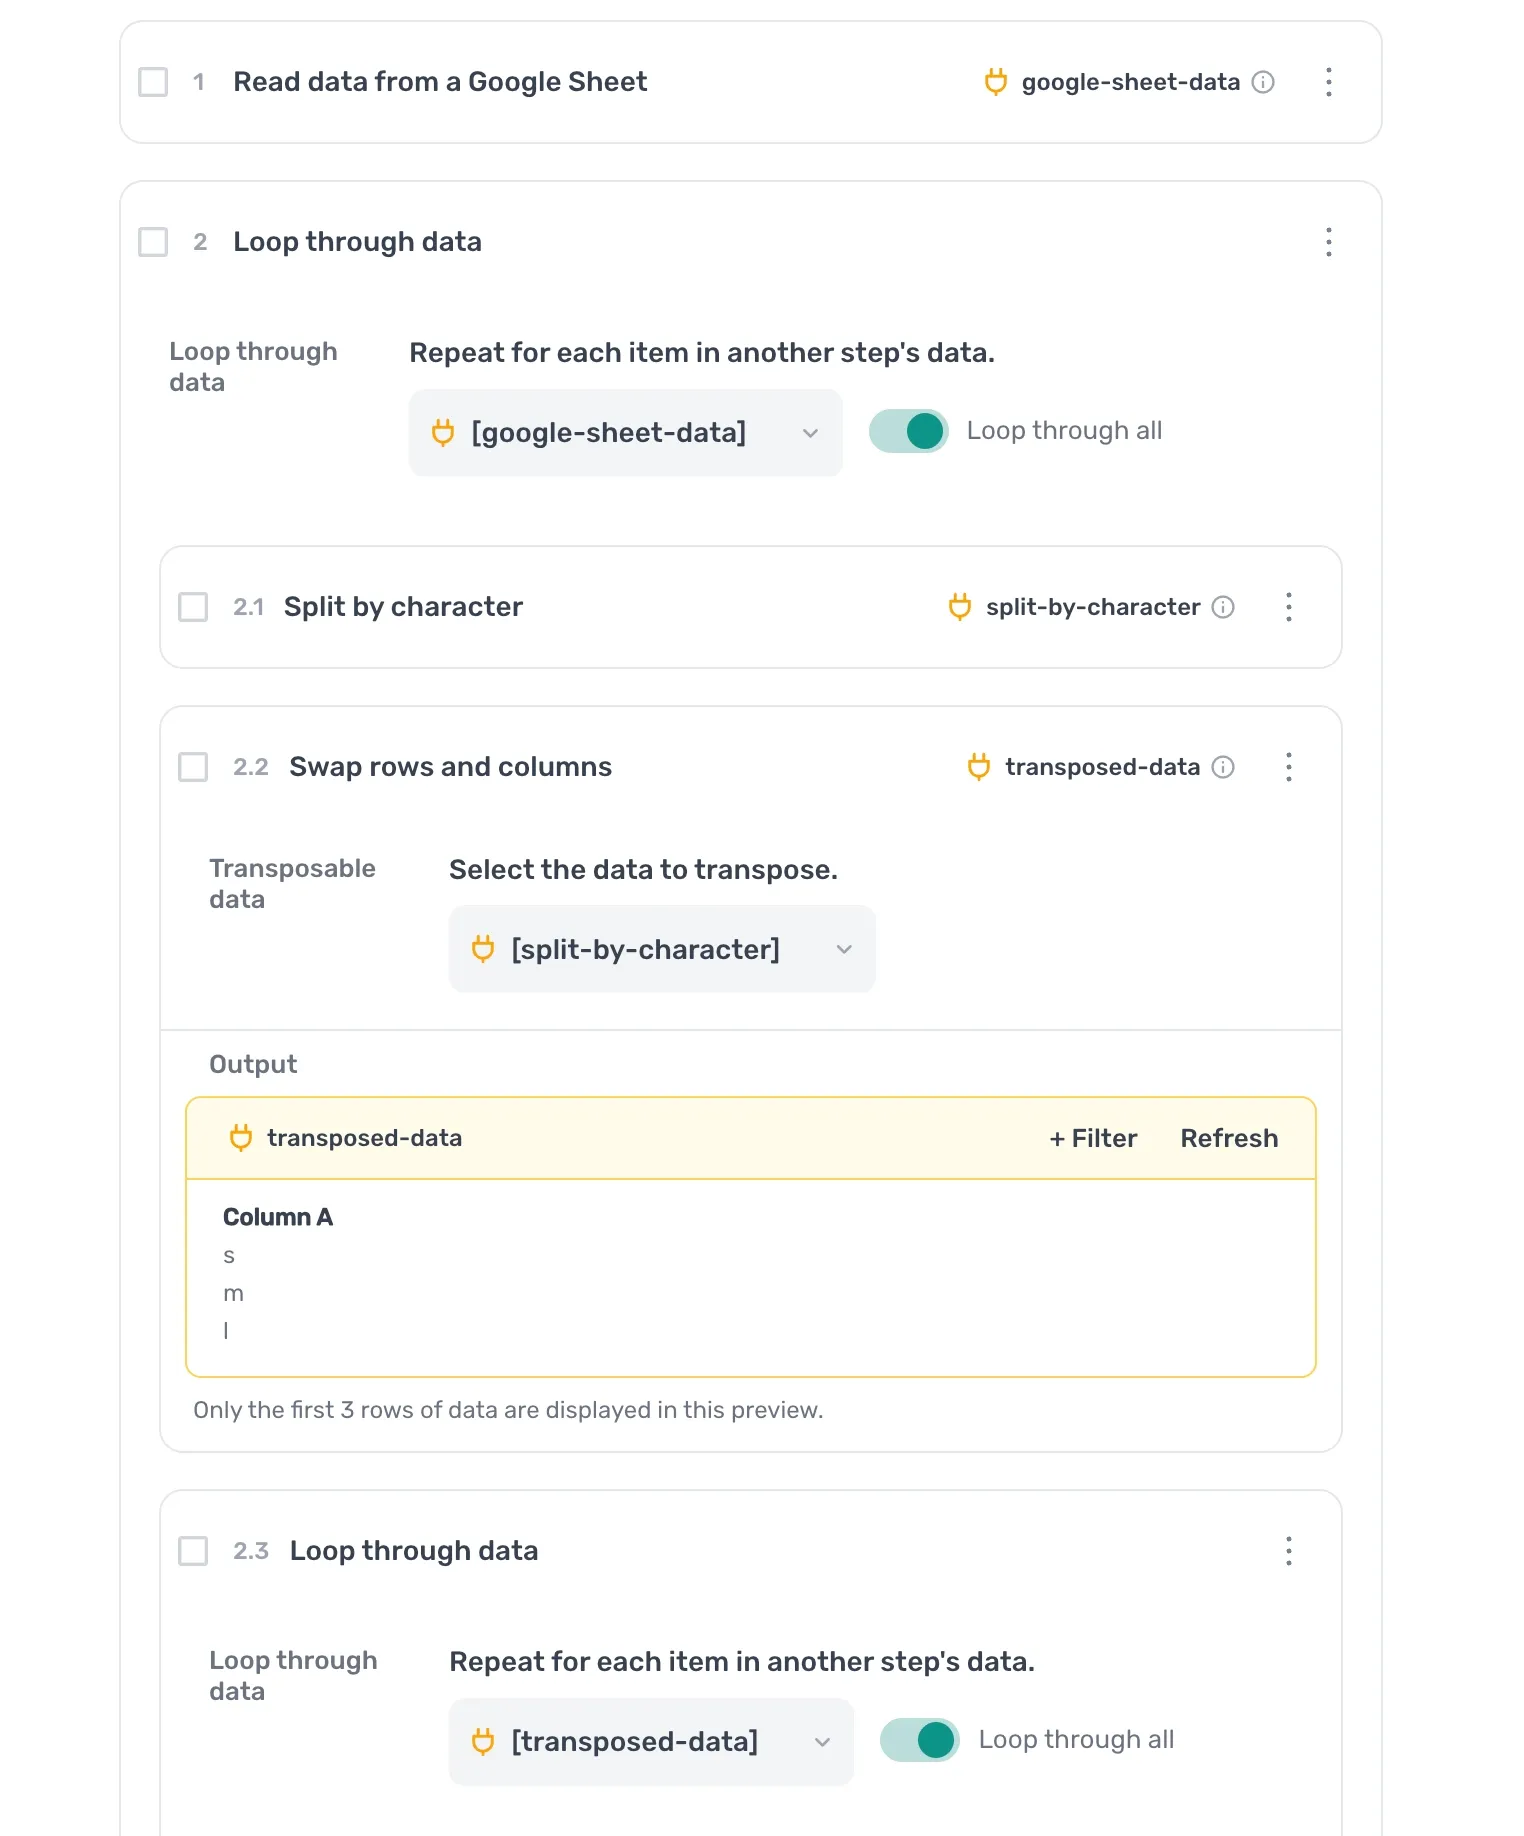
First, we import the source data using the Read data from Google Sheet step. This gives us access to all product values stored in the sheet.
Next, we use the Loop through data step to process each row individually.
Within that loop, we add a Split by character step. This takes a single cell containing multiple values and splits it using a delimiter, turning the values into an array.
Because the split data is returned horizontally, we then use the Swap rows and columns step to convert it into a vertical list.
Finally, we use another Loop step to iterate through the transposed values one by one. This allows each option to be selected individually in the target dropdown or checkbox group.
How to structure the steps
Below is a simplified outline of the structure:
- Step 1.0
Read data from a Google SheetSpreadsheet: Search for the Google Sheet you created. Once found, click to select.Sheet name: Choose a sheet tab or leave blank to use the first tab.First cell: Start from a specified column and row, e.g.,"A1".Last cell: End at a specified column and row, depending on how many rows you want to process.
- Step 2.0
Loop through dataLoop through data: ClickInsert data, selectgoogle-sheet-data.
- Step 2.1
Split by characterCharacter: Enter your chosen delimiter, for example,.Data: ClickInsert data, select the column that contains your delimited cell values (e.g., sizes column).
- Step 2.2
Swap rows and columnsData: ClickInsert data, select the output from theSplit by characterstep.
- Step 2.3
Loop through data (nested loop)Loop through data: ClickInsert data, select the output from theSwap rows and columnsstep.
- Step 2.3.1
Click elementSelect: Highlight the size dropdown.Click: Set toCustom, enable "Use element text instead of HTML", click "insert data" and select the output from theSwap rows and columnsstep. Finally click "Complete".
This allows each value in the cell (for example, each size) to be selected individually.
Wrapping up
Looping through data inside loops can feel complex at first. The key is setting up your data correctly using a delimiter.
Once your data is structured properly, you only need a few steps:
From there, you can automate selecting multiple dropdown items, ticking multiple checkboxes, or interacting with repeated UI elements.
Master nested loops, and you unlock the ability to automate highly dynamic interfaces.